
If you followed along during Lil' Inker Designs February release, you might have seen the video I made (you can view it HERE) showing some ways to use the new Color Blocking die that I've fallen in love with. There was one technique that I shared and I wasn't sure if I explained it well enough so I am coming back today to share some pictures on how to easily do the technique using the die.
First, let me share the card with you that I'll be creating.

Like one of the cards I showed in the video, I also used the Cover Up Die: Diamond Lace on this card. I love the lines in it and it works so well with the color blocking die. I only used one cut of the die for this card but it makes putting this card together so simple and getting exactly the right cut (and that great finished edge!) each time.
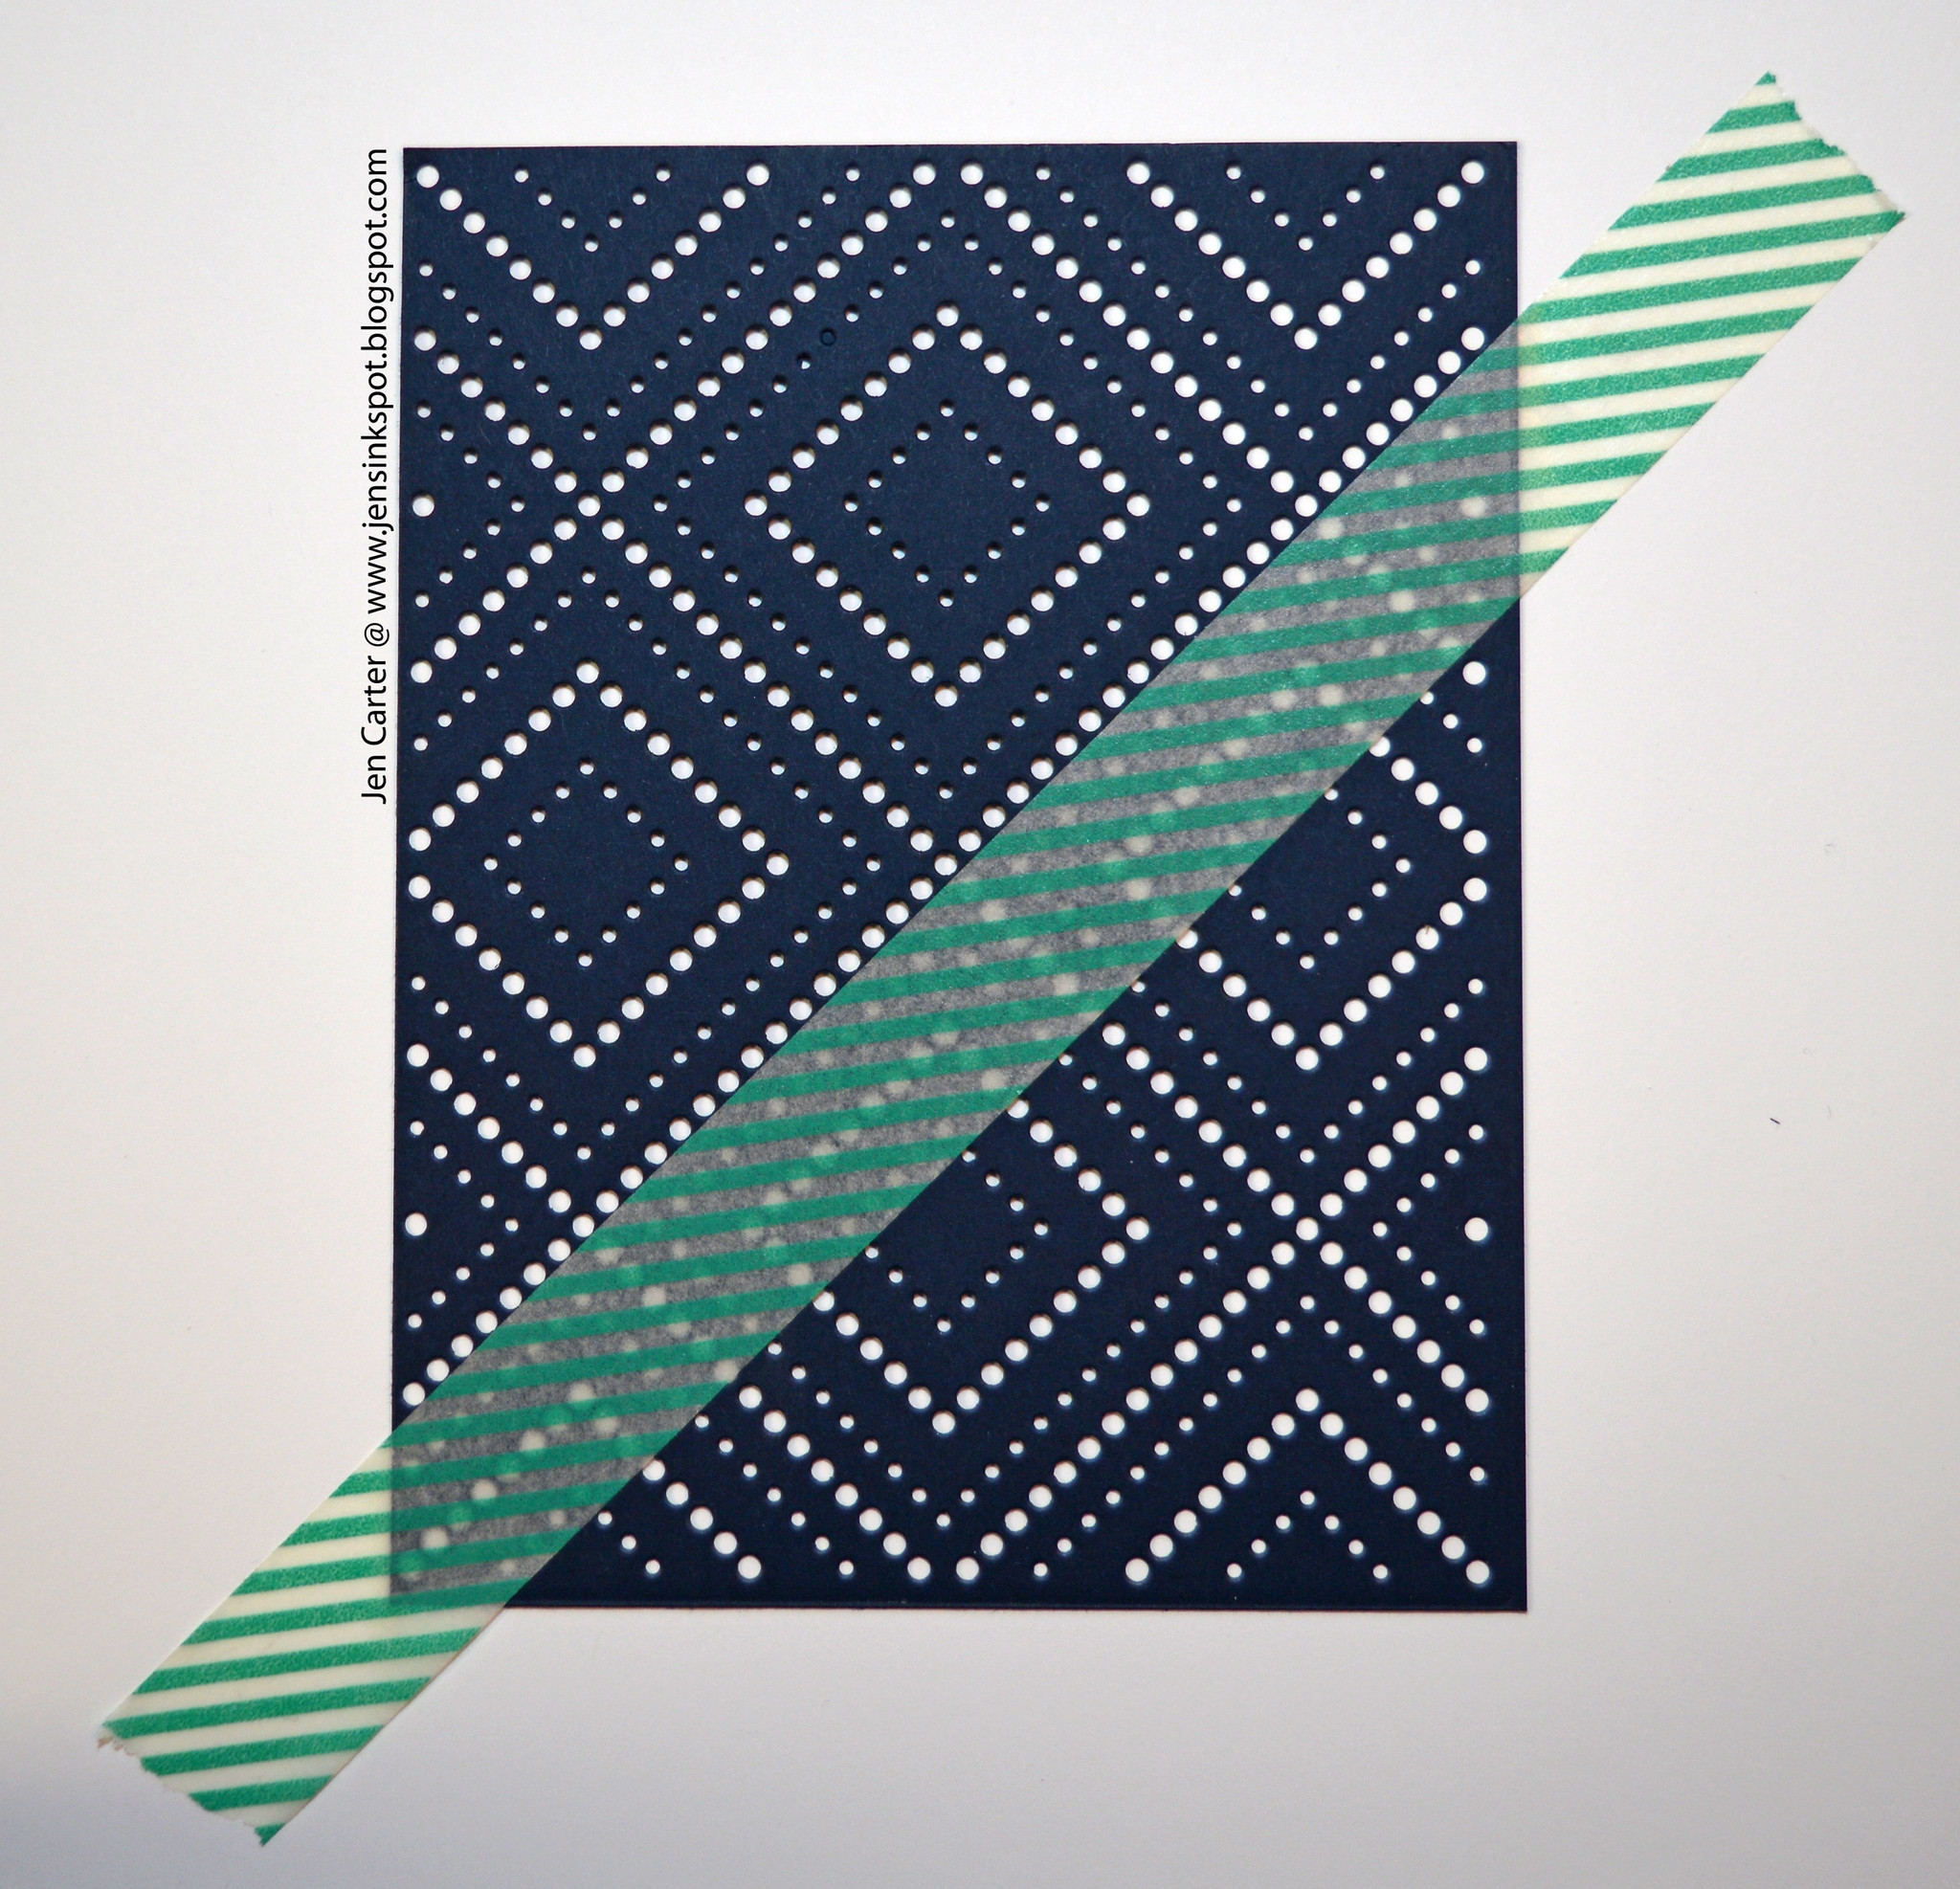
So to start, I lined up my washi tape with one of the dotted lines cut into the cardstock. For this card I want my patterned paper to line up with the line of holes that is under the washi (so basically these larger holes will be covered with the paper once it is cut).
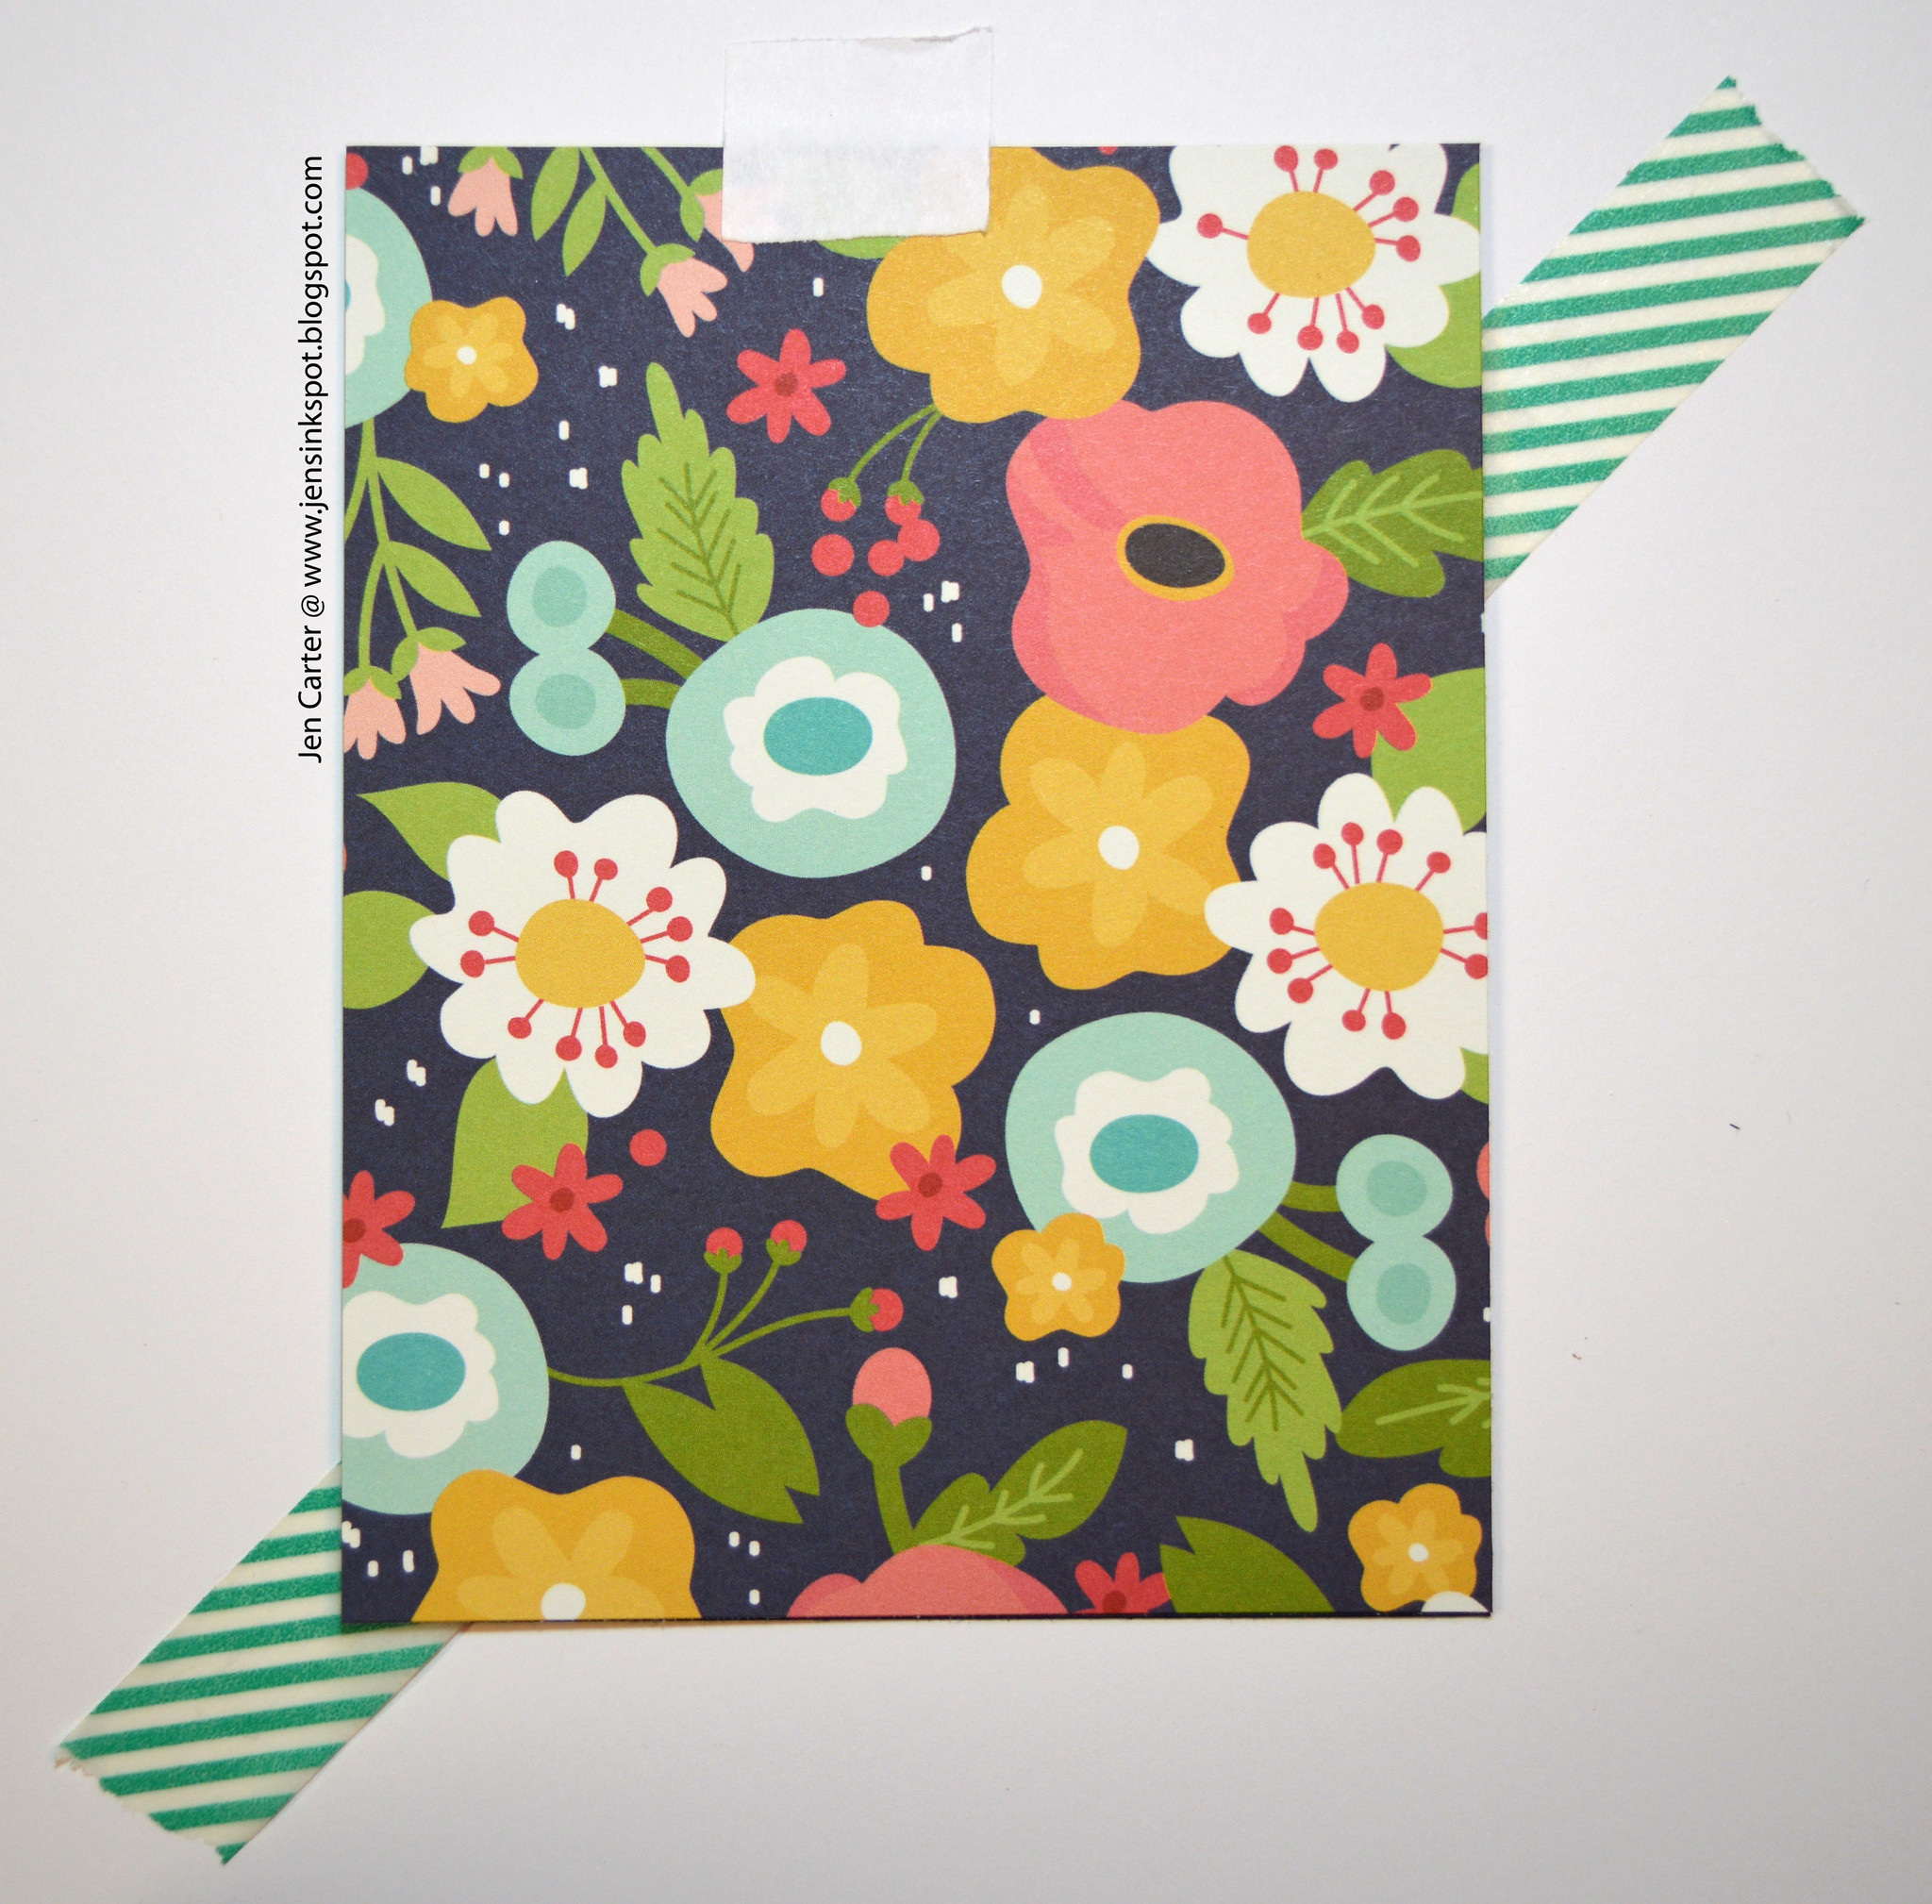
I put my patterned paper right on top of the blue cardstock so that I can see the washi tape ends peeking out.

I line the die up with the top edge of the washi tape. I found post-it note tape holds the die in place nicely.
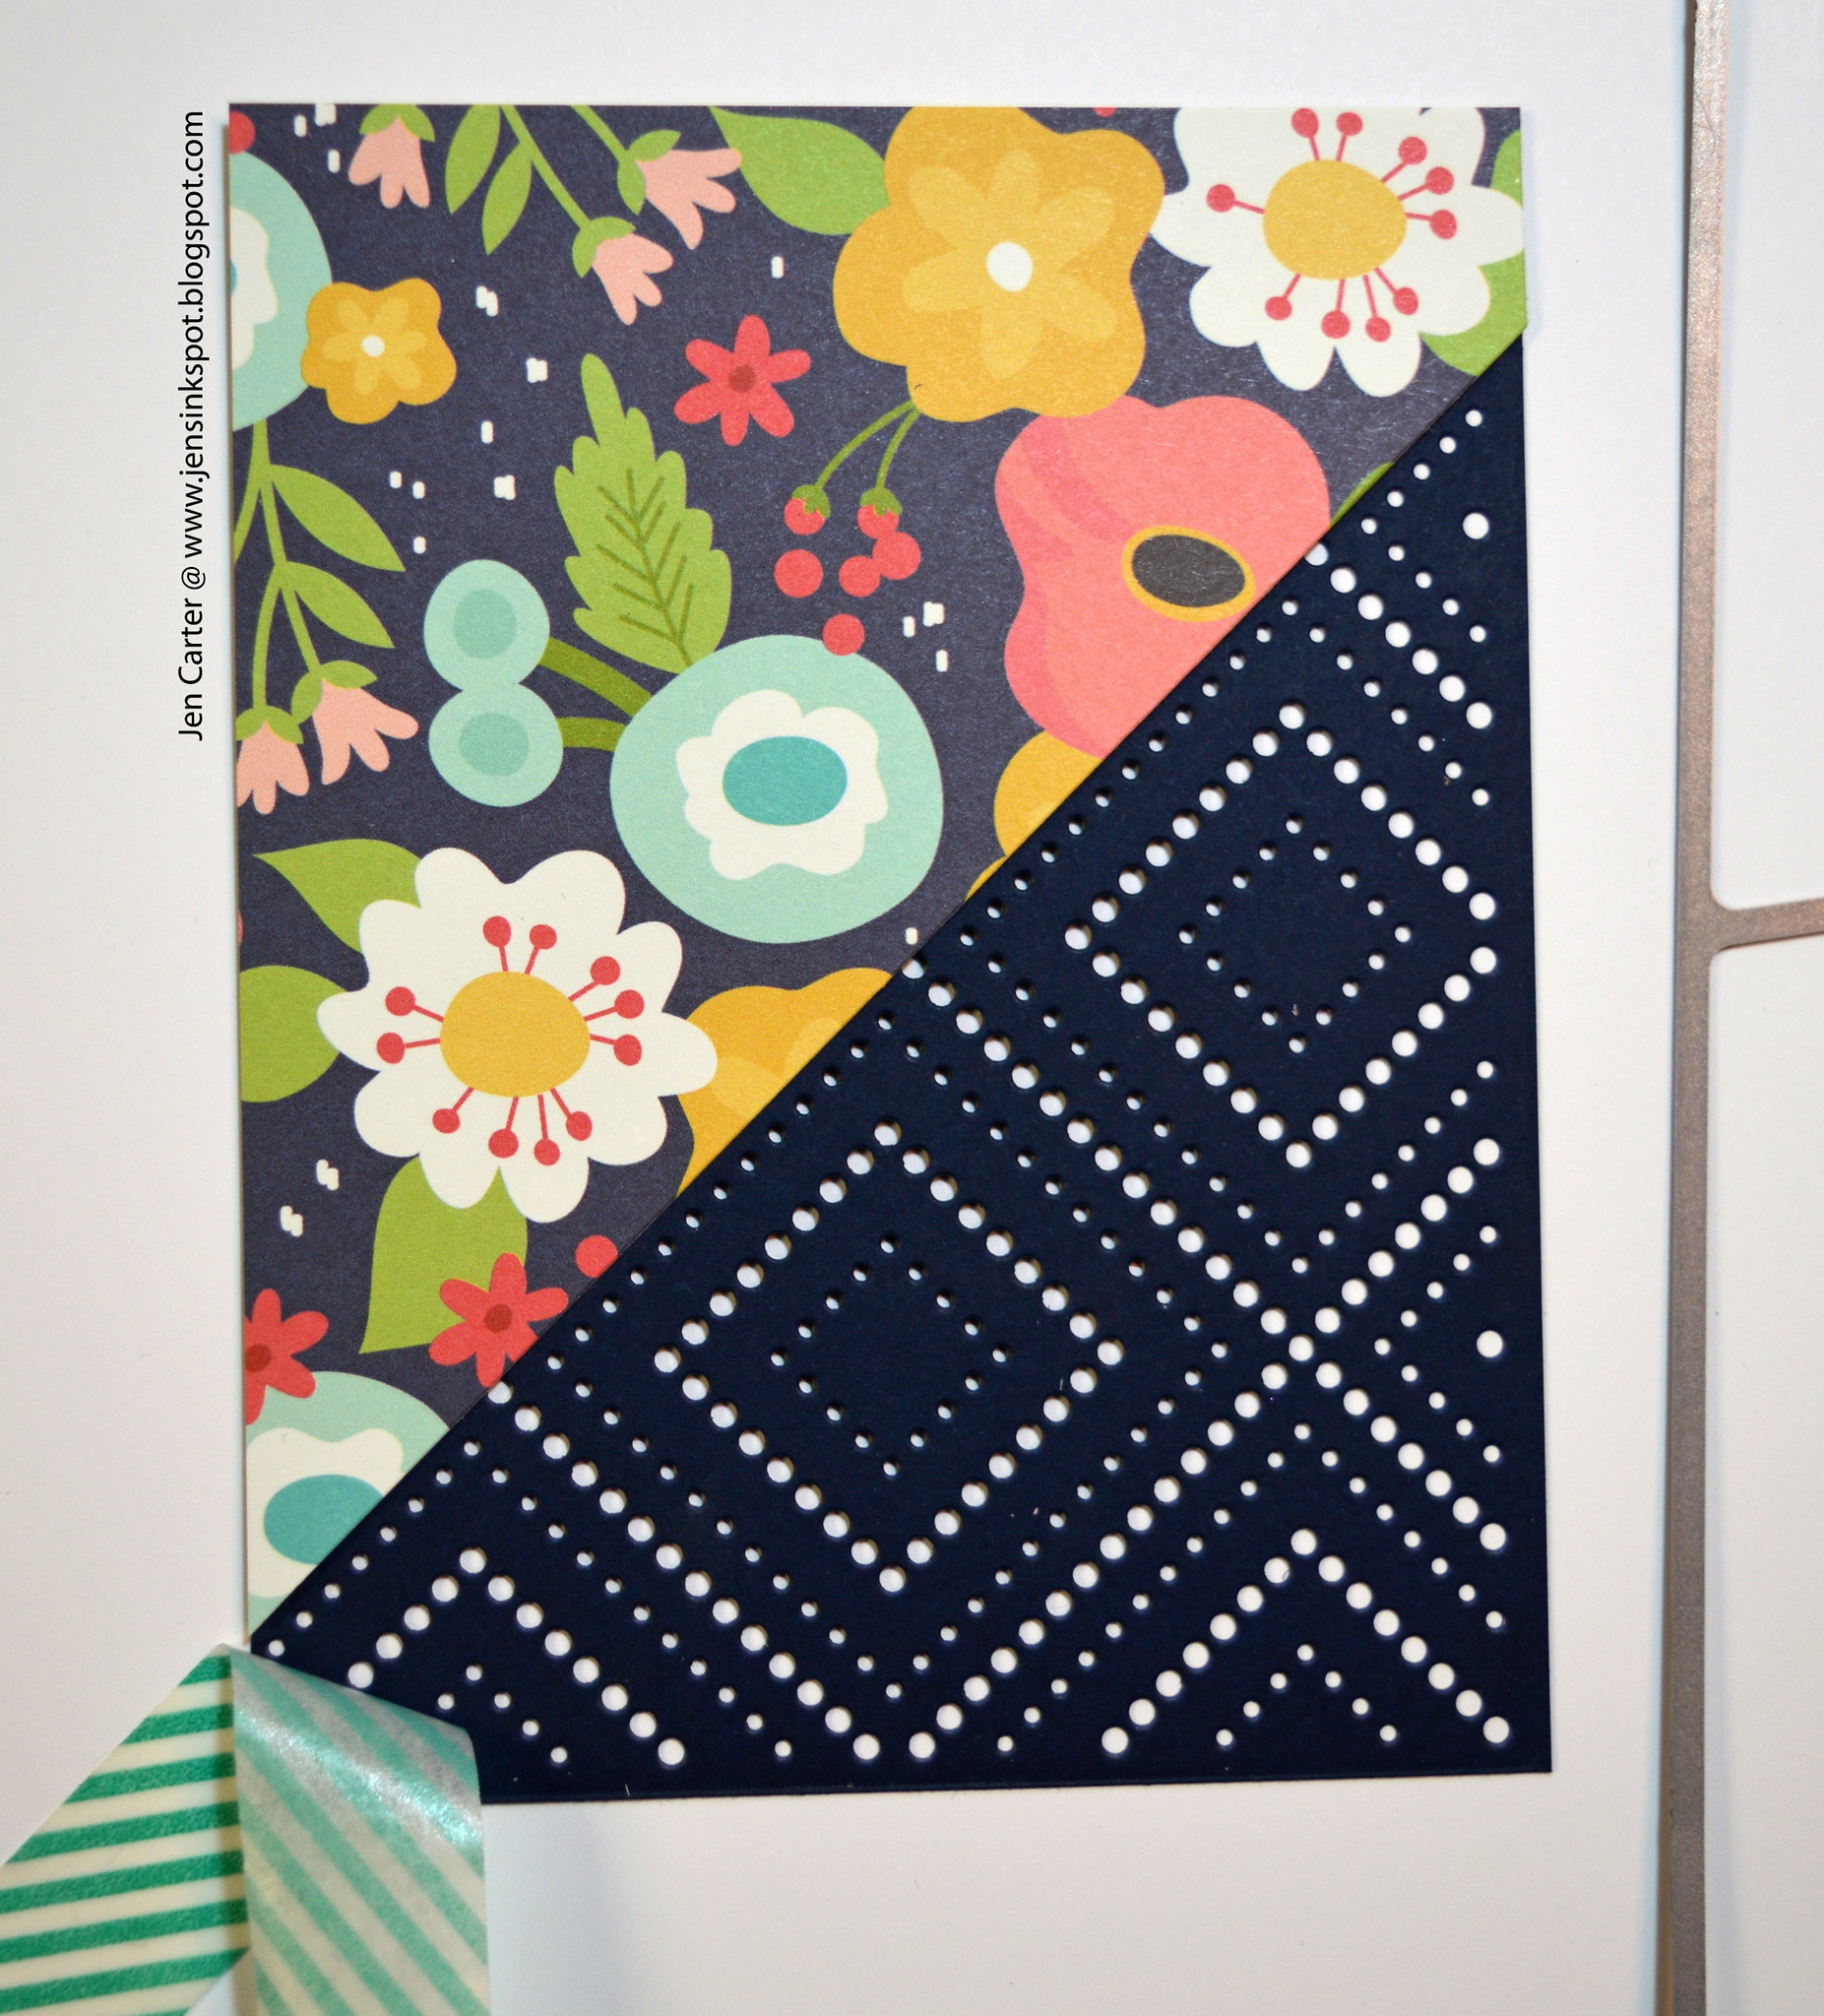
I ran the paper and die through my die cut machine, removed the tape and voila! the piece is cut exactly where I needed it to be.
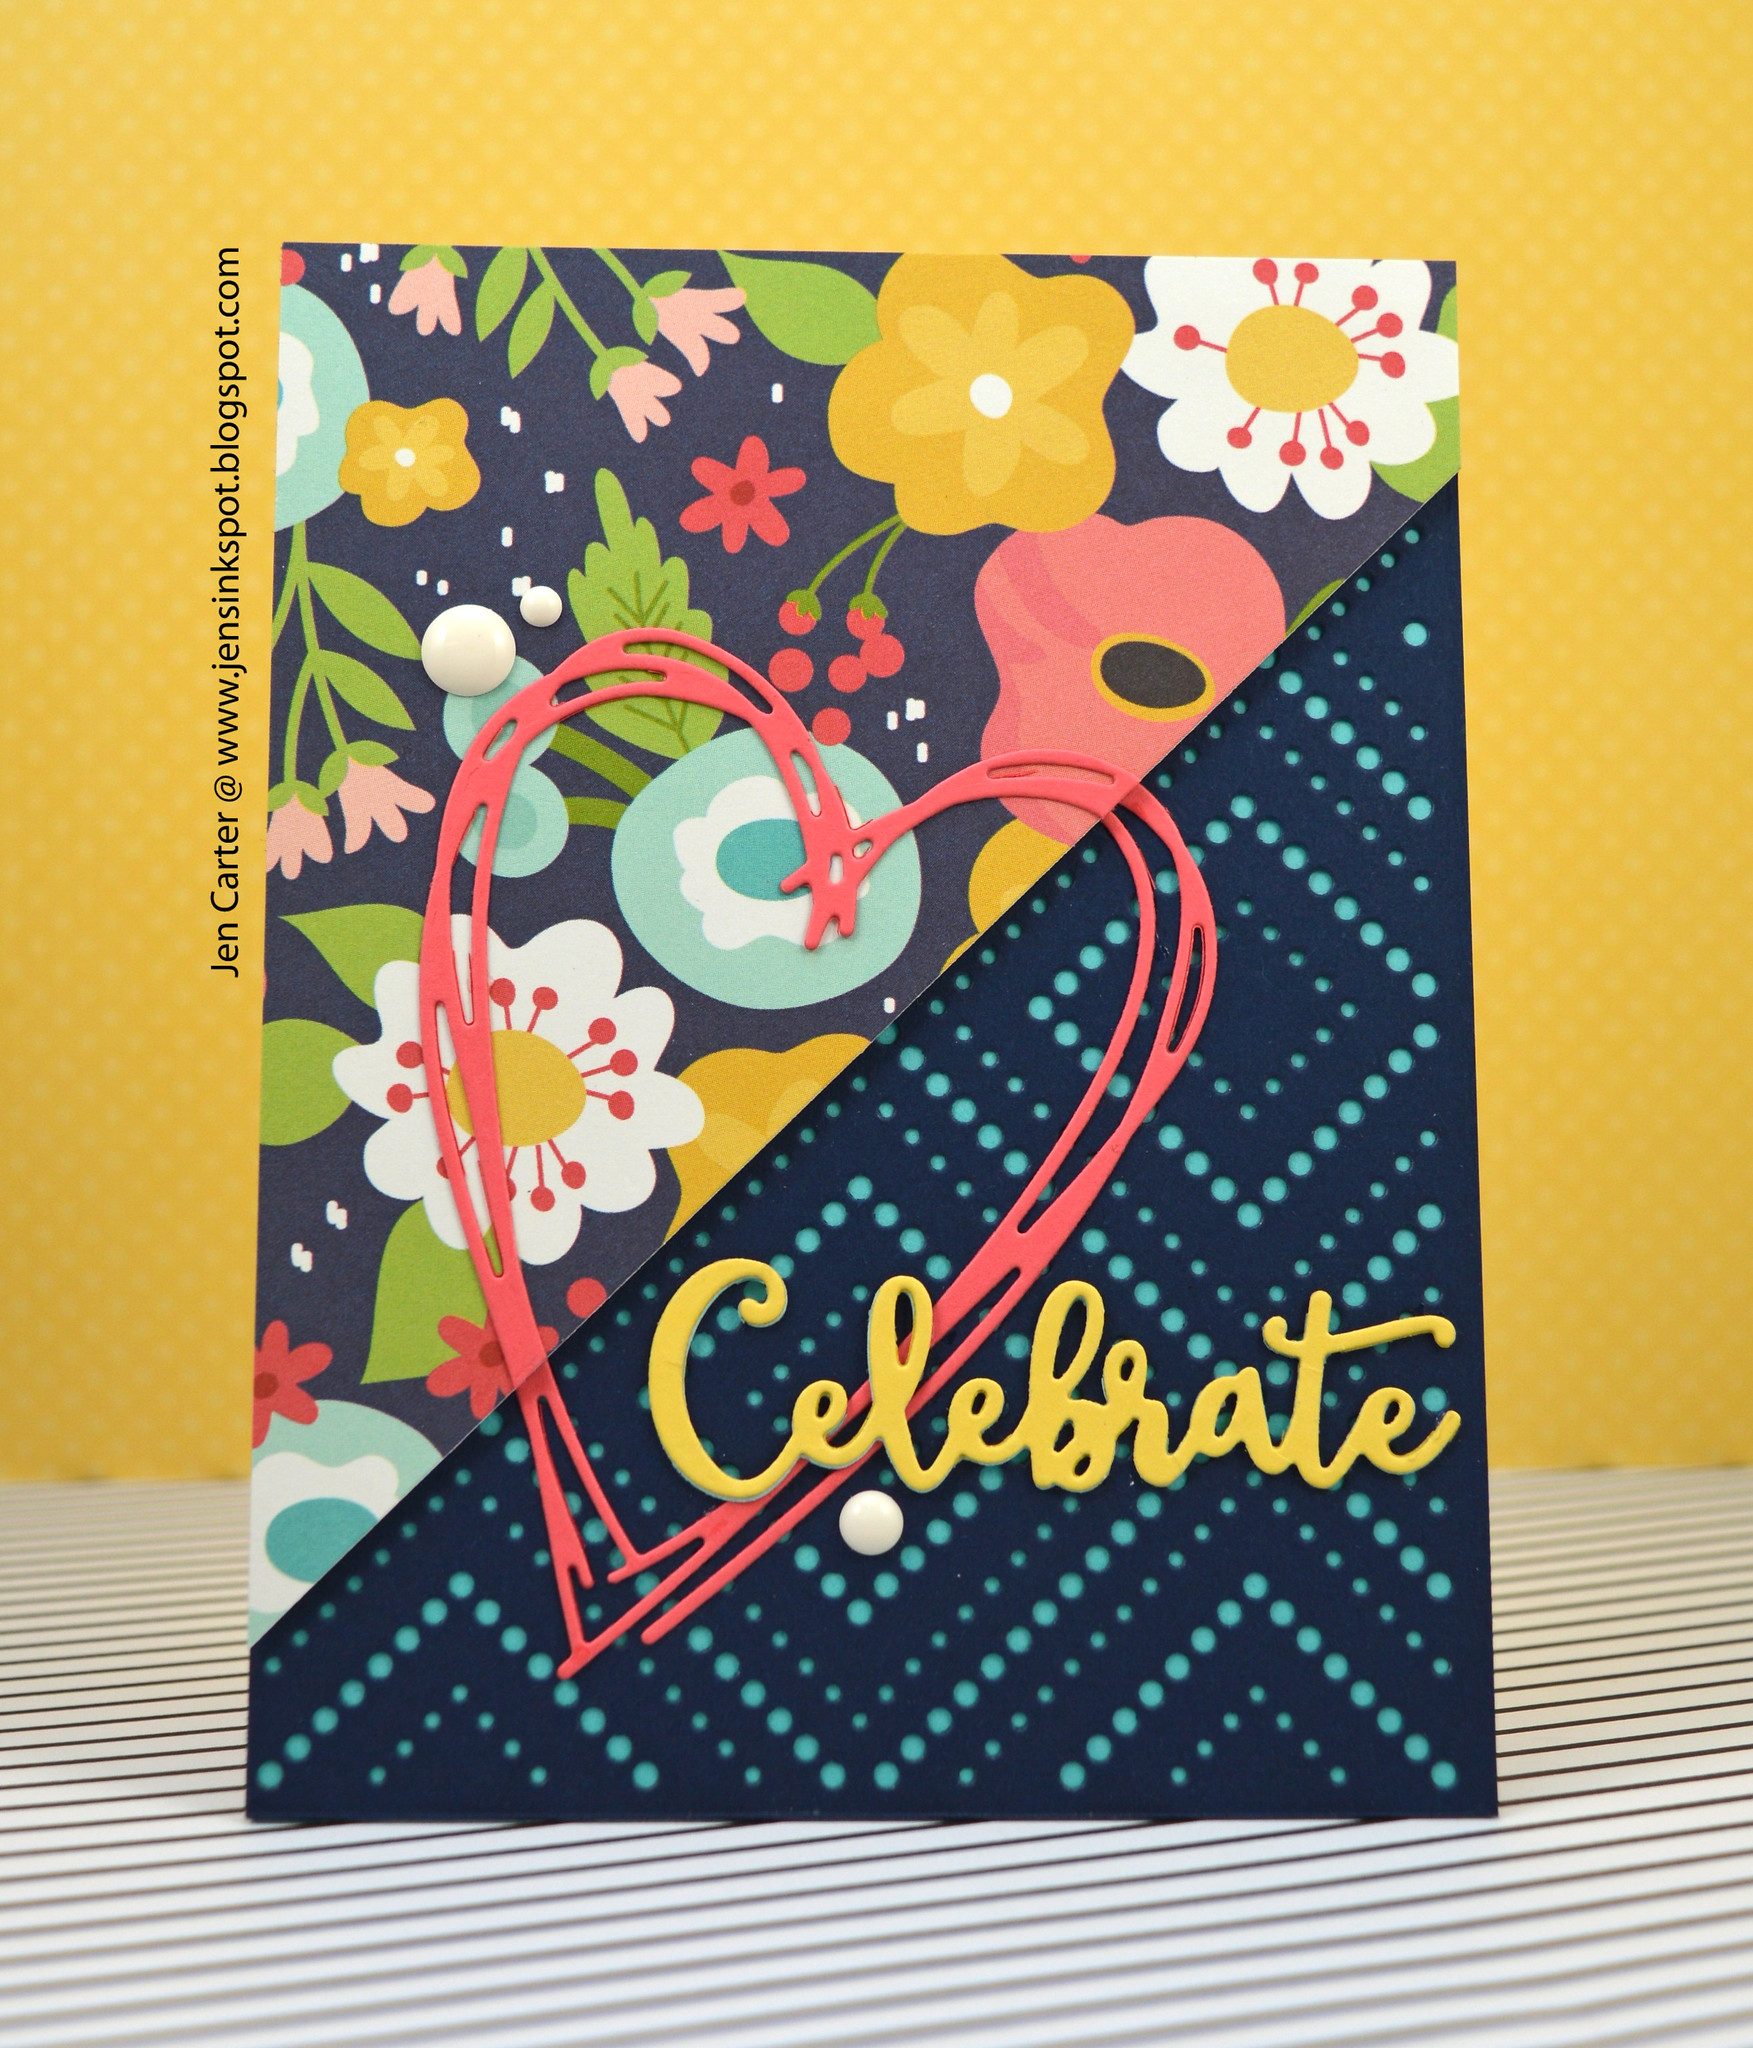
Here is the finished card again. I die cut the heart with the Sweet Celebrations die set (matching stamp set can be found here). I also die cut the Celebrate Word Die a couple of times, adhered them together and then attached them to the card.
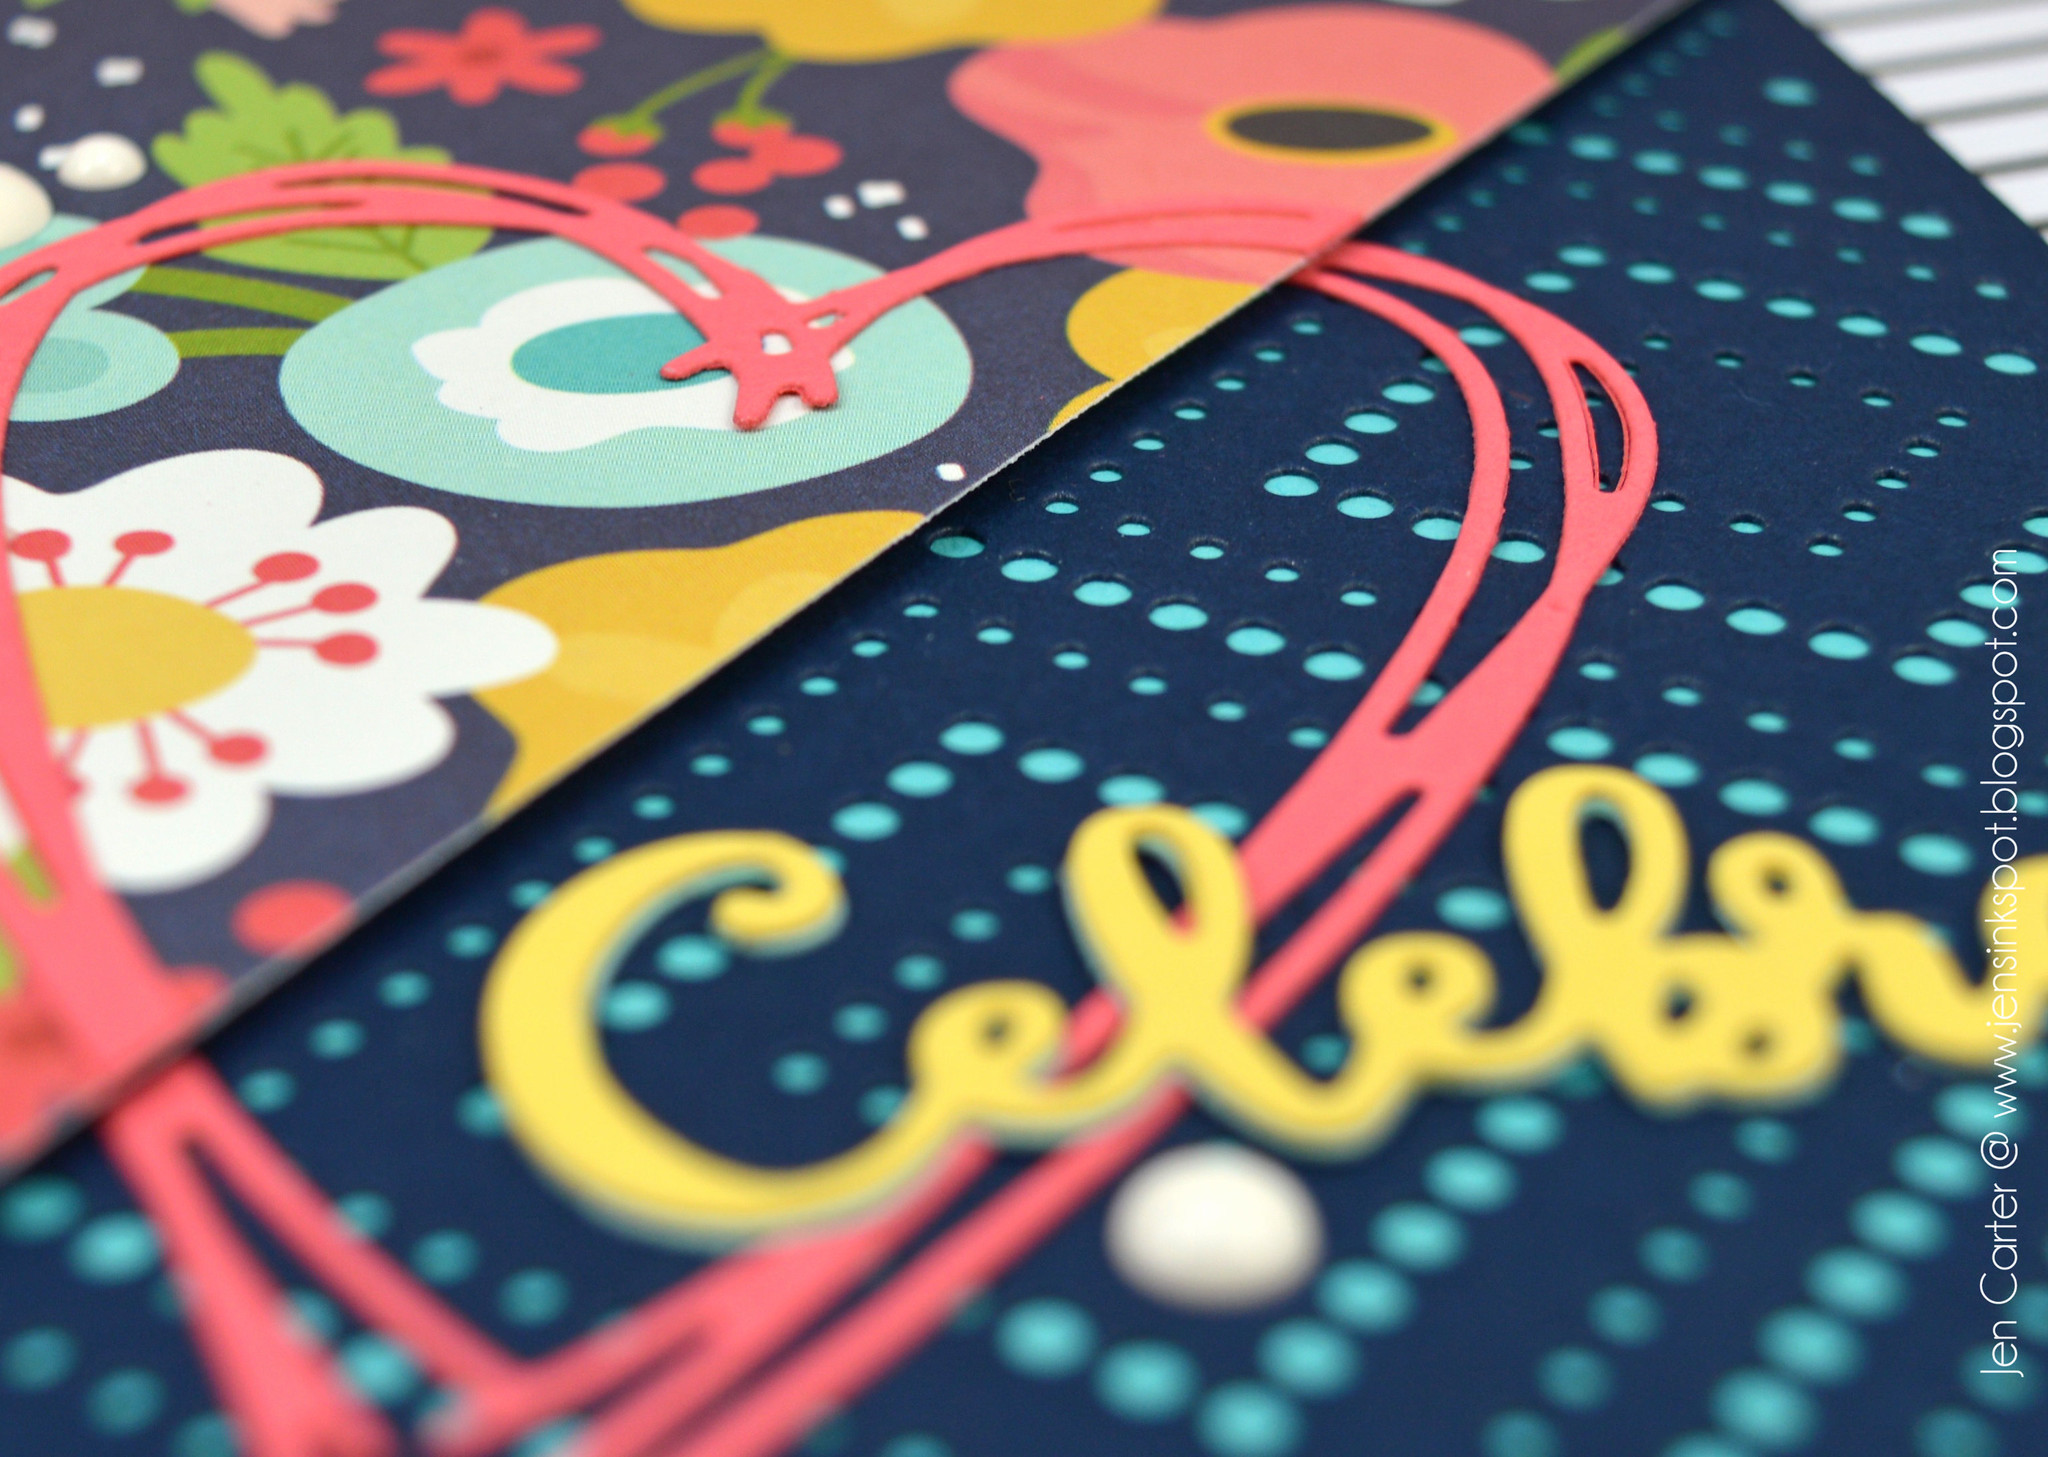
For my heart, I didn't want it hanging over the side without any support so I cut it in half and adhered half to the patterned paper and then adhered the other half to the cardstock.
I'm going to enter this in the Sunday Stamps Challenge to use the colors scheme below.

I'm also entering this card in the Stick it Down Challenge to use the provided sketch.


9 comments:
WOW. That die is neat-o! I love the bold, yet vintage-y feel to this card Jen. I'm off to check out that die in more detail...
Wonderful post, Jen! Thank you so much!
Laura
Fun card. Thanks for playing along with us at Stick it Down.
Colleen DT-for SID
http://scrappingranny-colleen.blogspot.com/
Very pretty card! Love that diamond lace die! Thanks so much for sharing with us at Stick It Down! -Lori DT
Your colors are gorgeous! Thanks for playing along with us at Stick It Down.
Very pretty! Love the die cut heart and sentiment, great design too! Thanks for joining us at Sunday Stamps, hope to see you again soon!
Cool card, fantastic colours. Thanks for creating with us at SID!
this is adorable, sweet patterns and such a fun die! I am so glad you played along with us at
sunday stamps!
blog-paperie blooms
ig-2klines
sparkle & shine, kindness *~*
What a great card. Love the die work. So nice that you shared the techniques with everyone. Thanks so much for joining us at Stick It Down.
Post a Comment