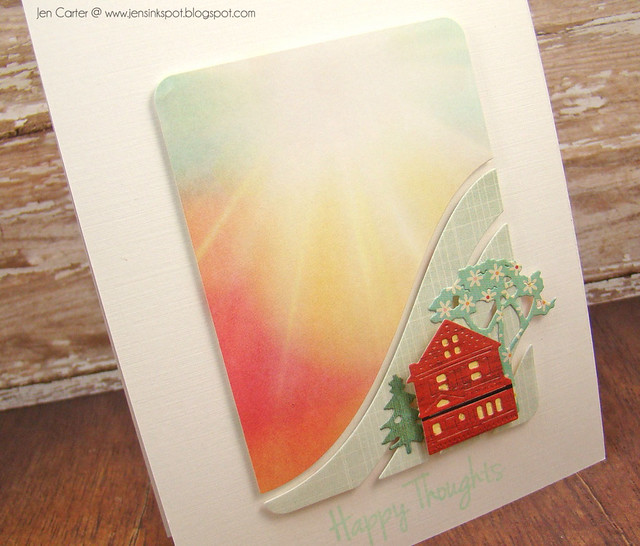
Hey everyone! I am sure loving this weather we've been having lately! It feels so nice & cool for Kansas this time of the year! Definitely feels like Fall is right around the corner! Love it!
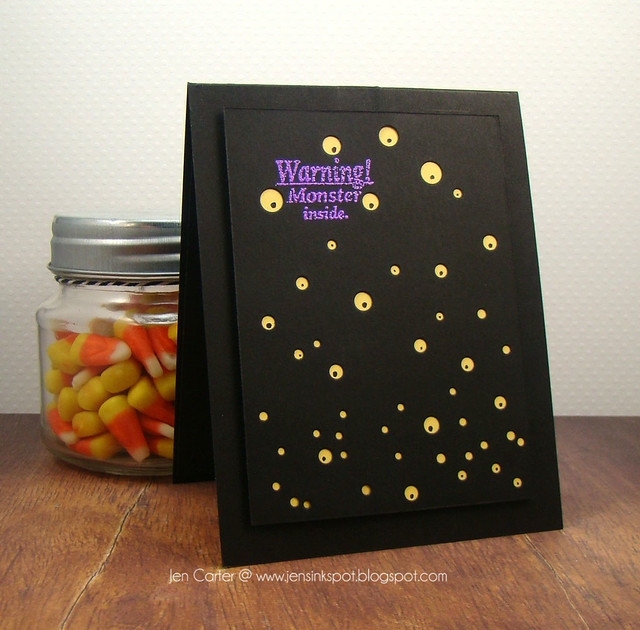
For today's card I thought a little outside the box. I love the new Frantic Stamper Snowflake Reverse Cut die! As soon as I saw it I knew that this is one I'd go back to time & time again. But, since I'm looking forward to FALL and not winter, I thought that I could put this die to another use as well! Yep! I turned those little snowflakes into eyeballs! :) After I cut out the die from black paper, I backed it with a bright yellow cardstock. I used a black marker to make a little dot for eyeballs on some of the yellow circles. I think it looks like monster eyeballs. Then, I heat embossed the sentiment from the cute Monster Mash Up stamp set in Neon Purple embossing powder. I could see using this die and doing something similar with the eyes with the Birch Trees & other tree dies (like this one)!
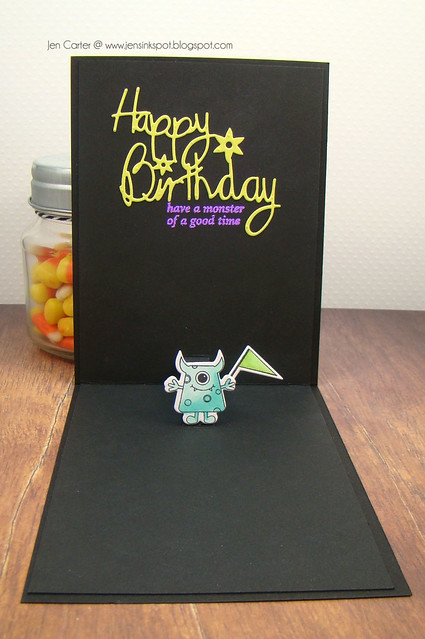
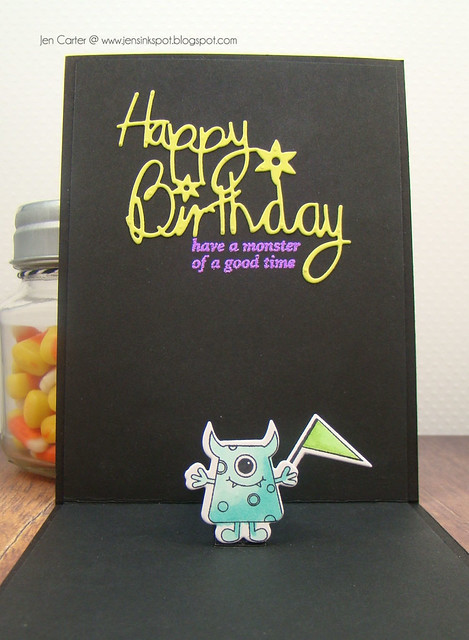
When you open up the card you have a very simple message and a little guy greeting you! :) I thought about adding a lot of monsters to the inside, but thought that this way was so much cuter.
I don't often use this blog to share things that are outside the paper crafting community. But today it just feels right.
This week has been tough. We found out Wednesday that my husband's sister had a heart attack (she's 50) and was in a diabetic coma. The doctor's had told the family that this could go either way. She could come out of it or she could never wake up. The signs weren't good and we were warned that the prognosis wasn't good either.
This is Dwight's sister.
Little things started happening. Her muscles twitched, she'd open her eyes from time to time but it didn't seem like she was really "there" when that happened. She responded to stimuli and on Friday we were told she would respond to some small commands. But she was still in a coma. Still we were told, "Make a plan." That meant, prepare for the worse because these little things, these "signs" might mean nothing. She could go either way.
Friday night my husband met his family at the hospital to make a plan like the doctors had requested. What do we do if she doesn't make it. What kind of funeral do we plan? All of those questions that no one really wants to think about.
At one point as my husband, his mom and niece sat in the hospital room together, his sister briefly opened her eyes and then they closed. His niece was excited and said, "See!" like it was a sign. My husband felt bad for his niece because she was getting her hopes up. He felt like when the eyes opened there was no life in them and he was scared for the hope that this gave his niece. False hope.
It seemed grim.
Saturday morning we hadn't heard anything new, so we guessed nothing had changed.
We we wrong.
God was at work.
Around 10:45 we got a call from Dwight's brother who had just walked into his sister's room. I didn't know what to expect when he said "This is Steve." So many thoughts run through your head at each phone call you receive. Is this the phone call we've dreaded? Is this more bad news? Is this the end? And you dare to hope too that maybe it's good news. But yet still preparing yourself for the worse. You really don't expect good news at this point after the warnings that you've heard over & over..."don't get your hopes up", "prepare for the worse", "make a plan".
But it was good news.
It was news of second chances.
She was awake! She recognized her brother! And that brother was calling to give us good news of great joy! Unexpected news.
God had once again overcome death.
I think sometimes in America we tend to miss God's miracles. We get desensitized and take for granted the miracle of modern medicine. I'm not going to overlook this one. I think God took my sister-in-law from death's door and brought her back.
And sometimes I wonder who this miracle is for. For one it is about getting another chance at life. For one it is about getting a chance with her mother again. About looking tragedy in the eye, making tough choices and being stronger for it. For another it is about having a daughter back. For chances at more time spent with the one she birthed. For others it may be about broken relationships having a chance to right themselves. For others it is about being the one experiencing tragedy personally, not walking along side of them, but being one of them, in their shoes! For others it is about seeing God at work.
For me, it is about a lot of little lessons.
Yesterday as I was getting ready for work I was working myself up with all of the "what if's". What if she dies? What if we can't find the money to pay for a funeral? What if she wakes up but isn't able to function like she use to? What if this is too much for my niece, mother-in-law and husband to bear? On and on and on.
But the Lord gave me a message. I felt it clearly. "Jennifer, before you were even born I had this." And the word that stuck with me was "I'm already there." And He was. He went out before us all. He had this covered. And that gave me peace that whatever was to come, He had already gone before us. He was in control. We were experiencing that firsthand, in the good and the bad.
But he taught me again about having faith and not fear.
He reminded me about the power of prayer.
And I know he taught a lot of others lessons along the way too.
One I want to share today is this. During this difficult time we had hope. Hope that she would wake up, yes! But also the hope that is found in a loving Savior who many years ago sent His son to die on the cross for us all. It is a free gift that we only have to believe in to receive. That was our main source of hope. Yes, either way, no matter life or death, the Lord gave us hope.
Had my sister-in-law not made it, we knew she would go to a much better place. Many years ago she put her trust in an eternal Savior and we knew that if she were to pass from this life she would live forever with Him.
For some of you, this may not be a welcome message. You don't believe in this God. But, the truth is, He loves you too. He loves all of us and desires for us all to have a relationship with Him. And I cannot walk through this with husband and his family and not share the good news with you, my blog readers who I consider my friends.
There was another time in history where the angels announced good news of great joy! That was the birth of our Savior! And that birth was just the beginning of that story too. John 3:16 tells us that God loves the world so much that He gave His one & only Son (the one that the angles had announced) and that whoever believes in Him will have eternal life. I pray that for each of you friends. I hope that this personal journey might speak to you as well and touch a place in your heart that is hurting or empty.
Thank you for bearing with me on this non-craft related post. This story was too important (and exciting!) not to share.
Oh, and by the way, as I am typing this my sister-in-law is eating applesauce and being told the story of what transpired over the course of the last few days.
Some of you prayed for her. Thank you! I can't express the gratitude we feel for so many reaching out to our family during this time! We felt your love and support.
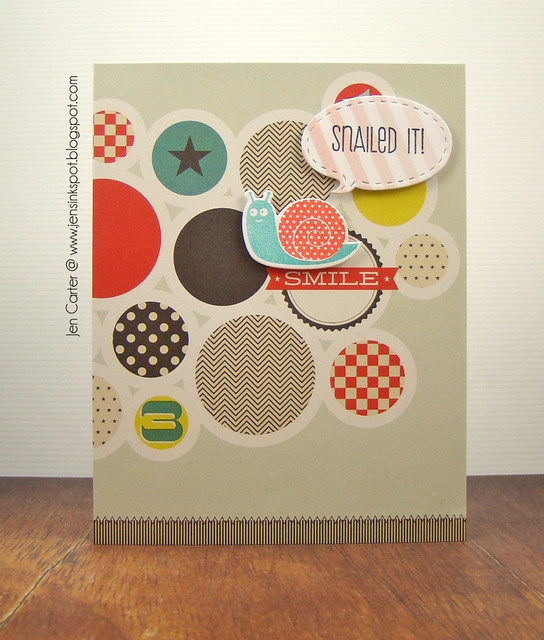
Hello everyone! I have a simple card to share today.
To make this scene I first started with the Stars & Strips Photo Card die. I used two different patterned papers to create a sky & land scene. I used the die outline as a guide for where to place each piece.
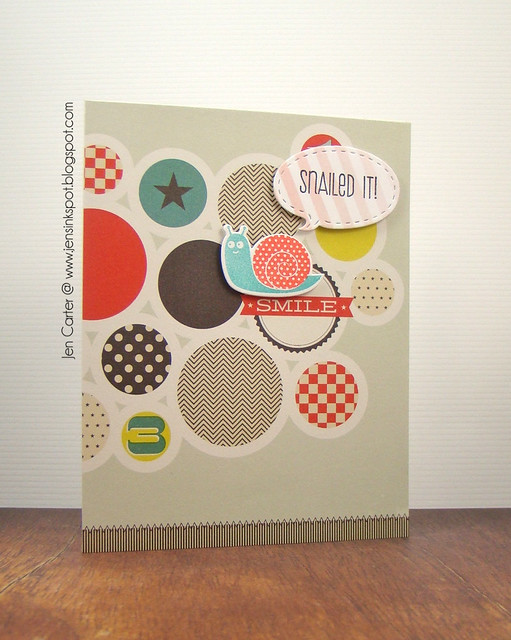
The sketch, shown below, was open to a lot of interpretation, so the card above is what I came up with. I used the fun stamp set called Snailed It! and the coordinating Snailed It Dies!
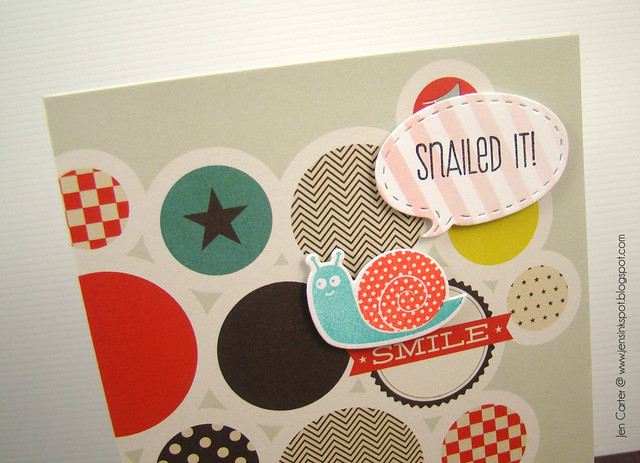
The sentiment "Snailed it!" (how fun is that!!) is stamped inside a speech bubble that I die cut with Lil' Inker Designs Speech Bubbles 2 Dual Stitched die set. I used the COOL & TRENDY Ombre Stripes paper pad that if you don't own yet, you really should consider adding to your collection! And another note about the speech bubble set is that it is so fun that it stitches both inside the speech bubble and also on the negative piece of leftover cardstock! Love that versatility.
For my line across the top 1/3 of the card, I die cut & stamped the snail from Snailed it! above the "smile" sentiment. The line the snail would make across the paper is invisible but hopefully understood. It is a loose interpretation of the sketch I know.
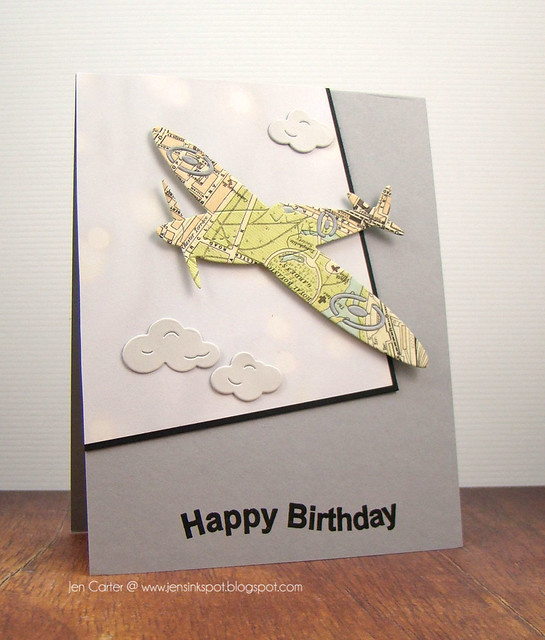
I always seem to need masculine cards but very rarely have one ready to go when I need it. Today is my dad's birthday and since he works in the airplane industry I felt like this card would be appropriate for him.
I decided to create a scene beginning with the Frantic Stamper Spitfire plane die. I wanted a masculine paper for the plane, so as I was looking through my stash of papers, I found an old piece of map paper and thought I'd try that out. I inserted gray cardstock in most of the pieces that cut out of the die for a little contrast and was happy with the final result. For the sentiment I used a stamp from Frantic Stampers Wavy Banners & Greetings clear stamp set. I really like how crisp & clear it stamped.
I cut my bokeh paper, that I felt made it look like it was flying at night, at an angle and backed it with black paper. I die cut some clouds from the Village Sky set and added them to my sky background. I popped the airplane up with dimensionals.
Hello! It's time for another Lil' Inker Designs Monthly Meet up Challenge! This month we are celebrating LID's 5th birthday! So, not only is this challenge time where we want to see what you are making with LID products, but it also means we have a special release of a stamp & die set! I'll tell you more about that in a little bit, plus the prizes you can win too! Oh...and there just might be some info on a sale you won't want to miss out on too! :)
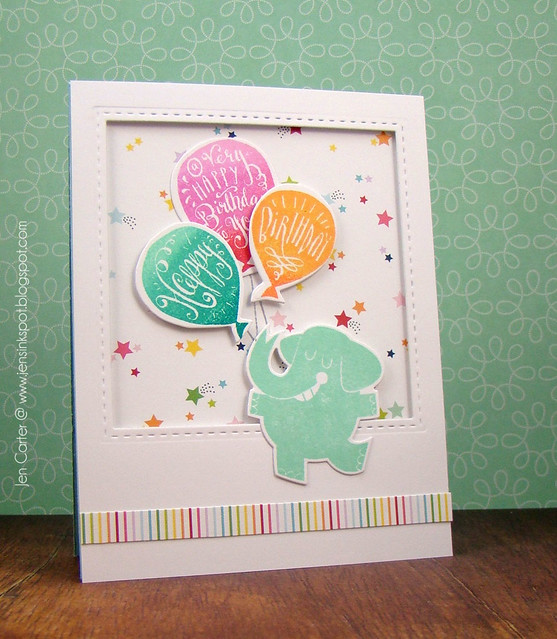
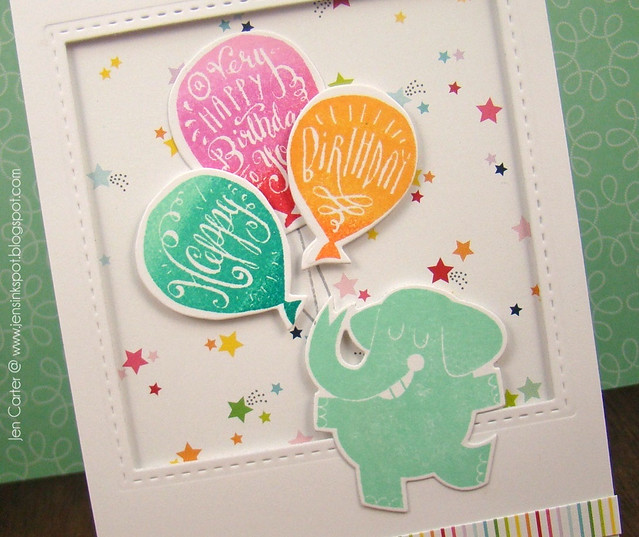
I love the fun Party Pachyderm stamp & the coordinating Party Pachyderm die set! Oh my goodness, there are so many fun ways to use them! For this card I wanted one of the elephants from the set to be partying by holding the balloons. Do you see anything new on this card? Yes!! Those fun balloons are part of a new birthday and die set from Lil' Inker Designs being released TODAY!! The stamp set is called Birthday Balloon Greetings & the coordinating dies are Birthday Balloons Greetings die set.
I used Ombre inks to stamp the balloons and then popped two of them up with dimensionals. I cut my square frame out with the awesome Stitched Mats: Dual Stitched Square dies.
How can YOU pay along?
Make a new project or share something you've been working on featuring LID goodies & post this new project to your blog or favorite gallery. Link your project to our challenge by using the InLinkz tool on the monthly post on the Lil' Inker Designs blog. You have through August 18th at 11:30 PM EST to link your project to be eligible to win a prize. Projects should exclusively feature LID goodies to be eligible to win but do not need to exclusively feature LID goodies to join our Meetup.I'm excited to see what you create!
What can you win?
This month's prize is a $50 gift certificate to Lil' Inker Designs! Winners will be announced in a new blog post shortly after the challenge ends on the Lil' Inker Designs blog. Have fun and we can't wait to see what you're working on!
And I mentioned a sale earlier too! During the time of this challenge, now through August 18th, you can save 20% off of stamps & 15% off all dies (no code needed for this sale)! AND...if you spend $100 you can purchase the new Birthday Balloon Greetings Stamps & Dies (shown below) for 30% off (code is LIDIS5).
Hello everyone! I hope you are all having a great day!
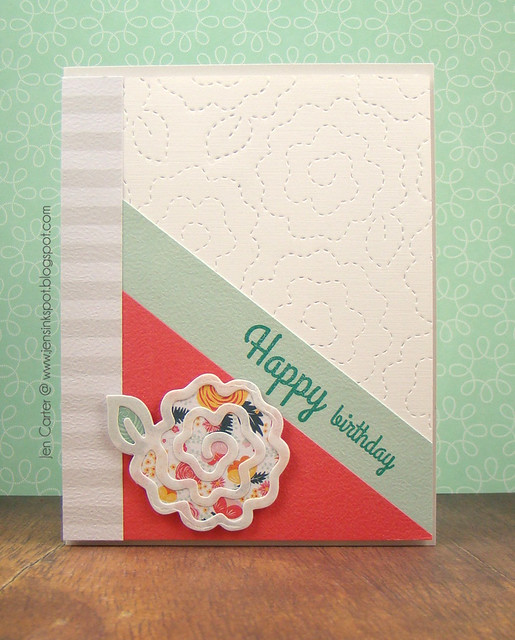
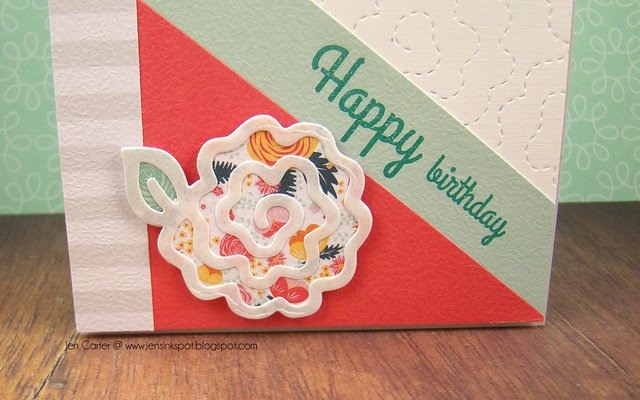
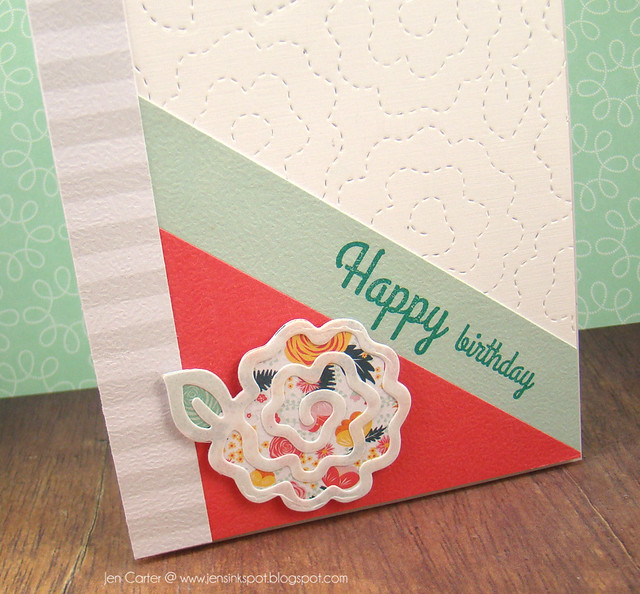
For today's card I used one of my favorite new dies from Lil' Inker called the Quilted Flowers die. If you haven't seen my video on how many different ways you can use this die, you can view it here. I used it several different ways on this card.
I started by creating my background. To do this, I used just the stitching die included in the Quilted Flowers die set and laid it on my white cardstock and made a pattern with it. I love how this custom paper turned out!
For the flower, I cut out the base with patterned paper. Then, I took a thick piece of vellum and cut out the outline, setting the inside piece aside for use on a later card. To adhere it I used a GREAT product called Stick It! You just place it on the back side of your paper and then die cut and then peel away the backing to reveal the adhesive! It makes intricate dies so easy to attach!
The happy birthday sentiment is from a stamp set called Pineapple Panache which has some great mix & match sentiments.
I'm entering this card in Addicted to Stamps Anything Goes challenge. Thanks for stopping by!
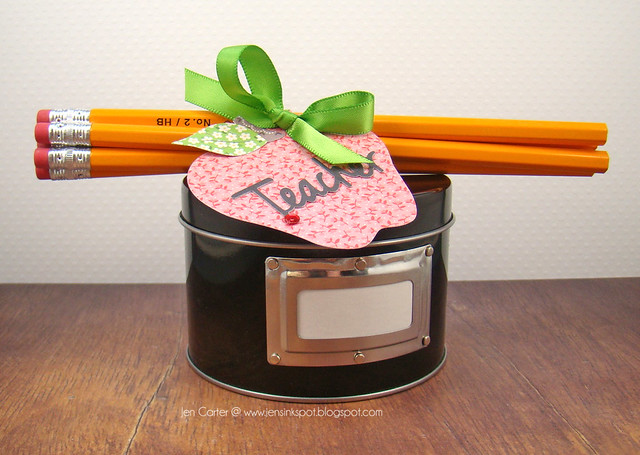
Hey everyone! We just returned from a conference in Oklahoma (to find out our AC is out when we walked into a very hot house) and now today I am jumping back into work after a few (and what seem like SHORT) months off. Hard to believe that school will be starting in a few weeks and now it's time to prepare for the students' return! With that in mind I felt like this was a great time to share a simple teacher gift idea.
This is a simple, inexpensive gift that you could give your child's teacher just to let them know that you care about them and appreciate them.
I cut a tag with a die from Frantic Stamper called Teacher's Apple. I used several different patterned papers to create the apple, using different pieces for the apple, stem & leaf. The apple is a nice size for a tag that could be used with tons of different teacher gifts. I also die cut the "teacher" from the same die set and attached it to the tag. I added in a few red sequins and a green bow to embellish it.
If you are looking for a quick & easy way to dress up a teacher's gift, this is an easy way to do it for sure!