Saturday, November 29, 2014

ShowCASe Your Style: Merry & Bright

It's time for another ShowCASe Your Style blog challenge!  This week the challenge is based on a photo!


 From this photo I was inspired by the bulb ornaments & some of the colors of the bulbs.

Jen Sparkle & Shine Pink Nov 29 Challenge

I went in a pastel route with the color scheme for this one.  I stamped the light bulb cord from the Clearly Whimsy Sparkle & Shine stamp set.  I then stamped each light bulb with white pigment ink and then stamped the colored light bulbs on top of the white to help it stand out more.  


Jen Sparkle & Shine Pink Closeup

The sentiment, also from the Sparkle & Shine stamp set was embossed with pink embossing powder.

We'd love to have you join us for this challenge!  Just visit the ShowCASe Your Challenge blog for all of the details and to link up your creation!  

Supplies not listed above:
Dies: Lil' Inker Designs Stitched Mats: Rounded Rectangles
Embossing Powder: Zing Rose
Ink: Avery Elle Mint to Be, Pixie & Raspberry, Fresh Ink Pool 

Wednesday, November 26, 2014

Merry Christmas Ornament Card

This past weekend I got to Christmas shopping!  I say I "got to go" because it is something I actually really enjoy!  Now I'm really in the Christmas mood!  Don't get me wrong, I can't wait to celebrate Thanksgiving this week too but this whole season is about being thankful and grateful to me!  I just love it all!

With that Christmas mood in mind, I have another Christmas card to share with you.  This is a similar card to one I made for the make & take at our Stamping Away weekend in September, with just a few little tweaks to it.

Merry Christmas Bauble Side

I started by cutting my gray panel.  I trimmed it just slightly larger than the shape I would cut out of it.  I used the Frantic Stamper Teardrop Christmas Bauble Background die to cut the negative out of the panel.   

Merry Christmas Bauble Closeup Top

I popped the gray panel up with dimensionals and adhered a piece of pattern paper directly to the card base to add dimension.  I added a gold ribbon piece to the top of the ornament.

Merry Christmas Bauble Closeup bottom

I adhered the lovely Script Merry Christmas die cut to the card panel as well and then added in some sequins to finish the card off.

I'm entering this in the Pink Elephant Challenge Anything Goes.


Tuesday, November 25, 2014

A Baubled Merry Christmas!


Hello! When I was growing up my Grandparents would sometimes put out their silver tinsel Christmas tree that they saved from when my mom was a little girl.  They even had the spot light for it that changed colors every so often.  I loved it and was so fascinated with it.  This card for today's post was inspired by those sweet memories.

Christmas Tree Bauble Blue

I used the Baubled Christmas Tree die from Lil' Inker Designs to cut out this cool Christmas tree in silver glittered cardstock.  I then used the Stitched Script Holiday Word dies to "stitch" my sentiment into the card.   The shape of the card was cut with the very versatile Border Builders die set.

Christmas Tree Bauble Blue Closeup Stitches

Here's a closeup of the stitched words.  It's hard to capture these in the photo but hopefully you can get a good idea of what they look like.  I finished the card by adding red silk ribbon and pearls and sequins to the tree for ornaments.

Thanks for stopping by!  I hope you have a wonderful day!

Friday, November 21, 2014

Birthday Wishes


Hey!  I have a birthday card to share today.

Jen Carter Tremendous Trees, Happy Everything

For this card I used the Clearly Whimsy Tremendous Triangles set.  I found a picture on Pinterest that I used for inspiration for the color scheme.  You can see the picture here.  I loved the touches of black & white in the picture so I added that in with the patterned paper on the side and the black sentiment.

Jen Carter Tremendous Trees, Happy Everything Closeup

My sentiment comes from the Happy Everything set which is perfect for birthday cards!  I added in a few sequins and some linen thread and this card was good to go.

This card is for a co-worker that I job share with.  Her birthday is today and mine is tomorrow.  Of course I had to make her a fun card!  

Thanks for stopping by!

Wednesday, November 19, 2014

Nativity Pop-Up Card


I love the Christmas season!  I love getting into the holiday spirit and buying presents.  Love the holiday smells of cider and pine.  But I also love celebrating the day that Jesus was born!  When I first laid my eyes on the Frantic Stamper Nativity Creche & Sheep die set I knew I had to have it!  I have had an idea on a way to use it for a long time and had a really rough example sitting next to my workspace to remind me to figure out how to do it but it wasn't until now that I finally took the time to play around with the design.  After a lot of readjusting I finally got the result that I wanted and I'm excited to share it with you today!  I've also included a photo tutorial at the end of this post in case you'd like to replicate this idea.

Manger Card Jen Carter

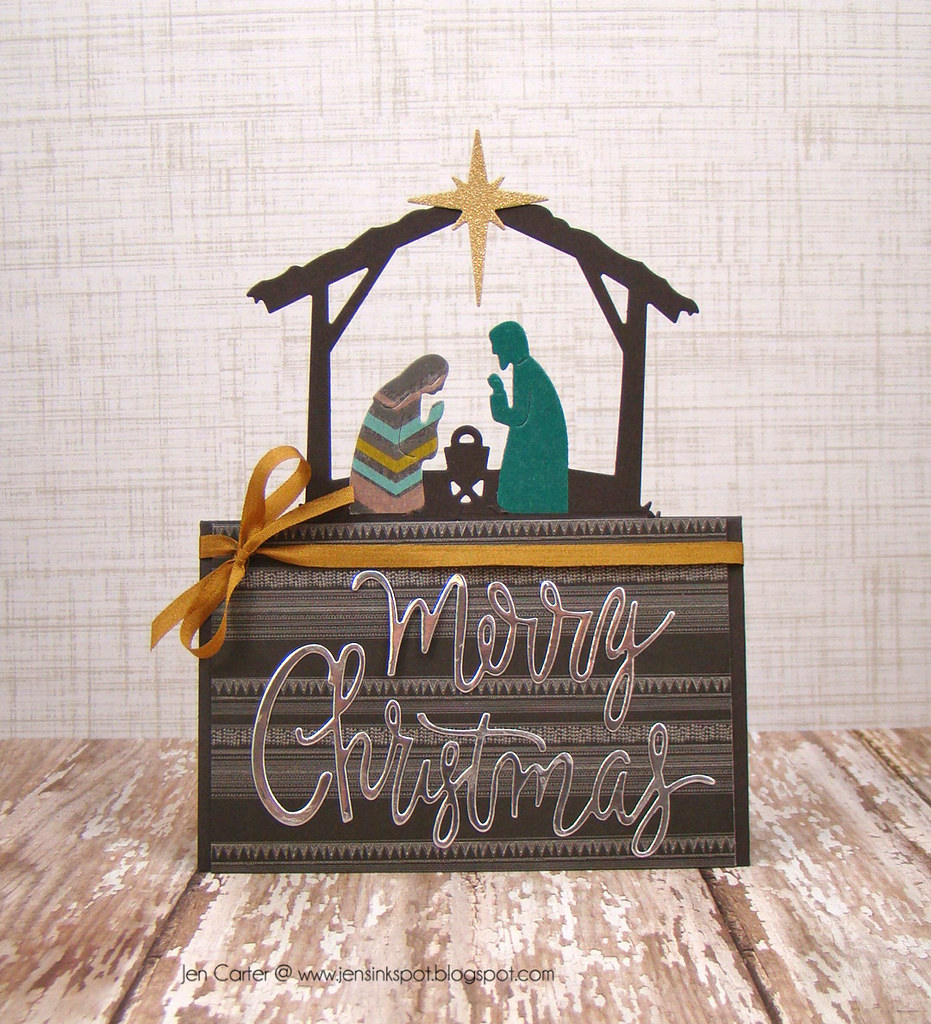
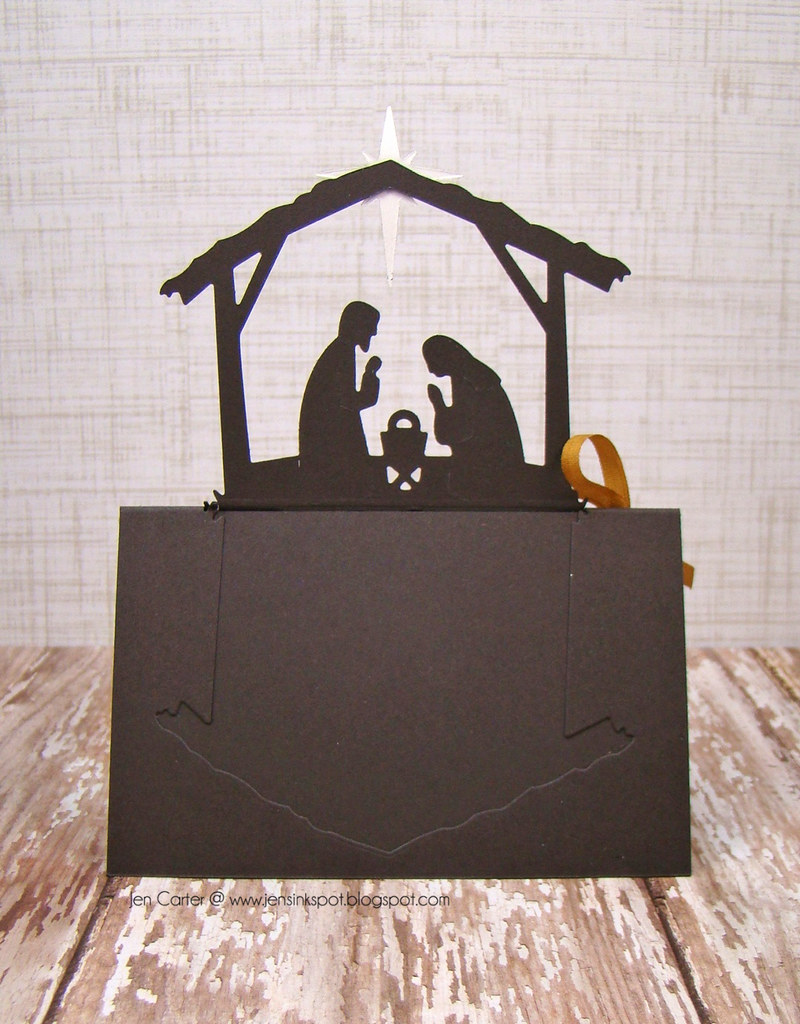
I used this die to create a pop up card.  Like I said, it took a little bit of measuring and cutting before I got it just how I wanted but I love the results!  I love how the focus of the card is on the nativity.

Manger Card Jen Carter Closeup

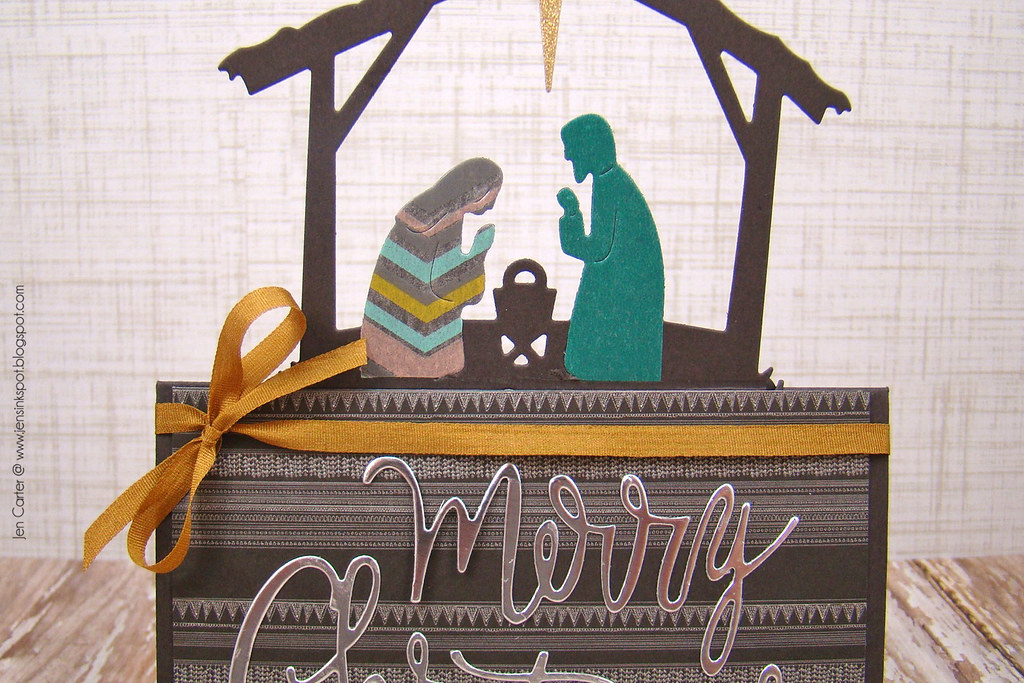
Here's a closeup of Mary & Joseph.  I used strips of washi tape to highlight them as they pray over Baby Jesus.  I'll show you how I achieved that below. 

Manger Card Jen Carter Inside

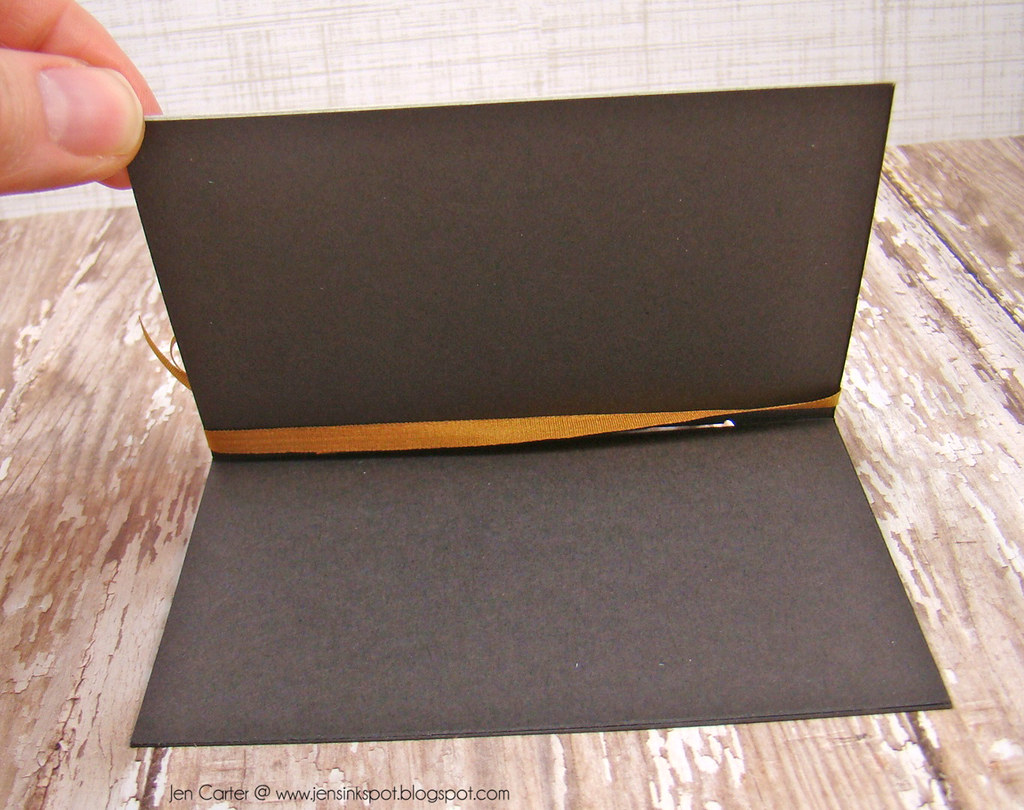
This is the inside of the card.  To hide where I had cut out the nativity from the back side of the card I cut a matching piece of cardstock to the same dimensions as the card and adhered it so you can still write a message inside.

Manger Card Jen Carter Back

And here's the back of the card.  You can see where the nativity was cut out of the backside and how the piece that I adhered on the inside also helps stabilize the card.  

Here's a tutorial on how I put this card together.


First I cut my cardstock to 4 1/4 x 11 (I could have cut it shorter because I end up trimming it later, but this made it easier at the time to get my measurements right).  Then I scored it at 2 3/4".  This is the line where I will line up my die.


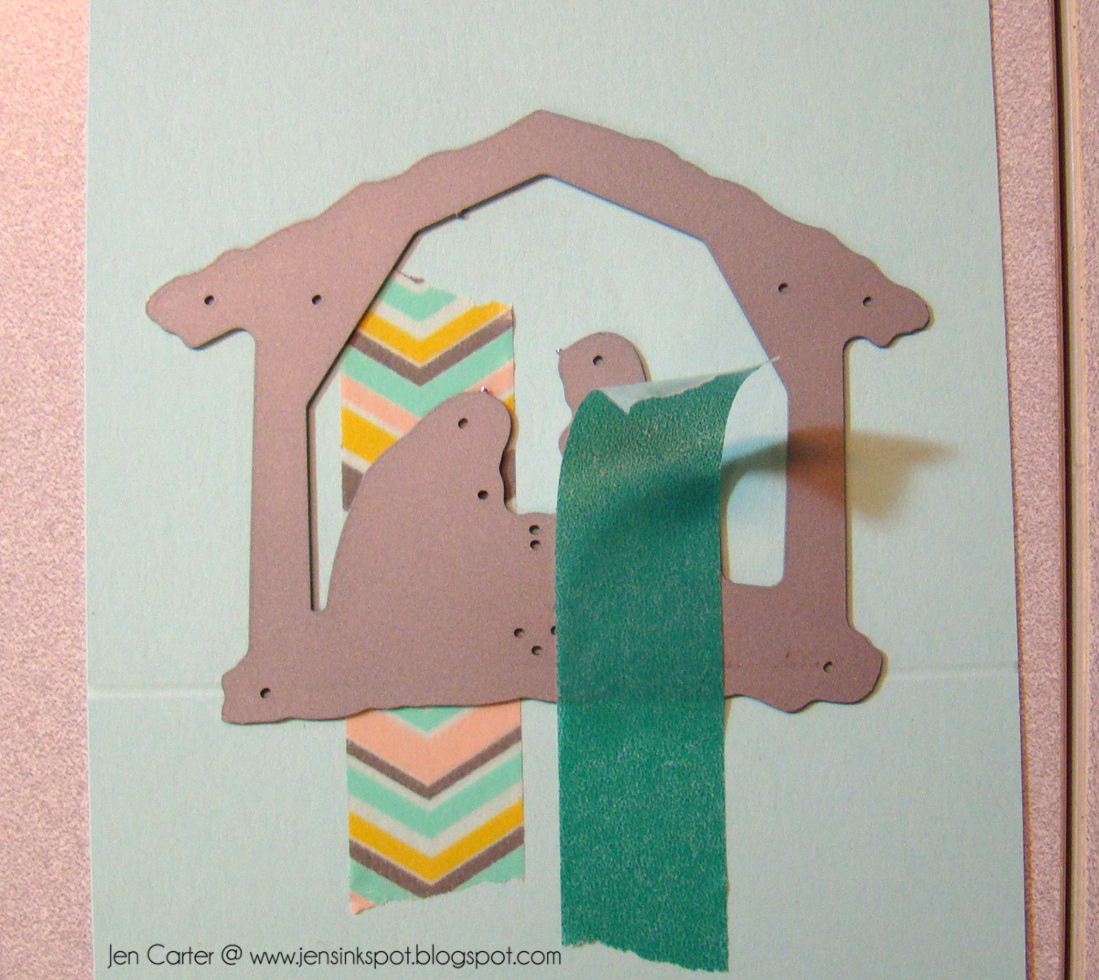
I then chose 2 pieces of thick washi tape.  It's best if your tape is the same width of Mary & Joseph so I found that my skinnier tape didn't work as well.  The tape I used was 3/4" wide.  I used my die as a guide to where I should place my washi tape on the cardstock as shown.


I lined up the die on the scored line and then placed the cutting plate on my die cut machine just above the bottom of the die so that I wouldn't cut the shape completely out.  I wanted the bottom of the nativity to still be attached to my card so that it could pop up.  By placing my cutting plate above the bottom of the die, when I run it through my machine it will only cut to where I have my plate, leaving the bottom portion intact. 


This is what it looks like after I ran it through my die cut machine.  You can see that it didn't cut the bottom of the nativity.


I removed the negative pieces of the die and then carefully peeled off any washi tape that was on the shape that I didn't want on my card.  You can see how the tape goes farther down on my figures and over on to baby Jesus. 


I took a very sharp pair of pointed scissors and gently used the tip like a knife to cut the tape in the places where I didn't want it, careful not to cut the cardstock in the process.  Most of those places were almost cut for me because of the details that are already cut into the shape with the die, I just had to add a few slices here and there.  


After gently peeling away the pieces that I had just cut with the tip of my scissors, this is what I had.


Now I trimmed the back side of the cardstock so that it was the same size as the front.


After trimming, this is what the card looks like when it is standing up.  I tried to get my card to be about the same size as a normal card once it was cut and the star was attached but it ended up a little long.  The front of this card measures 4 1/4" x 5 3/4".  If I made this again, I'd adhere the star just a tad lower so it would fit in a regular sized envelope.


The inside/backside looks like this.  To give it added stability to support the popped up nativity and to allow a place to write a greeting on the inside (which also "cleans up" the inside) I cut a piece of matching cardstock to place inside of the card (as shown on my card sample at the top of this post).

Manger Card Jen Carter

To the very top of the nativity, I added the 
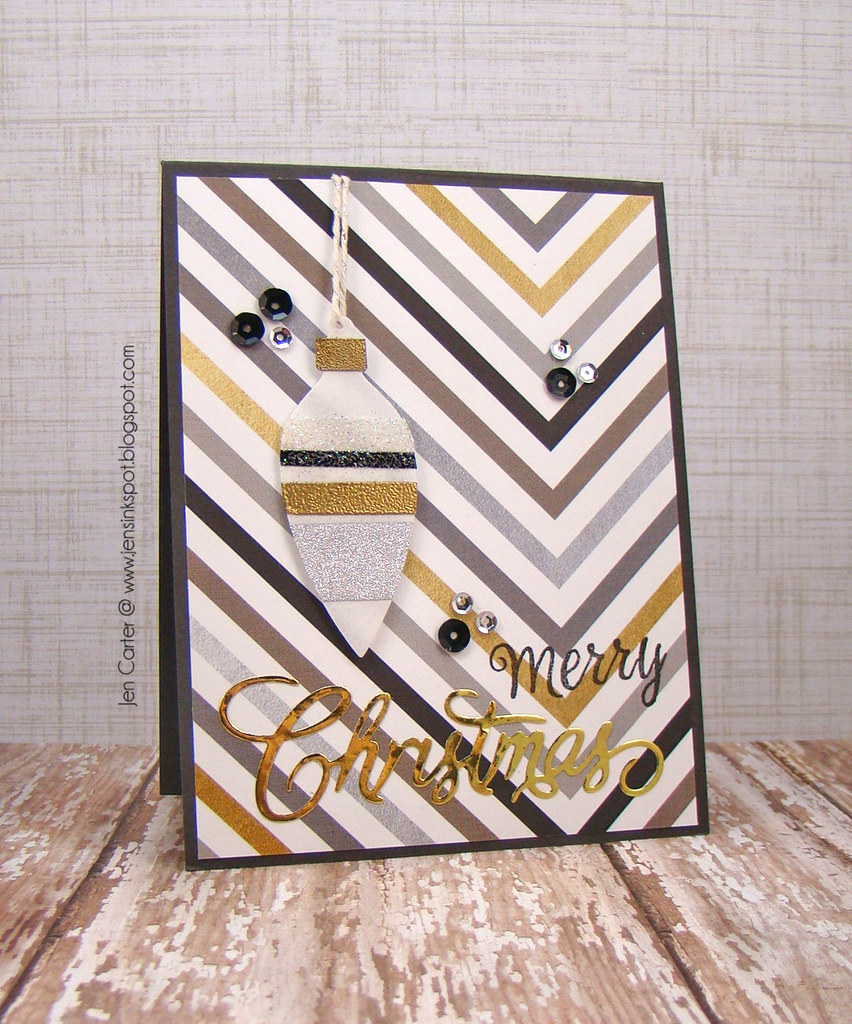
Northern Star, cut out with gold glitter paper, and attached with a glue dot.  I also cut out the 
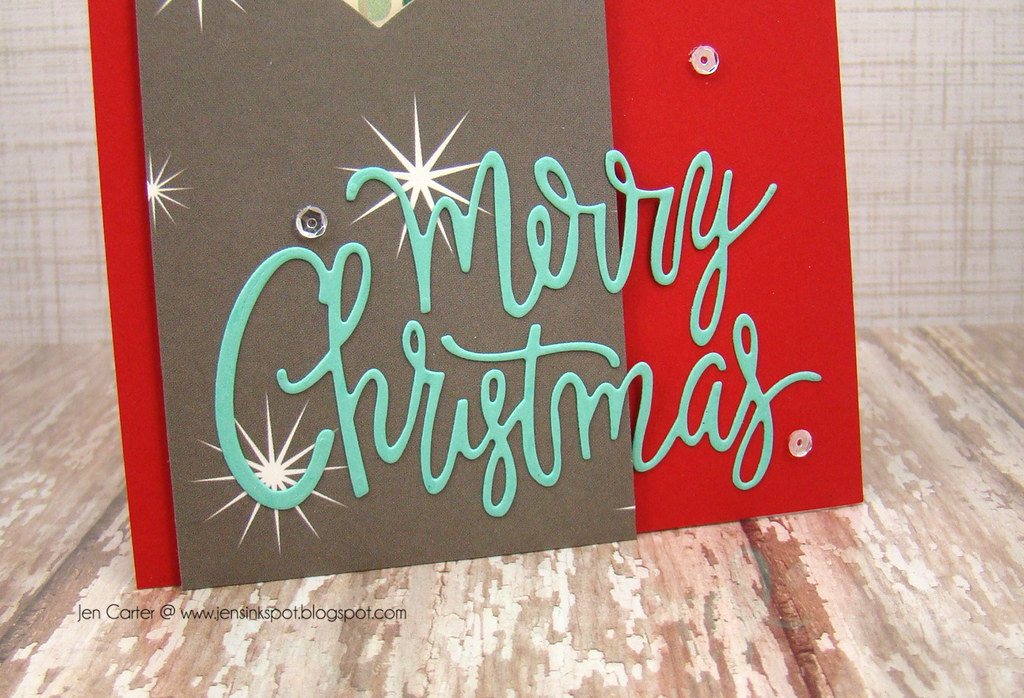
Script Merry Christmas in Silver Metallic paper to finish the card off.

I'm entering this card in the Catered Crop Say Yes Recipe Swap challenge, which has an "Anything Goes" theme this week.


The dies I used for this project are: 


Thanks for stopping by!  I hope you enjoyed this card & tutorial!


Monday, November 17, 2014

Seeing Stars!


I hope today finds you doing well!  I have a seriously awesome card to share with you today, LOL!

Seriously Awesome Stars Side

No, I wasn't being conceited, but isn't that sentiment a fun one? :)  I really like how bright and fun this card ended up being!  I used the new zig zag die included in the Lil' Inker Designs Border Builders die set to cut the edge on the 3 pieces of colored cardstock and then layered them on top of each other.  This is such a fun look!  

Seriously Awesome Stars Closeup

I die cut the stars with the Seasonal Stars die set.  I love how they make the cutest accents!  I used one of everyone's favorite dies, the Seriously Word die to cut out the glittery word.  The awesome comes from the companion stamp set called Seriously Awesome.  This would make a great masculine card too!  


Supplies:
Dies: Lil' Inker Designs Seasonal Stars, Seriously Word Die, Border Builders Dies
Stamps: Lil' Inker Designs Seriously Awesome
Cardstock: PTI Limeade Ice, Pure Poppy, Hawaiian Shores; MFT Nightshift Blue

Saturday, November 15, 2014

ShowCASe Your Style Color Challenge


Hello!!  Today starts Challenge #2 for the new ShowCASe Your Style challenge blog!  The theme for the next two weeks is a photo inspiration and it is a gorgeous photo!


Here is my card based on the photo.

Jen Carter Clearly Whimsy November

Whimsy Stamps has the perfect die for this photo challenge!  It's called the Holiday Gift Tag die set and it is on sale for $3.00!  I used embossing powder and washi tape to make the stripes on the ornament.  I also made one stripe with scor-tape and glitter.

Jen Carter Whimsy November 15 ChallengeJen Carter November 15 Challenge Closeup

The "Merry" was stamped in black and is from the Christmas Greetings stamp set. I die cut the Christmas Large Word die from gold metallic paper.  To finish the card off I added sequins in assorted sizes.

Now I do have to say that this isn't the cleanest card I've ever made.  I was so focused on the inspiration photo that I forgot to keep it clean.  I'll try to do better next time! :)

I hope you'll play along!  There is a great prize up for grabs!

Supplies not listed above:
Patterned Paper: Simple Stories The Story of Us
Sequins:  Cartwrights Sequins & Pretty Pink Posh
Gold Paper: DCWV
Twine:  The Twinery

Monday, November 10, 2014

Reverse Cut Triangle Christmas Tree

Hey everyone!  It is going to be a cooooold week here!  I am so not ready for this!  But with the cold weather is the reminder that the holidays are right around the corner.  I know a lot of you are working on or starting to think about making your Christmas cards and so today I am going to share an easy Christmas card with you that I recently made.

Jen Reverse Cut Triangle Tree woodgrain WM

This card was so simple to put together!  I started by cutting my white glitter mat to the size I wanted it and then rounded the corners with a corner rounder.  I really like this die by Frantic Stamper called Reverse Cut Triangle Christmas Tree. I lined it up on the glitter cardstock and die cut.  The cool thing about this die is you can use it two ways.  You can use it how it is intended like I did here or you can use the negative pieces that cut out and piece them together to create the tree also!

Jen Reverse Cut Triangle Tree woodgrain CLoseup

I wanted to keep the card soft so I chose a turquoisish pattern paper to put behind the die cut tree.  I popped the white glitter piece up with dimensionals and added some clear sequins to add just a touch more bling.

Jen Reverse Cut Triangle Tree Side WM

To finish the card I cut a little banner and added a button with some floss.  I almost always add a sentiment to the front of my card, but this one just didn't seem to need one.

Reverse Cut Triangle Christmas Tree


One more thing before I go.  Did you know that Frantic Stamper now has a Flickr gallery!?  We'd love to see what you've been creating using the Frantic Stamper Exclusive Precision dies!  You can join the group and see what others have been creating or you can upload your own creations by clicking here.

Thanks for visiting!

Friday, November 7, 2014

You're One of a Kind

So far on my blog this week I've covered Fall & Christmas and now I'm going to share a card that is just plain fun! :)

Donuts About You wm

I have to admit that I kind of love this card!  I mean donuts with eyes?  How can you resist that?  LOL!  When I got my Lil' Inker Designs Eat More Donuts stamps and dies, this was the first card I made using them. The paper with the sprinkles just seemed to fit so well with sprinkled donuts too!

Donuts About You Closeup

I love the little die that cuts out sprinkles too!  So cute!!  And the sentiments in this set are adorable!

 I used this photo for inspiration.  


Thanks for visiting!  Have a great weekend!!

Supplies not Listed Above:
Patterned Paper: PTI
Twine: Londonderry Linen Thread Azalea

Wednesday, November 5, 2014

Triangle Trees

Did you get a chance to check out Clearly Whimsy's new release last week?  There were a lot of great new sets released! One of my favorites which is SO very versatile was the Tremendous Triangles set. I really like this set and so I pulled it out to make a Christmas themed card this time around.

Jen Tremendouse Triangles Christmas

I stamped various sizes of the triangles and embossed them.  Some I stamped directly on the card base and some I die cut out using the coordinating Tremendous Triangles die set and then stamped on to the die cut and embossed.  I also embossed several of the different sizes of snowflakes from the Sparkle & Shine stamp set in white.

Jen Tremendouse Triangles Christmas Above

I made a snowy, glittery hill using one of the dies from the Stitched Border Die set.  From this angle you can see the dimension of the trees and hill.  The sentiment stamped in gray at the bottom is from the Scandi Christmas set.


Thanks for stopping by!

Supplies Not Listed Above:
Embossing Powder: Zing Butter, Rose & Leaf; Recollections Glacier; Filigree White
Twine: Londonderry Canary Linen Thread
Cardstock: PTI Aqua Mist & White; DCWV White Glitter
Ink: Fresh Ink Provincial Gray

Related Posts Plugin for WordPress, Blogger...