Showing posts with label Winnie & Walter. Show all posts

Monday, March 18, 2019

You're Amazingly Amazing

Jen Carter CP Amazingly Amazing Best in You 2

I'm pulling out some older products to play with that haven't seen enough love!  I love this flower set from Catherine Pooler called Best in You!  Here I used one of the flower images to make a fun background and didn't use the stamp that goes with it that makes it into more of a flower image.  I love stamps that are so versatile like that!


For the sentiment I die cut a Stitched Mats Oval die from Lil' Inker Designs out of vellum.  I stamped the sentiment from Catherine Pooler's Lovely Flowers stamp set & then embossed over it with Wanderlust embossing powder which you know I LOVE!   The background was stamped with Winnie & Walter's Mini Scenery: Spotty stamp.

Jen Carter CP Amazingly Amazing Best in You 1

Sales & Last Chance
We all love a good sale!!  There are quite a few sale items in the Catherine Pooler store right now!  Shop sale items here.

Catherine Pooler has a new category of items in the shop that won't be there much longer!  Once they are gone, they are gone!! Shop last chance items here.

Thank you for joining me today!! Have a great day!

Affiliate links are used at no cost to you
Best in You Stamps
Best in You Stamps
Shop at:
CP
Lovely Flowers Stamps
Shop at:
CP
Stitched Mats: Ovals
Shop at:
LID
Party Dress Ink
Party Dress Ink
Shop at:
CP
Flirty Fucshia Ink
Flirty Fucshia Ink
Shop at:
CP
Something Borrowed Ink
Shop at:
CP
Tiara Ink
Tiara Ink
Shop at:
CP
Orange Twist Ink
Orange Twist Ink
Shop at:
CP
All CP Inks
All CP Inks
Shop at:
CP
CP Mini Inks
CP Mini Inks
Shop at:
CP
CP Mini Life of the Party Ink
Shop at:
CP
VersaFine Black
VersaFine Black
Shop at:
SC
VersaMark Ink
VersaMark Ink
Shop at:
CP | SC | SBP
Wanderlust Embossing Pwd
Shop at:
CP
Anti-Static Pouch
Anti-Static Pouch
Shop at:
SC | SBP
Vellum
Vellum
Shop at:
CP
Round Grid Block 2.75
Round Grid Block 2.75"
Shop at:
CP
Small Rectangle Acrylic Grid Block
Shop at:
CP
Border Grid Block
Border Grid Block
Shop at:
CP
Acrylic Grid Blocks
Acrylic Grid Blocks
Shop at:
CP
Mini Scoring Board
Mini Scoring Board
Shop at:
SBP
Big Shot Die Cutting Machine
Shop at:
SC
Fiskars 12
Fiskars 12" Trimmer
Shop at:
SC
Titanium Blades
Titanium Blades
Shop at:
SC | SBP
ATG Gun
ATG Gun
Shop at:
SC
ATG Refill
ATG Refill
Shop at:
SC | SBP

________________________________________________

Instagram: JenniferDCarter * YouTube: Jen's Ink Spot
Pinterest:  Jennifer Carter * Facebook: Jen's Ink Spot

Saturday, March 10, 2018

Winnie & Walter Wrap Up & Giveaway


Jen Carter Winnie Walter Faith Believe Miracles Debra's Poinsettia Winter Wishes Stripes

Hello friends!  I wanted to share one more Winnie & Walter card that I made for the February Leading Lady posts that I haven't shared yet and then get to what you've been waiting for: the winner of the $30 gift card to the Winnie & Walter store!

For this card I used the Scenery: Stripes stamps to create my background.  I used lots of bright Catherine Pooler inks for the rainbow of colors: Flirty Fucshia, It's a Girl, Party Dress, Rockin' Red, Tutti Frutti, Orange Twist, Sauna, Something Borrowed, Aquatini & Garden Party. Once the background was finished, I used the little cross like images from the Winter Wishes with Evelin T Designs stamp set to make a little random pattern.  The sentiment is from the In Bloom: Debra's Poinsettia with Lydia Evans stamp set.

Winner! Winner!
Thank you to everyone who left comments on my blog during the four weeks of being the Leading Lady on the Winnie & Walter blog!  Your comments meant a lot to me!  Thank you again to Shay for the opportunity and for providing this gift certificate to one lucky winner!


Our winner is Sammi!  Congratulations!  
Thanks again everyone for your support! Have a great weekend!

Saturday, February 24, 2018

Winnie & Walter Leading Lady: Take Four


It's hard to believe the month is coming to an end already and this is my last post as Leading Lady for the month of February.  I have enjoyed spending time with Winnie & Walter fans and friends and reading your comments so much!  Thank you for all of your love!  Thank you for your support of not only my work, but of this fabulous company as well!  Thank you so much to Shay for having me!  (Fun fact, I get to craft with her in just a few days!! I can't wait!)

Today my post is focusing on black & white cards with a pop of color.  I loved the floral set that released in November called In Bloom: Victoria's Very Merry Flowers with Lydia Evans and I used that set for both of my cards today.

Jen Carter Winnie Walter Victoria's Very Merry Flowers Happy

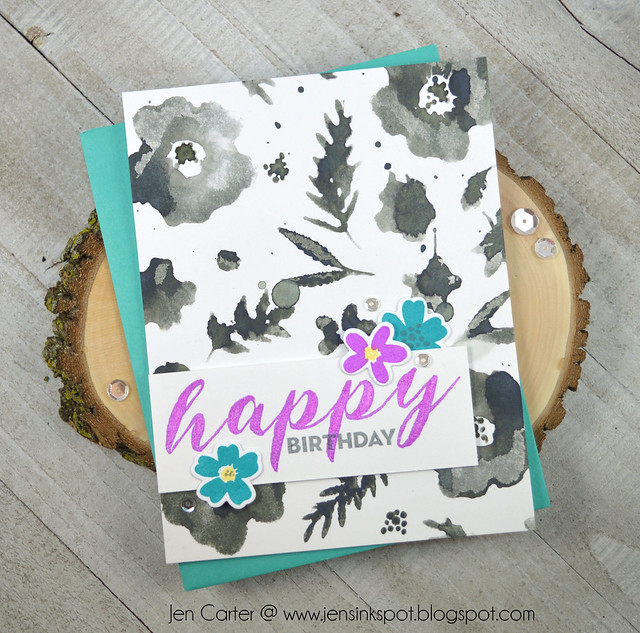
For this first card I grouped several of the flowers and leaves from the In Bloom: Victoria's Very Merry Flowers with Lydia Evans on to a larger acrylic block and then inked them up with Black Soot Distress Oxide ink.  I then spritzed them with water and stamped them on to my white cardstock. I repeated this until the cardstock was filled in.  I then lightly flicked a few drops of the black watered down ink onto my cardstock.  For my sentiment strip I stamped the "happy birthday" using the In a Word: Happy stamp set and Flirty Fuchsia ink.  I die cut some of the smaller flowers with the In Bloom: Victoria's Very Merry Flowers with Lydia Evans Cutaways, stamped them with the coordinating stamps using All that Jazz (releasing soon), Black Jack & Tiara inks and adhered them to my panel.  A few clear sequins finishes the card off.

Jen Carter Winnie Walter Victoria's Very Merry Flowers Rugby Stripes

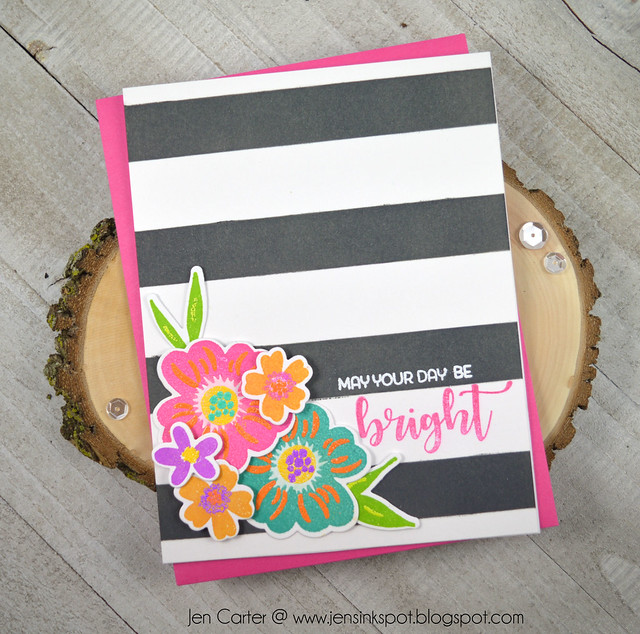
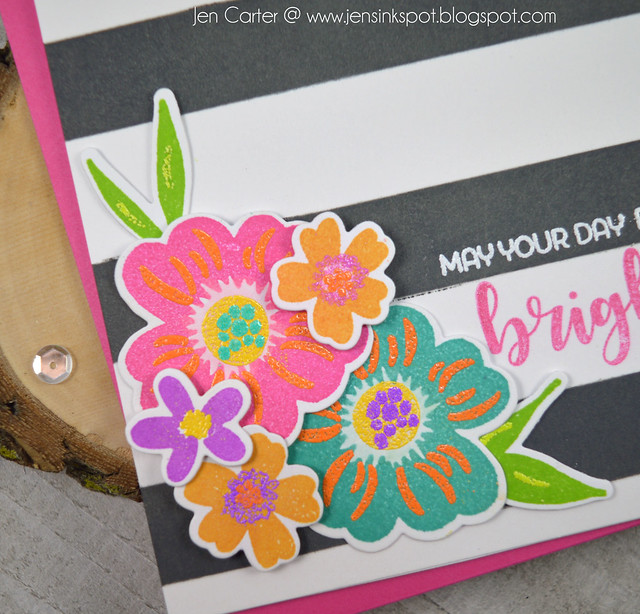
This last card has a more classic feel to it.  I used Black Soot Distress Oxide Ink and the Scenery: Rugby Stripe Creative Screenings stencil to create those nice bold stripes.  I love being able to create my own patterned paper so easily!  The sentiment is stamped using the In Bloom: Victoria's Very Merry Flowers with Lydia Evans stamp set.

Jen Carter Winnie Walter Victoria's Very Merry Flowers Rugby Stripes Closeup
  
For the flowers I went very bold.  I die cut the flowers and then stamped the first layer with Catherine Pooler inks.  I used Party Dress, Aquatini, Lime Rickey, Sauna & Flirty Fuchsia.  The layers that you see on top of the solid flower/leaf images were made by embossing.  Did you know that you can emboss on top of embossing powder?  If you're careful not to overheat the powder so it loses color, you can layer embossing powder which is what I did here for the centers of my flowers! Simply emboss the first layer, stamp the second layer with watermark ink, add your second layer of embossing powder and heat it again.  The brands of embossing powder I used are Ranger & Zing.  


Thanks for stopping by again today! I  Before you go, leave a comment on my blog Jen's Ink Spot on any (or all four) of my Winnie & Walter Leading Lady posts for a chance to win a $30 gift card to the Winnie & Walter store.  You have until Friday, March 3rd to comment and I will pick a winner randomly from all of the comments left and will announce the winner March 7th!    Thanks again and have a wonderful day!

Saturday, February 17, 2018

Winnie & Walter Leading Lady: Take Three


Hello again!  I'm excited to be back for my third Winnie & Walter Leading Lady post on the Winnie & Walter blog!  I've really been enjoying spending time with you this month!  Thank you for all of the nice comments you've left on my posts!  

Today's topic focuses on using the Cover Model: Do You See What I See Cutaway to make two totally different looking cards.

Jen Carter Winnie Walter See What I See You Amazing Holiday Cheer

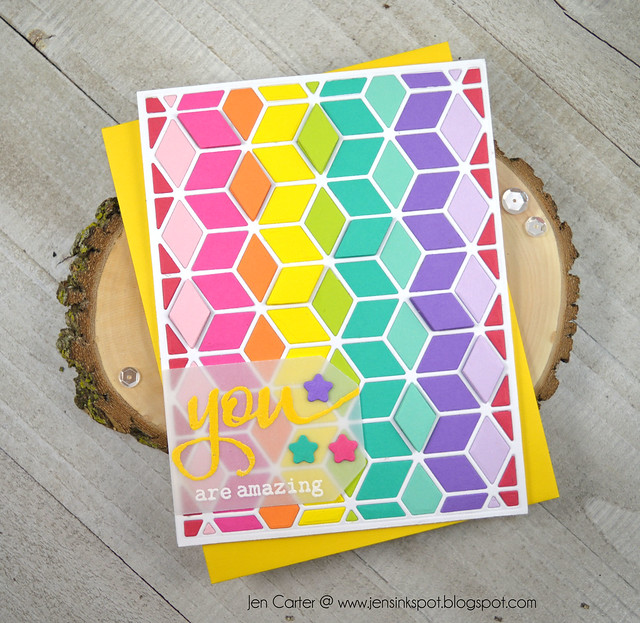
First up is this bright and colorful card.  I die cut the Cover Model: Do You See What I See Cutaway with white cardstock first and then attached that to my cardbase.  I then used a rainbow of colorful cardstock and pieced each row together.  It looks time consuming but it really went quickly.  I just dabbed a dot of glue in each empty space and then inserted the individual pieces one row at a time. 

For the sentiment I die cut the Tagged: Holiday Cheer Cutaways from vellum.  I embossed the yellow "you" that I had stamped using the The Big, The Bold and You stamp set.  The "amazing" was embossed with white and stamped using the same sentiment set.  The little stars were die cut with a die in the Tagged: Holiday Cheer Cutaways.

Jen Carter Winnie Walter See What I See You Amazing Holiday Cheer Closeup 2

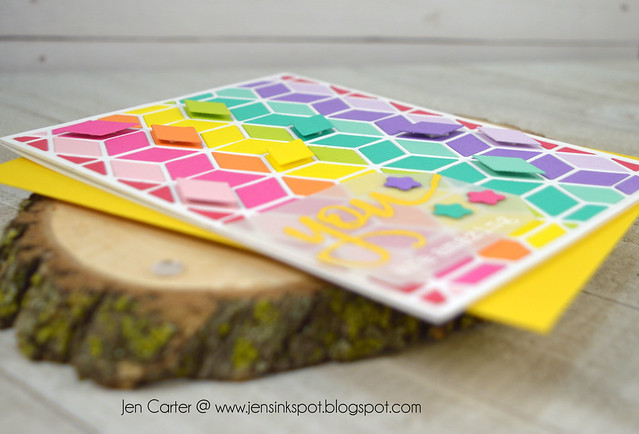
I like adding a little dimension to my cards so in this photo you can see how I also popped up some of the diamonds in each row.

Jen Carter Winnie Walter See What I See Faith Believe Miracles

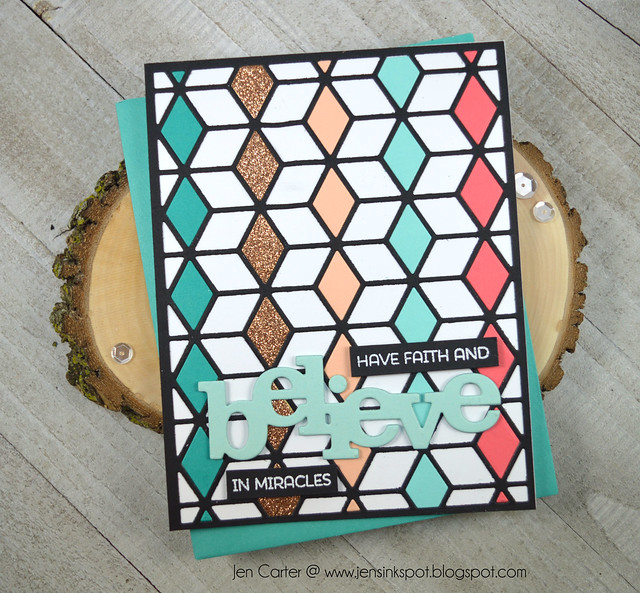
For my second card I went with a more sophisticated look.  I first die cut the Cover Model die from black cardstock and adhered it to a white card base.  I then chose five colors of cardstock and placed those pieces in the corresponding places using a small dab of glue.  I die cut the "believe" from aqua cardstock using the In a Word: Believe Cutaway die and then layered it on top of two more die cuts to give it dimension.  I stamped the sentiment, from the In Bloom: Debra's Poinsettia with Lydia Evans on black cardstock and then embossed it in white. 


Thanks for visiting today!  Before you go, leave a comment on any (or all) of my Winnie & Walter Leading Lady posts for a chance to win a $30 gift card to the Winnie & Walter store.  

Saturday, February 10, 2018

Winnie & Walter Leading Lady: Take Two


Hello Winnie & Walter friends!  I'm happy to be back today for my second Leading Lady post this month on the Winnie & Walter blog.  Following my post from last week where I put out the challenge to make the most of the tiny stamps in our stamp sets, today's theme is to stretch your dies.  For the next two cards I mainly used two recently released die sets, Essentials: Josephine Cutaways (hexagons) & In a Word: Holidays Tiles Cutaways.

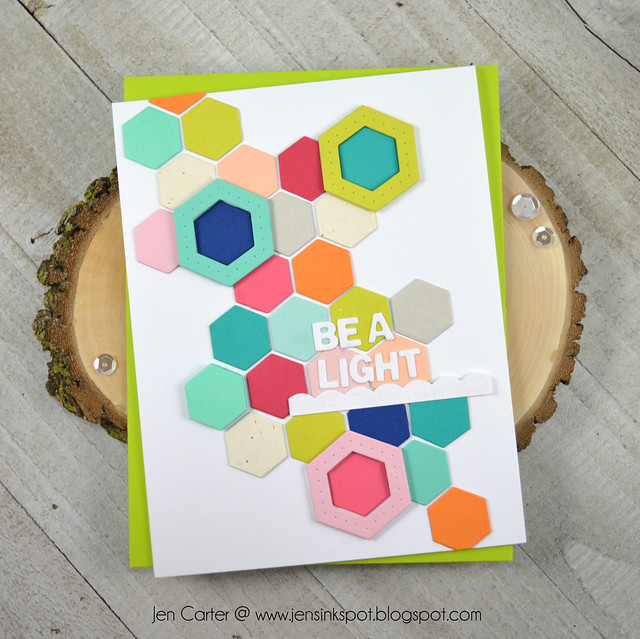
Be a Light

Jen Carter Winnie Walter Josephine Hexagons Holiday Tiles Be Light

For this first card I started by choosing a color scheme and then die cutting three of the smallest hexagons from the  Essentials: Josephine Cutaways die set in each cardstock color.  When die cutting with this die you not only cut the small hexagon but you also get the hexagon frame in one pass.  I set aside most of the frames for a second card.  I started by laying out the hexagons in the order I'd like, trying to keep them as straight as possible and then adhered them down to my card front.  


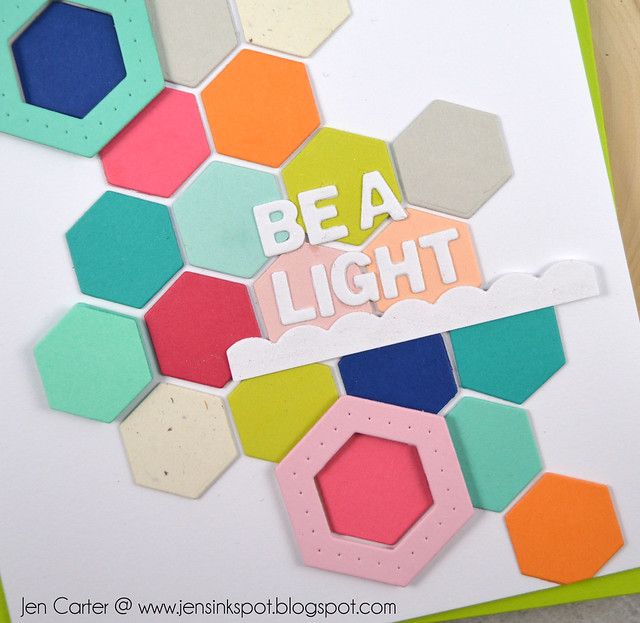
Jen Carter Winnie Walter Josephine Hexagons Holiday Tiles Be Light Closeup

I had a lot of fun playing with the sentiment.  I took the In a Word: Holidays Tiles Cutaways (shown below so you can have a visual) and started playing with the letters to see what words I could come up with using the various letters this set cut.  I found a website that was a big help to me called Word Grabber.  You enter the letters that you are working with and it generates words using those letters.  There were pages and pages of words to choose from using only the letters included in the Holiday Tiles set.  It was definitely a great way to stretch a holiday themed die set!  Once I came up with the sentiment I adhered it to my card. I die cut the top portion of the scalloped frame included in the die set and used it for a border under the sentiment. 

To finish the card, I added in three of the hexagon frames and popped them up with dimensional tape and then chose one of the hexagons and also popped it up to add some visual interest.

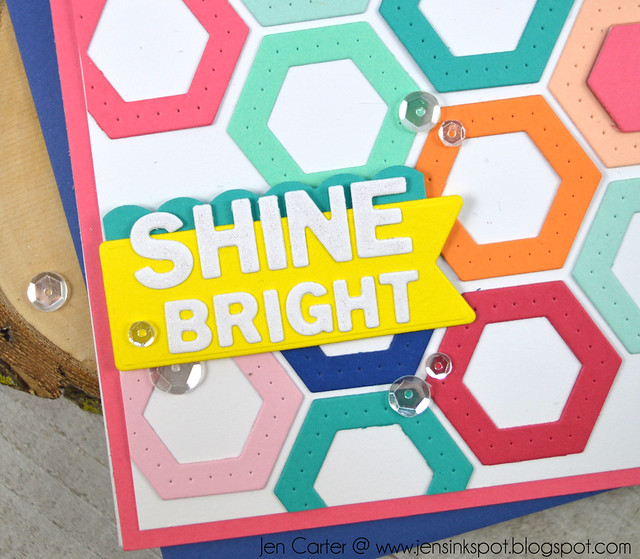
Shine Bright

Jen Carter Winnie Walter Josephine Hexagons Holiday Tiles Shine Bright

My second card is basically a repeat of the first card only this time I used the frames that were die cut when I cut the hexagons for the first card.  Again I randomly added the solid hexagons to the centers of a couple of the frames and popped them up with dimensional tape.

Jen Carter Winnie Walter Josephine Hexagons Holiday Tiles Shine Bright Closeup


I created the sentiment the same way I did on the first card, using the  Word Grabber website to find the words to use. I used a Nuvo Aqua Shimmer pen to add some sparkle to the white letters.  I adhered the letters to a banner that I had die cut with the Tagged: Holiday Cheer Cutaways die set.  I again die cut part of the scalloped frame in the In a Word: Holidays Tiles Cutaways set and adhered it to the back of my banner tag. I finished the card off by adding some clear sequins.

I hope this post will help you to be able to find ways to stretch your dies in new ways.  


Leave a comment on any (or all) of my Winnie & Walter Leading Lady posts for a chance to win a $30 gift card to the Winnie & Walter store!  Thanks for visiting today!
Related Posts Plugin for WordPress, Blogger...