Tuesday, October 20, 2009

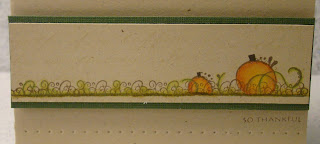
Edge Design Pumpkins Take 2


If you saw my post yesterday, you also saw this set used to make pumpkins.  Well, here is one more for you that is a little more involved.  I used the decorative strip in the same way but layered it onto my card.  It is hard to see in the photos, but I used TAC's "Script Background" on the large piece of Kraft cardstock.  I stamped it with Haystack ink which makes a light, soft background for the card.


Supplies
Stamps:  TAC Edge Designs, TAC Thinking of You (Sentiment), Script Background
Ink:  Burnt Umber Palette, Haystack Palette
Paper:  TAC Kraft (my favorite!!), Bazzill Greens
Other:  Cloud Scissors, Prismacolor Pencils, Odorless Mineral Spirits, Pop Dots, Buttons

Sunday, October 18, 2009

Fall Theme Blog Hop

Our assignment for this blog hop was to create a fall themed project. Honestly, I don't have very many fall stamps, so I had to use my imagination in a big way!


I've had on my wish list for a L-O-N-G time The Angel Company's "Edge Designs" stamp set. About a month or so ago when I was looking at it a pumpkin popped out at me! Fall! I could use these stamps for Fall! Here is what this set looks like:
Do you see pumpkins? Well, they aren't exactly there but with a little coloring, adding a stem and some "foliage" you can easily create a pumpkin patch theme!

Here are some of the projects that I came up with using this set with a Fall theme. All the images were colored with my Prismacolor Colored Pencils and Odorless Mineral Spirits. (And, by the way, these look so cool in real life but kind of plain in the photos, so you'll just have to try it yourself and see!)

I wanted to make some one-layered cards because they are easy to mail, very economical and can be so pretty!


The one above is stamped on ivory paper. It's hard to tell in the photo.


The one above is my favorite of all! It is sooo simple yet just so "pretty"! I love, love the simplicity of it!


Here is another one that is basically the same as the ones above, but I popped it up with pop dots and matted the image. Below are some additional views of this card.


I hope you enjoyed these cards! Be sure to visit the other Angels who are participating in this blog hop! Their links are below.

Also, be sure to visit tomorrow as well and I'll show you one more card made with this set with a pumpkin theme that is a little more involved. I'm sure you'll be seeing this set used again soon on some of my Christmas cards as well. Stay tuned!

Laurie
Kim
Angela
Shirley
Julie
Trudy
Teresa
Diane
Rita W
Bridget
Jamie
Suzanne
Barb
Stacy

Tuesday, October 13, 2009

Simple Joys


Well, if this isn't a colorful card, then I don't know what is!  :)


This one has a lot of layers to it as well.  The main panel and sentiment is popped up on pop dots and then you have the ribbon which adds more dimension yet.  There is also a line embossed with the scor-bug on the orange strip.  The holes on the side of the burgandy paper were made with the Bind-it-All machine.


The image was colored with colored pencils (Prismacolor) and odorless mineral spirits...that way just gives SO many color options!  The sentiment is just part of the sentiment from the set. I cut it apart from the rest of the saying so it would be even more versatile.  This phrase can now be used for many other occassions than just Christmas!

Supplies
Stamps:  Simple Joys
Paper: Penelope & SWIC Cardstock
Other:  Scor-bug, Bind-it-All, Cloud scissors, pop dots, ribbon

Monday, October 12, 2009

It's All in the Ribbon


Here are two very similar cards...well, more than similar.  The only thing that is different is the bow.  This is a FAST & EASY card to make and if you had to make duplicates, then this would be a good choice.  I saw a card similar to this on another blog by Maile Belles.  I loved her card and wished I had satin ribbon just like hers.  That's really why I did this card twice...experimenting with the ribbon. 


This card uses a very thin satin ribbon and I didn't like how the bow looked and so I knotted it and now I don't really care for how the knot looks. :)


This card uses an organzay (I'm sure that's not a word!) ribbon with a stitch.  I like the bow but I think the ribbon needs to be darker.  Maile Belles also used rhinestones on her version but can you believe I don't have any small, neutral rhinestones.  Guess what I just added to my wish list right below the olive satin ribbon!

Supplies
Stamps:  TAC Ornamental Snowflakes & Good Tidings
Paper:  TAC White Ultrasmooth
Ink:  Sea Breeze, Ocean Depth & Hint of Pesto Versamagic Ink
Other: Ribbon

Sunday, October 11, 2009

Christmas Polka Dots


I'm so excited to share with you something that I've had on my wish list for a while now.  It is a polka-dotted embossing folder for my Big Shot machine!  You know how much I love polka dots!  Well, Quickutz came out with 3 sizes of polka dotted embossing folders.  I hadn't bought them yet because I couldn't find them locally and had to order them.  Well, a store whose newsletter I subscribe to was having a great sale on them this past week.  There were only $2.99 each plus an extra 15% off that!!  WOW!!  I ordered 2 sizes.  This card uses the smallest size.

The paper was Coordinations and it is so cool!  The inside of the paper has a color that matches the outside of the paper--in this case it's a shade lighter than the outside color.  So, when you sand it, you see the lighter color on the inside.   After I embossed the polka dots, I sanded them lightly.


I used my scor-pal and scor-bug to make the lines on the right-hand side of the card (on the Kraft cardstock).  The image is from one of my favorite Christmas sets "Joyful Ornaments".  I first inked the image in Frost VersaMark ink and then inked the bottom half with Toile Pink Palette ink and the top with Platinum Brilliance ink (it has a sparkle to it).  By inking it with the Frost before the Toile ink, it creates a nice subtle shine to the ornament. I love, love, love this!  Just make sure your stamp is clean before putting it in the Frost or you'll make your pad dirty.   I also lightly rubbed the Frost VersaMagic over the embossed polka dots so the whole things glimmers!

Supplies
Stamps:  Joyful Ornaments, Holiday Liners
Paper:  TAC Kraft, White, Coordinations Greenish/blue, Bazzill Pink
Ink:  Toile Pink & Burnt Umber Palette, Platinum Brilliance, Frost VersaMark
Other:  White Eyelet, Ribbon, Scorpal & Scorbug, Corner Chomper, Quickutz Polka Dot Embossing Folder

Saturday, October 10, 2009

Rustic Simple Joy


Here's another "Simple Joys" card.  This one has more of a rustic feel to it.  I stamped the image on Kraft paper.  I love how colored pencils look when colored on Kraft paper.


Stamp set:  Simple Joys TAC
Paper:  Kraft, Willoughby
Ink:  Burnt Umber Palette
Other:  Pop Dots, Twill Neutrals, Prismacolor Pencils & OMS

Friday, October 9, 2009

Faith Journals


These are some journals that I made yesterday for our Bible Study group.  I took the original concept from Dawn McVey.  I am a HUGE fan of her work.  She is so creative!  Anyway, she made this card, and I loved it so much that I turned it into a journal. 


For the cover, I took a chipboard book, cut it apart, covered the edges with green walnut ink and then adhered the front piece that I had layered on Kraft cardstock.  For the back I just glued a piece of matching cardstock.  For the pages inside, I cut apart a composition notebook to the size that I needed and then used my Bind-it-all to punch the binding holes and adhere the wire. 


I love how they turned out!


Supplies
Stamps:  TAC Aged Ornaments, TAC Faith, TAC April SOTM Floral Vines, PTI Polka Dots Basics
Ink:  Champagne VersaMark, Chartreuse, Claret Palette, Sea Breeze VersaMagic
Other:  Buttons, Labels Nestabilities, Ribbon, Bind-it-all, Chipboard Book

Thursday, October 8, 2009

Hip Holiday Girl


Here's another card with the "Holiday Girls" set.  This paper is Penelope.  I paper pieced her dress & hat.


I colored her with prismacolor pencils and odorless mineral spirits and outlined her with a gray tombow marker.


Isn't that a fun way to tie off a ribbon? 

Supplies
Stamps:  TAC Holiday Girls
Papers:  Penelope, TAC Brown & Ivory
Inks: Noir Palette
Other: Ribbon, button, Tan Scrapper's Floss, Cloud scissors, pop dots

Wednesday, October 7, 2009

Merry Christmas Circles


Hi everyone!  I wanted to share another card with you that was inspired by one of my new favorite bloggers Maile Belles.  Here is her card and you can see my card above.  I love these colors together!  I added just a tiny Kraft border along the side of the Robin's Egg piece to give it just a little more visual interest and ground it.


The little circle snowflakes are popped up with pop dots and the scalloped edge was cut with my cloud scissors.

Supplies
Stamps:  Circle Sampler & Thinking of You
Ink:  Moulin Rouge Palette & Sea Breeze VersaMagic
Paper:  TAC Ivory & Kraft & DCWV Robin's Egg
Other:  Ribbon, pop dots, cloud scissors, hole punch, glitter gel pen, circle punch

Tuesday, October 6, 2009

Santa Baby


Here's a card using the new "Holiday Girls" stamp set.  I colored her using prismacolor pencils and odorless mineral spirits.  The paper is Reece. 


See how I tied the button on with the ribbon?  I love that look.  I also gathered my ribbon using pop dots.

The photo below shows the dimension that the card has.  The whole top panel is popped up on pop dots, as well as the girl image & mat.


Hope you enjoyed the card!  Have a great day!

Monday, October 5, 2009

Happy Holidays


This is a fun card that uses one of the new stamp sets from Inspiration Avenue.  I just love the colors on this card.  It makes me want to warm up with a nice, hot cup of hot cocoa or cappuccino.  I also love the vintage feel of the card.

The background is made with Ornamental Snowflakes set, which is one of my all time favorite sets!  I just love snowflakes images!  They are stamped with versamark and then I put buttons in the center of them.  If I did this card again, I would probably only put 3 buttons on instead of 6 and carefully choose the placement of those 3. 


Hope you enjoyed this card!  Have a great day!


Saturday, October 3, 2009

Christmas Ribbon?

I finally got to stamp! I have been so busy lately that I have been craving time at my table to play! I finished up a project that had a deadline of today and was able to cross one more thing off my list. My reward? Time at my table to stamp!

I had fun with an old stash of material that I've had for years. I can't sew. I wish I could sew, and I hope to learn some day! I had some material from another project that I had made years ago and I pulled it out today to use on my cards. I used it for the bows on my card! I LOVED it!! What a great, cost-effective way to use up scraps! And, as a note, I frayed the edge of my ribbon before I tied it.

This green card is my favorite of the two! The set I used to make the background is "Butterfly Bits". It is not a Christmas set at all but it makes a lovely background and I thought it would make a nice holiday background.

The red one looks so much better to me in real life. I love how rich the colors look.

So, I challenge you to use some fabric for bows on YOUR cards! If you do, be sure to leave a comment and let me know so I can check it out!

Supplies: Cardstock: TAC Ivory & Kraft
Ink: Landscape & L'amore Red Palette
Other: Buttons, fabric, glue dots, pop dots, scallop scissors, tan scrapper's floss
Related Posts Plugin for WordPress, Blogger...