Thursday, October 8, 2015

Make a Santa Pencil Topper: Lil' Inker Release Day 2

Hello again and welcome to Day 2 of the Lil' Inker Designs Release!  All of the products being shown today are currently available in the Lil' Inker Designs store!  If you are following along in the blog hop you should have come from my friend Amy's fabulous blog! There are three $15 gift certificates to the LID store up for grabs, so the more blogs you comment on, the better your chances are of winning! 

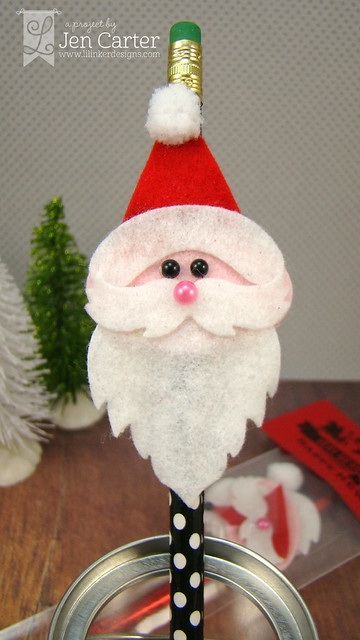
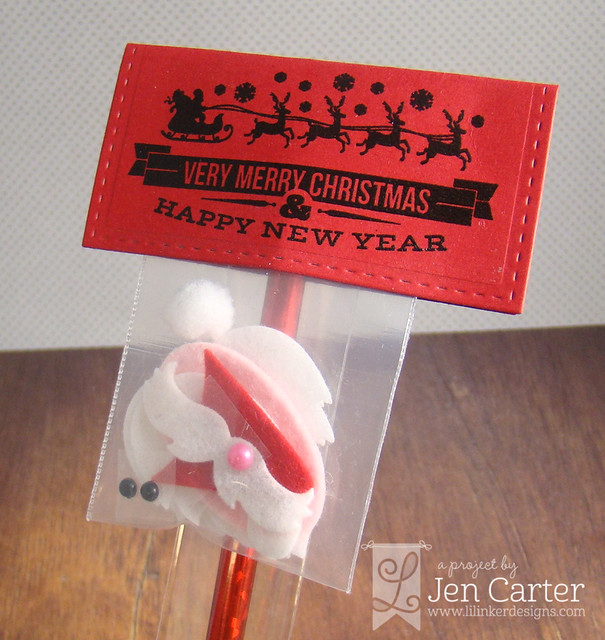
With Christmas on the horizon, many kids, teachers, grandparents, etc are looking for fun, inexpensive, little gifts to give to the special little people in their lives.  I think I've come up with a fun and easy idea that makes a pretty cute little gift!  It's a Make Your Own Santa Pencil Topper using the dies from the new Make a Santa Die & Stamp Set bundle (which also coordinates with the Triangle Treat Holder Die)!
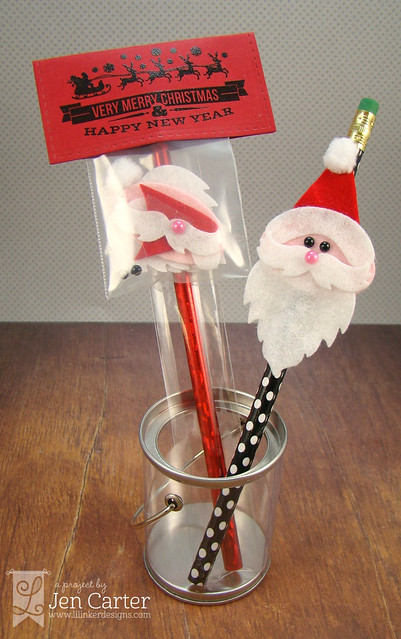

Jen Carter Santa Pencil Kit Duo 1 wm

Here's what one of the kits looks like and one of the finished product.  Isn't that so cute?  My daughter can't wait to make one!  She keeps begging me and I tell her she has to wait until I'm done with this post! LOL!


Below are a few more closeup shots of the Make a Santa pencil toppers.
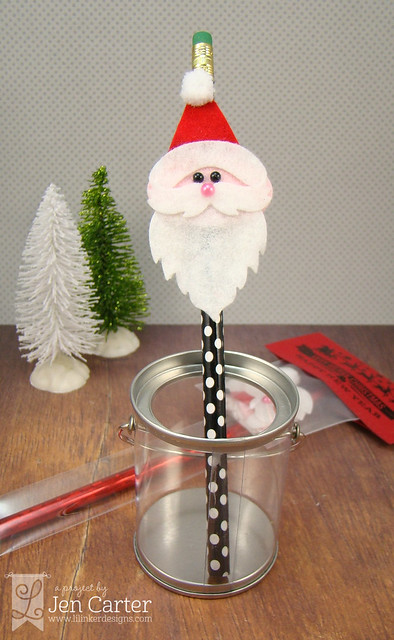
Jen Carter Santa Pencil Kit Finished 1 wm


Jen Carter Santa Pencil Kit Finished Closeup 1 wm


I found these pencils in the Dollar Spot at Target.  After Halloween you should be able to find a variety of pencils very cheaply in lots of Christmas colors!  


For the pink face of the Santa I cut the smallest die from the Stitched Mats: Ovals die set.  You could also cut one of the hat brims in pink for the face.
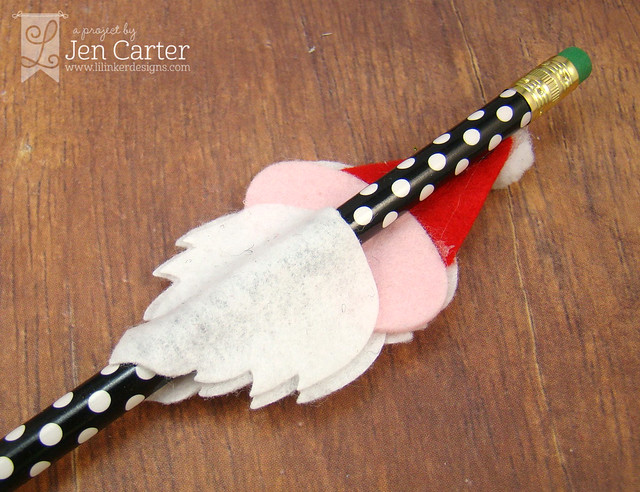

Jen Carter Santa Pencil Kit Finished Back


I used hot glue to adhere my pieces but you could have the kids use fabric glue (mine was all dried up). :)  I cut two of the beards for each kit so that they could be glued together to hold the Santa on the pencil a little better.

Jen Carter Santa Pencil Kit 66


For the bag topper I used one of the previously released Stitched Mats: Dual Stitched Square dies (folded in half) and then embossed the image from the also previously released but still trendy Big Christmas stamp set.

***********

In the kit I included:
Cut from the Make a Santa Die Set:  
1 white felt mustache
2 white felt beards
1 white felt hat trim
1 red felt hat
1 white felt ball for top of hat (or white medium sized pom pom like I used above)

Other items in the kit:
1 pencil 
1 bag for the pencil (1x8)
1 small bag for the other kit contents
2 small black enamel dots
1 medium pink enamel dot
1 pink felt face* 
*(either the hat brim from the Make a Santa die set or 
the smallest oval from the Stitched Mats: Ovals die set)

And, if you don't feel like die cutting all of the kits, pay a child to do it for you.  
My kids enjoy helping me die cut!

I have one more thing to share today and that is a card using another new, fun & trendy stamp set.
Jen Carter Oh Deer Peace 1 wm

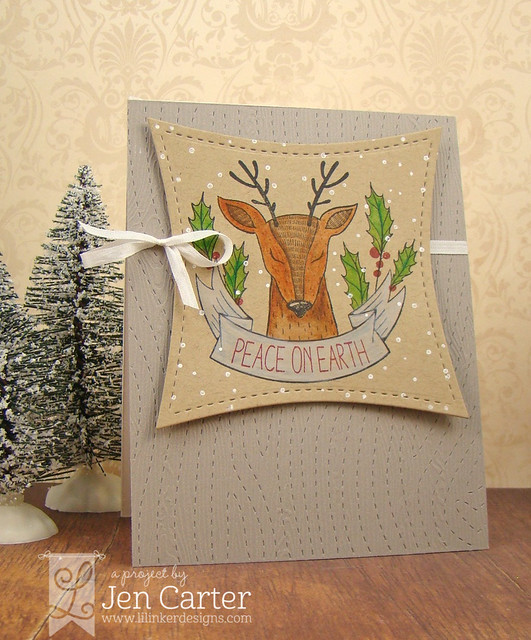
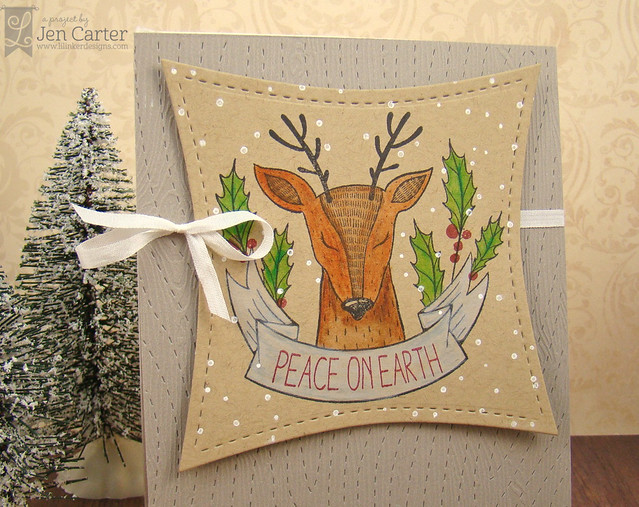
I know many of you will fall in love with this cute deer from the new Oh Deer Christmas stamp set!  I stamped her on kraft paper and used my watercolor pencils with an aqua pen to color her.  I stamped the white snowflakes, also from the Oh Deer Christmas stamp set in white pigment ink.  I also added the red berries from the stamp set as well.
Jen Carter Oh Deer Peace Closeup 1

The deer was stamped on one of the Wonky Squares dies and attached to gray cardstock that was die cut using the Cover Up Die: Stitched Woodgrain.  The deer & the woodgrain die just seemed to pair so perfectly together.  I finished the card off by tying a silk bow on the side.


There's plenty more inspiration to see using the new products today!  Your next stop on the hop is over to Heather's blog!  To see ALL of the new release items & to shop now, click here to visit the Lil' Inker Designs store!

I'm also entering my Oh, Deer card in the SSS Wednesday Challenge: CAS Christmas.


Santa Pencil Topper
Stamps: Lil' Inker Designs Big Christmas
Dies: Lil' Inker Designs Make a Santa Die & Stamp Set bundle Big ChristmasStitched Mats: Dual Stitched SquaresStitched Mats: Ovals
Other: Felt, Enamel Dots black & pink, White Pom Pom

Oh Deer Card

Stamps: Lil' Inker Designs Oh Deer Christmas
Dies: Cover Up Die: Stitched WoodgrainWonky Squares
Coloring Medium: Watercolor pencils & aqua pen
Other: Silk Ribbon
Carstock: PTI Kraft, SSS Gray
Wednesday, October 7, 2015

Lil' Inker Designs October Release Day 1


Jen Carter Gold Pumpkin Leaves Welcome 13 wm

Hello!  It's time for a new Lil' Inker Designs release! The new products are already available in the  Lil' Inker Designs store!  If you are following along in the blog hop you should have come from Laura's blog! There are three $15 gift certificates to the LID store up for grabs, so the more blogs you comment on, the better your chances are of winning! 

I had a lot of fun with this release and made a lot more than just cards with the new products!  I'm excited to share with you over the next few days!  To start today off, let's look at some Fall decor with pumpkins.


Jen Carter Gold Pumpkin Leaves Welcome 71 wm

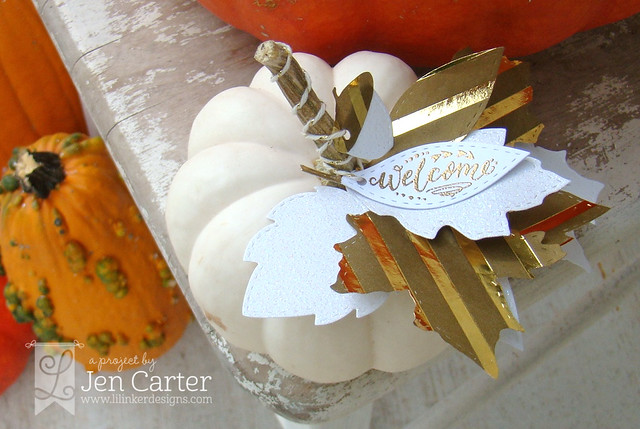
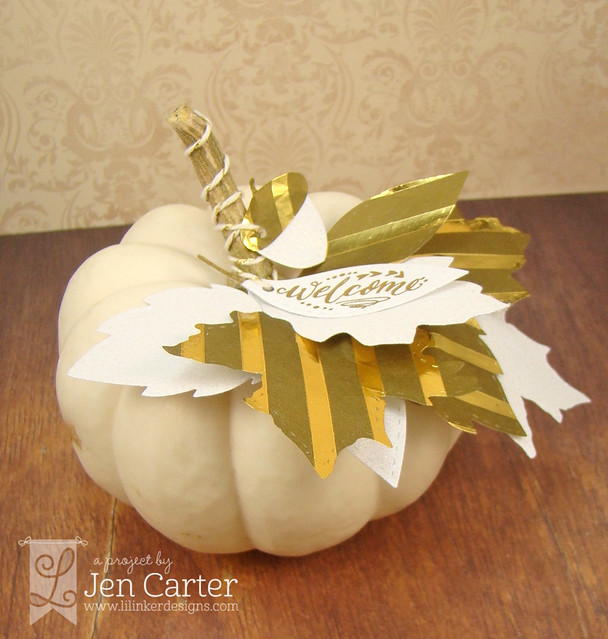
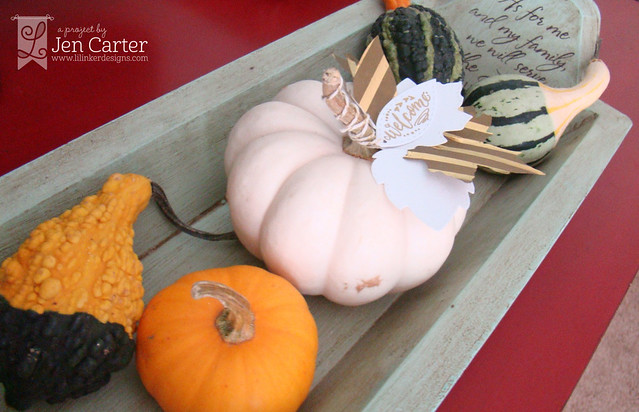
When I was at the Kansas Barn Sale this past weekend, I found a bunch of beautiful white pumpkins.  I brought quite a few home with me and decided that I'd dress a few up.  For this first one, I die cut the beautiful new Leaf Love Diesthat stitch all the way around the leaf shapes, from white glitter paper & gold striped tissue paper.

Jen Carter Gold Pumpkin Leaves Welcome Closeup 1

I attached the leaves into a bouquet of sorts with hot glue.  I die cut the smallest leaf from the set and stamped the coordinating Leafy Greetings Stamp on it.  I embossed that in gold.  I wrapped the stem with gold shimmer twine from the Twinery and also attached a little acorn from the newly remade Acorn Dies.

Jen Carter Pumpkin Decorations

This is not a great picture, but I wanted to show you how I displayed it (I want to get some acorns to fill in the gaps still).  I have the other pumpkin that I'm going to show you next in there also on the other side.  I think that this would be fun for a Thanksgiving table place setting too!

Jen Carter Gold Pumpkin Leaves 9 wm

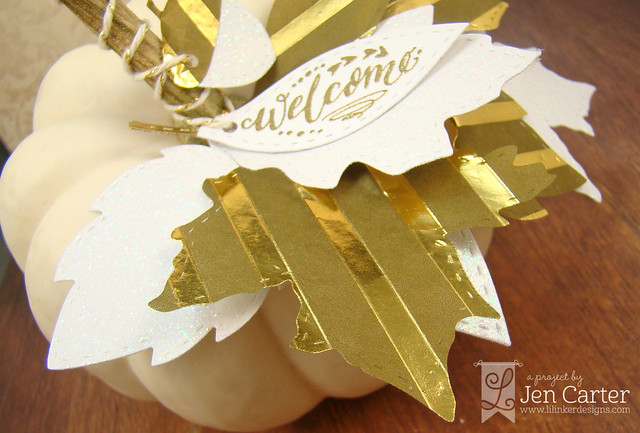
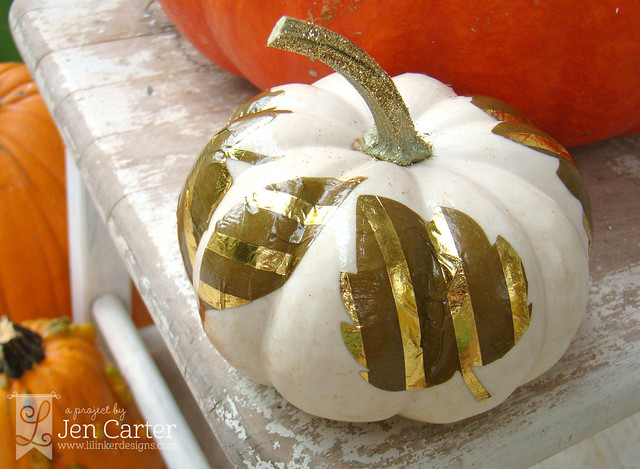
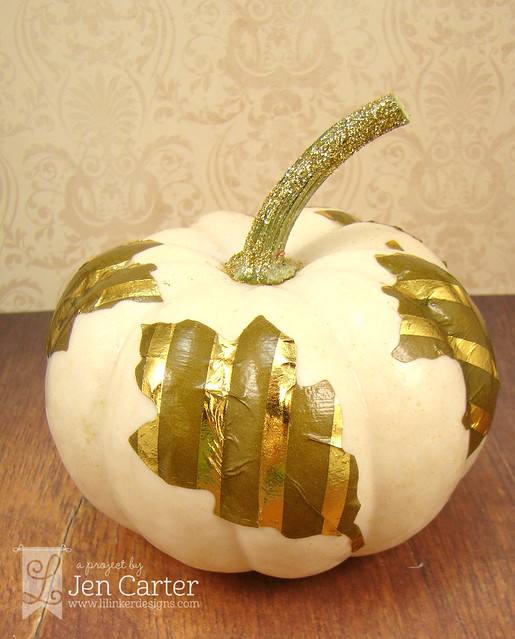
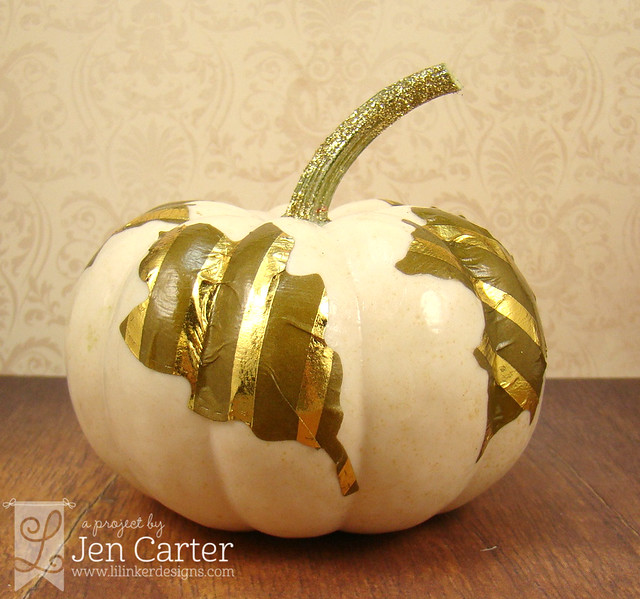
Here is the second pumpkin. I first die cut all of the leaf shapes from the Leaf Love Dies from gold striped tissue paper (from Target).  I then brushed Mod Podge on the pumpkin, placed the leaves into place, let them dry for 20 minutes and then brushed a top coat of Mod Podge on top.  It really looks cool and was so simple!

Jen Carter Gold Pumpkin Leaves 5 wm

I added some glitter to the stem too.

Jen Carter Gold Pumpkin Leaves 3 wm

One last look...

I'm entering these pumpkins in the SSS Monday Challenge Autumn is in the Air.

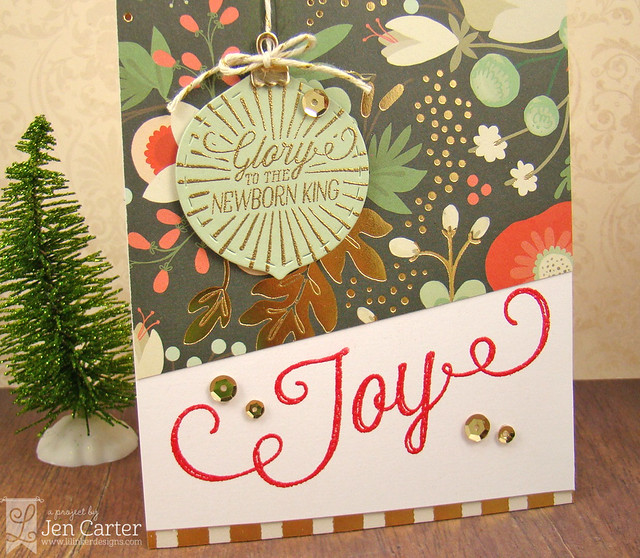
Jen Carter Joy Newborn King 2 wm

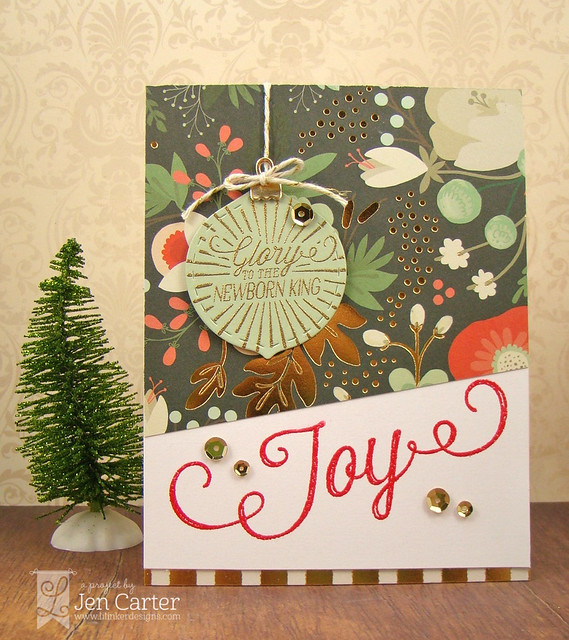
Now for a little Christmas.  I love the new All the Christmas You'll Ever Need stamps!  They coordinate with the new Oh My Ornament Dies.  Both products can be used with each other or by themselves!  The "Glory to the Newborn King" sentiment is included in the stamp set.  I stamped & embossed it on one of the six sizes of  Oh My Ornament Dies.

Jen Carter Joy Newborn King Closeup 1

Probably my favorite stamp from this entire release is the large "joy" from the All the Christmas You'll Ever Need stamps!  Isn't it beautiful?

All of the Lil' Inker products that I've used are linked above & you can purchase them in the Lil' Inker Designs store!  Your next stop on the blog hop is over the lovely & talented Amy Kolling's blog


 Leaf Love Dies
Leafy Greetings Stamp 


 Acorn Dies
Nuts About You Stamps

 All the Christmas You'll Ever Need stamps
Oh My Ornament Dies

Come back tomorrow for another round of inspiration and don't forget to leave a comment to win!  The more blogs you comment on, the better your chances are of winning!  There's plenty more inspiration to see using these new products!


Supplies
Pumpkins
Stamps: Lil' Inker Designs Leafy Greetings Stamp set
Dies: Lil' Inker Designs  Leaf Love Dies & Acorn Dies
Paper: White Glitter Paper, Target Gold Striped Tissue Paper

Joy Card
Stamps: Lil' Inker Designs All the Christmas You'll Ever Need stamps
Dies: Lil'  Inker Designs Oh My Ornament Dies
Patterned Paper: My Mind's Eye Christmas on Market Street 
Twine: Twinery Gold Shimmer Twine 
Sequins: Gold Cartwrights

Oh Nuts!


Hello!  I have a fun card to share with you today!  

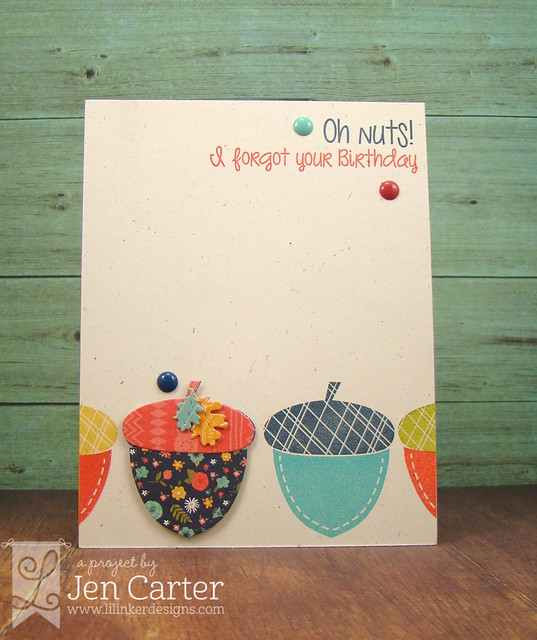
Jen Carter Forgot Birthday 1 wm

I used a newly revised stamp set called Nuts About You (I just adore these giant acorns!) and its coordinating newly revised die set called Acorn Dies to make this card.  I really like the acorn in fun colors and in patterned paper and love that you can either stamp or paper piece them!

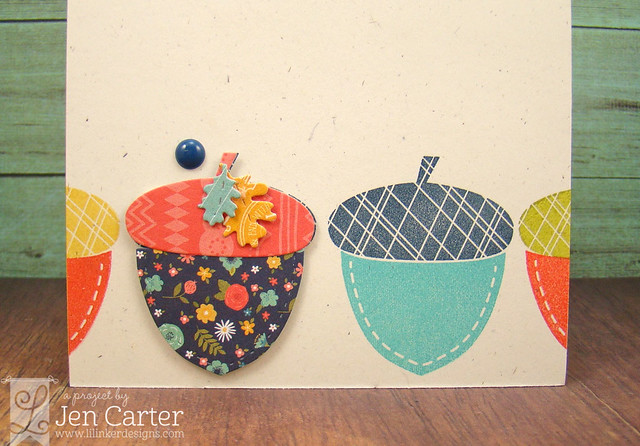
Jen Carter Forgot Birthday Closeup

I really like that the stitching is incorporated into the stamp set too!  Can you see the stitching on the patterned paper and on the leaves too? These newly revised products are available right now in the Lil' Inker Designs store!

Good news! Come back tonight at 11 PM CST to see more new goodies being released!


Nuts About You

Acorn Dies

I am also entering this into the SSS Monday Blog Challenge Autumn is in the Air!

Supplies:
Stamp Set:  Lil' Inker Designs Nuts About You
Dies: Lil' Inker Designs Acorn Dies
Patterned Paper: Echo Park The Story of Our Family
Inks: Fresh Ink Tomato Red, Navy, Harvest; Amuse Fern; Avery Elle Aquamarine

Tuesday, October 6, 2015

Noel...already?

It is very hard for me to think that Christmas is only a few short months away.  WHERE has this year gone?  It's also hard to believe that stampers all across the world are starting their Christmas cards! So, with the holidays so close by I wanted to share a Christmas card I put together.

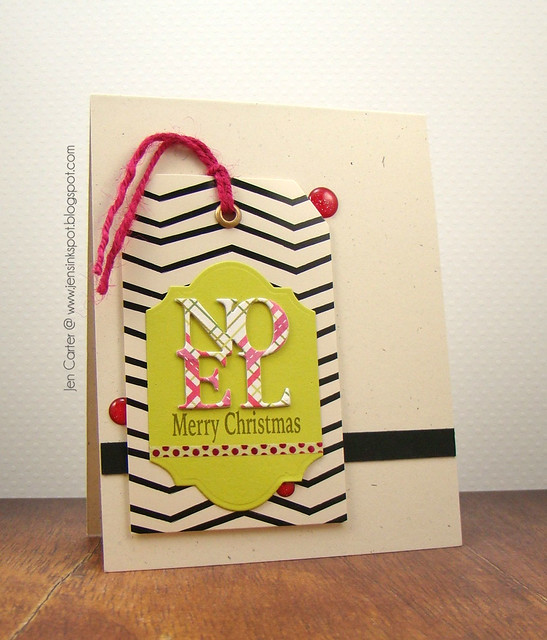
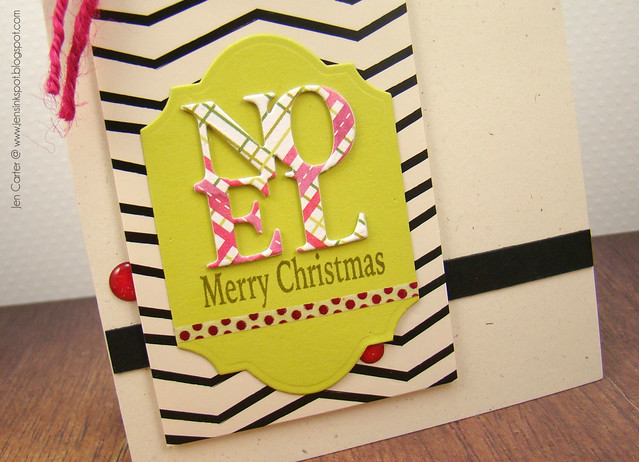
Jen Carter Noel Tag 1

I used a premade tag that I purchased from the dollar spot at Target.  Then, I adhered a green label that I die cut with the Coved Label Dies.  You can also get these labels with stitching on them now too.  I then die cut several of the Square Vignette Noel Insert and stacked them on top of each other for dimension.  

Jen Carter Noel Tag Closeup 1

The "Merry Christmas" was masked off from the Christmas Greetings Lines clear stamp set and I added a thin piece of washi tape below it.  I popped the tag up for dimension, added a strip across the card front and a few glittery enamel dots to finish it off.  Super simple and easy to mass produce!

Thanks for stopping by!
Related Posts Plugin for WordPress, Blogger...