Friday, September 5, 2014

Ombre Chevron Die!

Hello!  How is everyone doing?  Are you looking forward to the weekend?  My son has his first football game of the season tomorrow (he's in 6th Grade).  I am always a nervous mom during that first game but he enjoys playing so much so I grin and bear it and pretend I'm strong and not a nervous wreck! Can anyone relate? :)

Enough about football, let's get on to the card!  I love the ombre look and Frantic Stamper has a very cool die that is perfect for this trend!  I have so much fun playing with it and coming up with ideas and color schemes and patterns!

Ombre Chevron Petite Butterflies

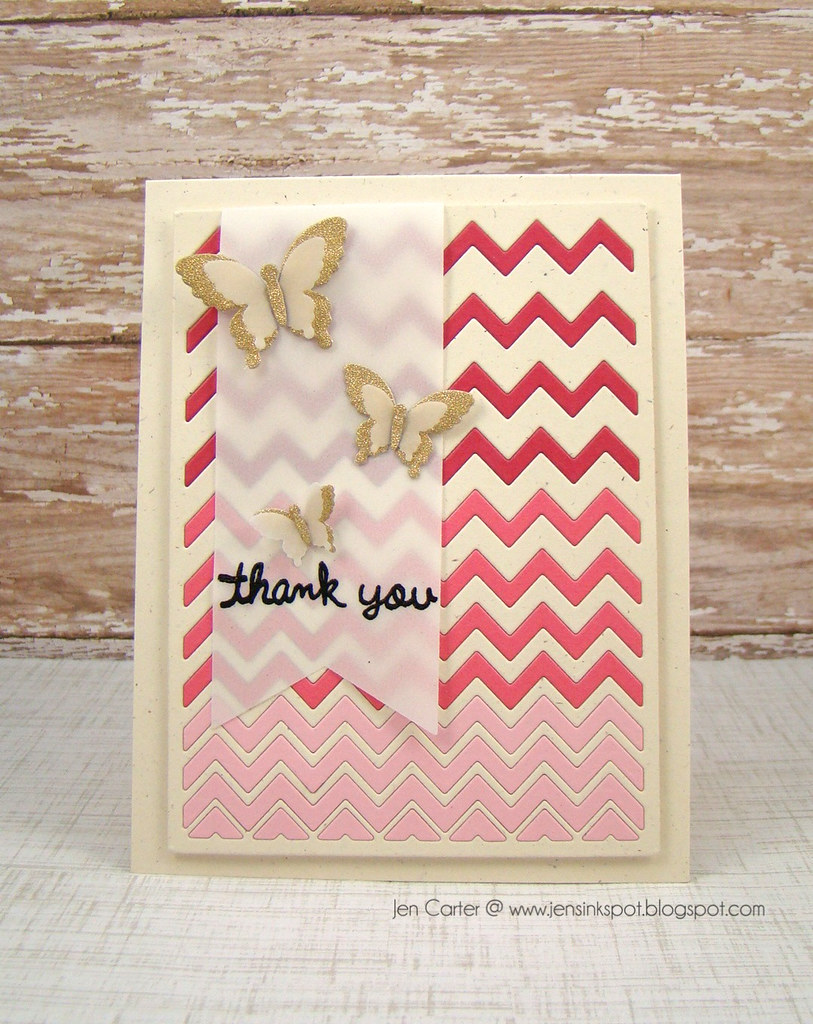
For this card I chose to work with pinks.  I die cut rustic cream cardstock with the Ombre Chevron Card Panel die.  I then used the same die to cut three different colors of pink cardstock using scrap pieces.  I used a large enough piece of scrap paper to cut four chevrons of each color.   

Ombre Chevron Petite Butterflies Closeup

Starting with the lightest pink at the bottom, I layered the chevrons into my rustic white piece.  I used scotch tape on the backside of the panel to keep the chevron pieces in place and this also helped stabilize it when I popped it up to attach to my card base.  I die cut the cutest Petite Butterflies (I LOVE how they layer!) in vellum and gold glitter cardstock and layered them on to a vellum banner.  I embossed the sentiment (from Lawn Fawn) in black.

Ombre Chevron Petite Butterflies Side

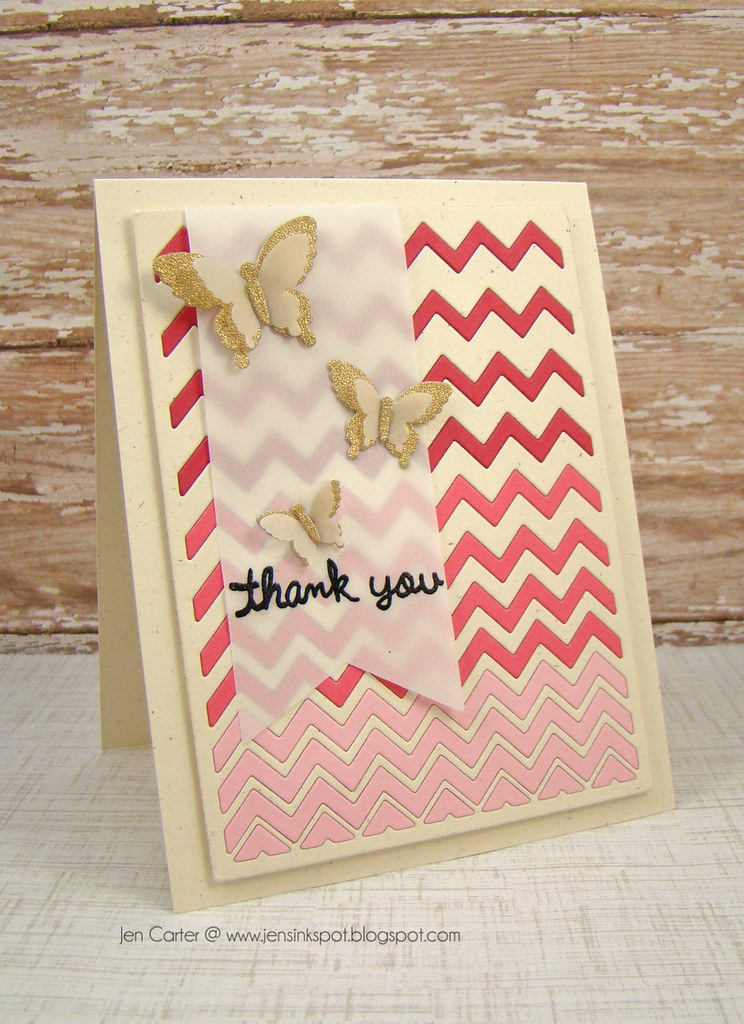
There are so many possibilities with this die! If you have a lot of scrap paper and wonder how to use it, this is a great die for that!  You can mix and match coordinating cardstock and paper patterns for a very fun background!  I hope you love it as much as I do!


Petite Butterflies Die (FRA-Die-09195)

Thanks for visiting!  I hope you enjoy your day!

Wednesday, September 3, 2014

A One Layer Card

Hey everyone!  It isn't very often that I make (or post) a one layer card, but I have one to share today.  Last week was the Clearly Whimsy Stamps August release and for this card I used a couple of the new sets that released.  

Jen Buckets of Thanks

I started by stamping the sentiment at the bottom from the Thanks a Million stamp set. I then stamped the stripes from the Basic Background & Border set in gray ink off to one side.

Jen Buckets of Thanks Closeup

I "hung" the bucket from the sentiment and then stamped some of the shiny stars spilling out. Very simple but makes a nice thank you for a male or female.


Thank you for visiting today!! I hope you have a wonderful day!

Ink: PTI Terracotta Tile & Canyon Clay; Fresh Ink Provincial Gray, Harvest & Navy
Cardstock: PTI Soft Stone

Monday, September 1, 2014

Congrats in Glitter!

Hello!  Happy Labor Day! I hope your day is going well! I know that I am so happy to celebrate Labor Day and to have a day off!  Thank you for taking the time to stop by my blog!  I am back today with another card featuring products from Frantic Stamper!  This time I've not only used their dies but one of their exclusive stamps as well!

Medallion 3 Congrats Side

I started by stamping my background.  I took a light piece of gray cardstock  and stamped the Frantic Stamper Medallion #3 stamp with watermark ink in a repeated pattern over the entire piece of paper.  I then sprinkled the paper with aqua embossing powder and embossed it.  It made such a gorgeous backdrop for the card!    

Medallion 3 Congrats Closeup

I found a coordinating piece of patterned paper in my stash and cut it at an angle and adhered it over the bottom portion of the embossed cardstock.  I then die cut the "congrats", from the Accolades die set which has to be one of my favorite die sets from Frantic Stamper, in both aqua paper & silver glitter paper.  I was careful to keep the accent pieces from the silver glitter paper still in the die cut piece and then adhered the aqua congrats on top.  This allowed the congrats to have a little dimension and it also allowed those little glitter accent pieces to show through!  Lastly I added glitter paper across one of the diagonal stripes and added a few crystals as accents. 

I love how soft the card turned out!  Thank you so much for stopping by today!  I'd love to hear what you think of the Frantic Stamper products!!


Supplies:
Dies: Frantic Stamper Accolades (FRA-Die-09219)
Stamps: Frantic Stamper Medallion #3 (FRA-CLG-4704)
Embossing Powder:  Zing Powder
Crystals: Prima

Saturday, August 30, 2014

Clearly Whimsy Stamps August Release Blog Hop

Welcome to the Clearly Whimsy Stamps August release BLOG HOP!


Jen Sat Thanks Word Stitched Borders Closeup 1


The Design Team and Guest Designers have been sharing some amazing creations made with these new stamps and dies over the last couple of days, and today we are celebrating their release with a GRAND BLOG HOP!

The hop starts today and ends on Sunday August 31st at midnight EDT.

If you would like to hop along with us today, please CLICK HERE to start the hop at Amy's blog.


PRIZE ALERT ... We have hidden a fabulous prize of a $25 GIFT CERTIFICATE at one of the stops on today’s hop!  We will draw the lucky winner from the comments left on the Whimsy Blog and on today’s design team posts, so be sure to visit everyone and leave a comment to be entered into the drawing.

Please visit the Whimsy blog for a full reveal of this month's new release.  The entire new release is available to buy from the Whimsy Stamps store RIGHT NOW!

Jen Sat Thanks Word Stitched Borders

This is a busy card, but I honestly have to say that I think it's my favorite of the ones I've shared for this release.  I chose a bold patterned paper (by American Crafts) and cut it down to the size of my card front.  Then, I used the new Stitched Border dies to cut my paper apart.  Leaving a gap the width I wanted, I trimmed the extra part of the patterned paper that I wouldn't need anymore.  I chose a contrasting pattern to layer underneath the flower paper and then popped up the top panel.    

Jen Sat Thanks Word Stitched Borders Closeup Side 2

The "thanks" sentiment was die cut from the Thanks Large Word Die.   I adhered it between the gaps that I created and then added a few gold sequins.  Such an easy card!

Below are the new products that I've used on this card:


Don't forget to keep hopping and to leave comments for a chance to win!  Here is a complete blog hop list in hopping order:

I hope you've enjoyed this release!  Thank you so much for stopping by!
Related Posts Plugin for WordPress, Blogger...