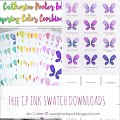
I shared with you several months ago a guide for layering ink colors using Catherine Pooler inks and I mentioned that I would have a downloadable guide for you soon. I've been working on the format this summer and have finally come to a place where I am ready to share the download with you. I actually created two downloads and I'll explain those below.
Why Catherine Pooler Inks?
I have a large collection of inks that I've collected over the years but none that I love as much as I love the Catherine Pooler inks. The reason that I very first fell in love with them is because of their vibrant colors. Stamp with Flirty Fuchsia and tell me that that isn't the most gorgeous and vibrant color! I'm not even a huge purple fan but when I stamped with that ink I knew I had to have it. I don't get splotchy images when I stamp (except once or twice after I've reinked and that was because I'd inked my pad up too much. Once I mixed the ink in better I didn't have that issue.). I love how quickly the image dries and I don't have to wait to make sure that I don't smear the ink. I love all of the color options too and how well they work together (which is the reason why this guide was created). I also love that I can use them to watercolor! I do this often and I have a video coming up with a tip about that too! I could go on and on about the reasons I love these inks.
Layering Images with Catherine Pooler Inks
Because the line of Catherine Pooler inks continues to grow and the color choices continue to expand, they are great inks to use layering stamps with. I created a video to show you how I set up my ink color combo layering guide and how I use it. This is such a great reference for me and it makes trying to figure out what colors I want to use together so much easier.
Hopefully this video helps you to see how I have set up the guide and how I use it. I refer to it often when I'm stamping layered stamps and it saves me a lot of time trying to figure out what color combo I want to use.
After you download the guide I suggest printing the swatch pages on whatever white cardstock you like and use. In my case I used a bright white, 110# white card stock which is what I often stamp my images on. After I stamped my images, I then die cut them out and adhered them to my pages and then put the completed pages into plastic sheet protectors. I purchased a 3-prong file folder and keep the pages in it for easy reference. You could skip the step of diecutting the images out and instead stamp the images directly onto the swatch cardstock. I had various reasons for die cutting the images out and then adhering to my page (one being that if I messed up I could easily discard the sample and do it again and I didn't mess up the entire swatch page), but it would save time to just stamp directly onto the cardstock.
So let's talk about the downloads.
Download #1: Layering Guide with the Images Already Stamped
If you don't want to go through the trouble of creating your own guide, I scanned my pages that I had already stamped with the different ink color layered for your reference. Now these are scanned pages so I readily admit that the quality isn't great. I tried to get them as true to life as I could. I found scanning gave me a closer to true life color than taking a photo of each sheet did because of the shadows.
Download #2: Swatch Chart for Stamping Your Own Layered Ink Pages
If you would like to stamp your own layered ink pages I also created a PDF download of the same ink color combinations that I used for my book. This swatch sheet only has the color combinations listed, like shown in the video, and then space above each combo to stamp your image. I realize that there are many color combinations that I didn't think of that could be added but this is a good starting point. I will try to add more pages as more ink colors are released.
I stamped my images, die cut them out and then adhered them to my page. If you want to save a step and time you can stamp your swatches directly onto your cardstock swatch pages. The reason I didn't do that was for several reasons including if I messed up I didn't ruin the entire sheet and also because I originally started this project on 1/2 sheets of cardstock (see original post) and then decided I wanted them on a full sheet instead. So instead of stamping them again, I die cut them out and adhered them to a full sheet.
The sample below is what the download will look like although it won't have the lines shown. It will just be the words and color combinations.
What about ink layering color combinations for 4-layer stamp sets?
To adapt these color combinations for 4-layer stamps I suggest using 2 - 3 ink colors. You don't have to have a ton of ink colors to stamp 4 layers, in fact you really only need 2 ink colors to stamp 4-layer stamps . To stamp with 2 - 3 colors, stamp layer #1 off lightly on a piece of scrap paper, then stamp it on your cardstock. It will leave a very light layer of ink. Ink up layer #2 in the same ink color and stamp it next but fully inked (not stamped off on scrap paper). You can do the same thing for layer 3 & 4 also or you can stamp a 2nd and 3rd ink color for layers 3 & 4. Of course you can always use 4 colors of ink also just adding a darker color of ink for layer #4. I share some color combinations on my videos here: Rose Garden & Hello Autumn if you'd like to check them out too.
I hope that these downloads come in handy and make good reference sheets for you. I'd love to hear if you use the downloads and how and any comments that you have! Thanks for stopping by today!
 Free Ink Combo Download Shop at: CP |
 All Inks Bundle Shop at: CP |
 All Inks & Refills Bundle Shop at: CP |
 ALL CP Inks Shop at: CP |
 Mini Inks ALL Shop at: CP |
 It's a Girl Shop at: CP |
 Be Mine Shop at: CP |
 Party Dress Shop at: CP |
 Pink Champagne Shop at: CP |
 Rose Petals Shop at: CP |
 Peppermint Scrub Shop at: CP |
 Rockin' Red Shop at: CP |
 Rouge Shop at: CP |
 Samba Shop at: CP |
 Coral Cabana Shop at: CP |
 Polished Shop at: CP |
 Mandarin Spice Shop at: CP |
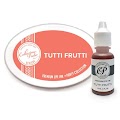 Tutti Frutti Shop at: CP |
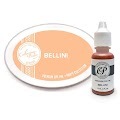 Bellini Shop at: CP |
 Orange Twist Shop at: CP |
 Orange Peel Shop at: CP |
 Tiki Torch Shop at: CP |
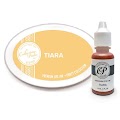 Tiara Shop at: CP |
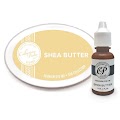 Shea Butter Shop at: CP |
 Sauna Shop at: CP |
 Limoncello Shop at: CP |
 Lemongrass Shop at: CP |
 Melon Ice Shop at: CP |
 Garden Party Shop at: CP |
 Lime Rickey Shop at: CP |
 Grass Skirt Shop at: CP |
 Green Tea Shop at: CP |
 Eucalyptus Shop at: CP |
 Seafoam Shop at: CP |
 Mint to Be Shop at: CP |
 Sage Shop at: CP |
 Spruce Shop at: CP |
 Mardi Gras Shop at: CP |
 Aquatini Shop at: CP |
 All that Jazz Shop at: CP |
 Hot Tub Shop at: CP |
 Skylight Shop at: CP |
 Daydream Shop at: CP |
 Fiesta Blue Shop at: CP |
 It's a Boy Shop at: CP |
 Something Borrowed Shop at: CP |
 Suede Shoes Shop at: CP |
 Stone Blue Shop at: CP |
 Juniper Mist Shop at: CP |
 Grape Crush Shop at: CP |
 Queen for a Day Shop at: CP |
 Sweet Sixteen Shop at: CP |
 Pixie Dust Shop at: CP |
 Sugared Lavender Shop at: CP |
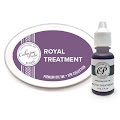 Royal Treatment Shop at: CP |
 Flirty Fucshia Shop at: CP |
 Sangria Shop at: CP |
 Twilight Ink Shop at: CP |
 Black Jack Shop at: CP |
 Midnight Shop at: CP |
 Sand Castle Shop at: CP |
 Over Coffee Shop at: CP |
 Icing on the Cake Shop at: CP |
Products I used on the card(s) on this post are linked above. Some of the links may be affiliate links which you can shop at no additional cost to you.
_____________________________________________
Instagram: JenniferDCarter * YouTube: Jen's Ink Spot
Pinterest: Jennifer Carter * Facebook: Jen's Ink Spot
Pinterest: Jennifer Carter * Facebook: Jen's Ink Spot


5 comments:
Wow! Thanks so much for the downloads and all the hard work.. This is so helpful. TFS.
An amazing resource and reference guide, Jen! Thank you for your generosity of sharing all the hours you have dedicated to this task.
Thank you for doing this! It was a lot of work!
Thanks for taking the time to put this together and share it. Today isn't the first time I've come back as a reference. Love your blog and designs!
What a wonderful resource. thank you.
Post a Comment