Home

Saturday, December 31, 2011

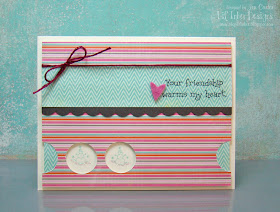
Wee Memories #81

Hello! I have some exciting news to share with you! I will be guest designing for Wee Memories Scrappy Saturday challenges the month of January!  How fun!!  I am so honored to be able to play along with this amazing group of ladies!


The challenge theme this week is "New"!


To kick off the new year, Wee Memories wants to see your projects featuring a new technique, new papers or new supplies, anything that is "new" to you!

I recently received an order with new supplies and so that is what I used on my card today!  This is also a happy birthday card to a special friend, who is also on the Wee Memories Design Team!  Happy birthday to you Amy!!  I am so thankful to have you in my life!


New things I used:
New Stamps & Dies (PTI's Rosie Posie & Happy Day)
New Ink (Amuse Buttercup)
New Trim (actually I have had this for a few months but never used it!!)
New Paper:  Head Over Heels by Lily Bee Designs


You have until January 6th to play along!  Be sure to link your card to the Wee Memories blog and to check out the prize that is up for grabs this week!
Thanks for stopping by today! Happy NEW Year!!


Other Supplies not listed above:
Lemon Tart, Smokey Shadow & Rustic Cream cardstock: PTI, Pearls, Ink: PTI True Black

Monday, December 26, 2011

Play Date Cafe PDCC112

It is so hard to believe that Christmas is over already!  It seems like it went by so quickly!  We all really enjoyed being together and seeing all of our family!

Today I have a card to share with you for The Play Date Cafe color challenge.  This time it is sponsored by Lil' Inker Designs and the prize up for grabs is a $25 shopping spree!  Pretty good prize if you ask me!  You have until Tuesday, January 3rd to play along!

Here is the gorgeous inspiration photo.


And here is what I made using those colors.


This mouse image is called "Snow Mouse" and is from Lil' Inker Designs newest release. I used watercolor crayons to color the mouse.  I don't know how long it has been since I pulled those out!  The white showed up so well on the kraft cardstock.


I tried to make the area where her heart would be a little bit pink since the sentiment says that friendship warms her heart.   It is hard to see in the photo.

If you would like to play along with this challenge, visit The Play Date Cafe's blog!

Thank you for stopping by today!

Supply list coming soon!

Friday, December 23, 2011

Christmas Scrubs

Merry (almost) Christmas!!  I have been working away (in between having strep throat) on Christmas gifts!  I like the personal element in giving gifts and have challenged myself the last few years to find a project to make to give to friends.  If you are looking for a last minute idea for teachers, Sunday School teachers or someone you want to give to but can't figure out what to do, this is a super easy and very fun project!

I made several varieties of sugar scrubs.  LOVE them!!  They make my hands feel so soft and smooth and I love how it exfoliates them too.  It feels so good rubbing it on my hands.  I hope my friends like them too!


This is the peppermint scrub (after this batch I left the scrubs white which I ended up liking even better but they sure look pretty green too). 


To decorate the jars, I tied a ribbon around the lid of the jar and hung a mini ornament from it and then tied a bow.  I also tied a tag (that told what the product was with simple directions) and a little spoon (to get the scrub out with and to stir it up if it seperates) onto the ribbon piece with various colors of Twinery twine. I also punched a piece of patterned paper and attached to the top of the jar.


I wrapped the Caribbean twine around the spoon for some decoration.


These are the 3 different scrubs I made.  The green peppermint scrub you've seen above, then I made a peppermint foot scrub and a lemon scrub (I did change the lemon scrub after this batch to make it a little "lighter" and it also made the color a much softer yellow.  I like it much better too.)


I love how easy it is to dress up the jars with my twine!  When I packaged these scrubs in a group of 3, I only wanted an ornament on one of them, so on the others I used various colors of twine.  I attached the tag and the spoon with the twine as well.
 
I did TONS of experimenting to find the scrubs that I liked the best!  I thought I would share my 2 favorite recipes below that I tweaked and tweaked until I got it just right.  These won't be exact because after I mixed according to the recipe I had written down I added extra of the ingredients to get the consistency to my satisfaction...a thicker formula or a thinner formula or a stronger scent.

Peppermint Sugar Scrub
3 cups white sugar
1/4 cup - 1/2 cup Kosher Salt
1 cup baby oil*
1 teaspoon Peppermint Extract
*(baby oil was the oil I preferred but you can also use olive oil or canola oil)

Mix all ingredients together.  (If you want it to be green, add a drop or two of green food coloring to the mixture.)  This made 4 - 5 eight ounce jars.


Lemon Sugar Scrub
1 1/2 cup sugar
1/3 cup kosher salt
Zest of 1 or 2 large lemons
1 cup oil (I used baby oil)
1/4 tsp Pure Lemon Extract
Juice from 1/2 - 1 lemon (depending on your preference)

Combine all the ingredients in a bowl.  Add more or less extract & lemon juice based on how much scent you want your scrub to have.


These would make great hostess gifts or baby shower/bridal shower gifts too!  I would love to keep a few on hand too for those times that I need a gift and have nothing at home to give.

Well, I hope you enjoyed this post!  Have a very Merry Christmas!

Thursday, December 15, 2011

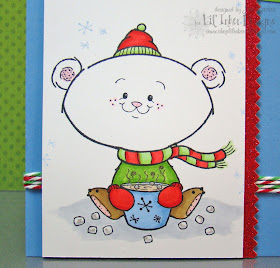
Lil' Inker Designs New Release: Cocoa Bear


Be sure to enter my Christmas giveaway here!!


Welcome back to the last post for the Lil' Inker Designs December new release blog hop!

Today we have another great image to introduce to you, Cocoa Bear!  If you are following along in the hop, you should have come from the blog of  Debby Hughes!  If you would like to start at the beginning, visit the Lil' Inker Designs blog!

Meet Cocoa Bear!

Cute huh?


I went with a winter theme for this cute little mouse! I used the snowflakes that are a separate image in the set to fill the space on the coffee mug and I also used them in the sky.  I love that there is an option like that! 


I colored the image with copics and highlighted the steam and the marshmallows with my copic glitter spica pen. 

I also wanted to create another card with this set using the tiny little snowman that was designed to also fit on the coffee mug.


I stamped the snowmen twice and then cut circles from my cardstock so that they were peeking through.  I added stickles to the snow that they are sitting on.


This set has more great sentiments and this is another one of my favorites!


I'd love to hear what you've thought of this new release.  It is new territory for Lil' Inker and we hope you fell in love with what you've seen!  Be sure to leave a comment to be entered into the prize drawings that are up for grabs this week!

Your next stop on the hop is over to the super sweet blog of  Emily Leiphart!

Thank you for visiting!! Be sure to stop by the Lil' Inker Designs store to see all the products that are available for sale!


Supplies
Warm Wishes
Twine:  The Twinery
Paper:  PTI Blueberry Sky, White, DCWV Glitter Red
Coloring: Copics, Spica Clear Glitter Pen

Wednesday, December 14, 2011

Lil' Inker Designs New Release: Snow Mouse


Hello! Welcome back to another new release post for Lil' Inker Designs!  Do you like what you've seen so far?  These new stamp sets are super cute!  If you are following along in the blog hop, you should have come here from Teresa Kline's blog

Today I am sharing with you another new stamp set called "Snow Mouse". 


And here is the card I made with this set.


I used sort of a unique technique to color the mouse.  I took a q-tip and dabbed it on my VersaMark and tea dye inks and rubbed it on the mouse.  This gave him a little darker look than the cardstock.  Then, I took my Pebbles Shimmer chalks, which I don't pull out often enough, and colored on top of the image with the chalks.  Putting the ink down first allows the chalk to really stick to it.  The chalk allowed me to shade the mouse easily and gave him lots of sparkle!


For the white snowflakes I used another q-tip and tapped it onto my white ink pad and then colored onto the cardstock with it.  I love how that looks!


The skirt on the bottom of the card is made out of tulle which costs next to nothing!  I gathered it using scor-tape and tucked it under my image.  It adds a fun element.  I also wanted to point out the cute font that these 3 new sets have.  I love it!! So cute and perfect for the sets that they are included in!  This sentiment happens to be my favorite of all of them!  LOVE it!! So cute!!

Your next stop on the blog hop is to the fabulous blog of the super talented

I'll be back tomorrow with one more new set and two new cards!  Thank you for stopping by!  Don't forget to leave a comment on each blog allow the way to be eligible for the prize packages!  And also be sure to visit the Lil' Inkers store and check out all the great products available!

Supplies
Stamps:  Lil' Inker Designs Snow Mouse

Ink:  PTI Snow White & True Black, Memento Black, VersaMark, PTI Tea Dye
Paper:  Kraft Funday Happy Days by My Mind's Eye, PTI Kraft, Bazzill (blue)
Other:  Tulle, Pebbles Shimmer Chalk, Pop Dots

Monday, December 12, 2011

Lil' Inker Designs New Release: Arctic Friends


Welcome to the December release of Lil' Inker Designs!! We are thrilled to have you join us!  If you are following along on the hop you should have come from Debby Hughes' blog!  I am such a fan of her fabulous work!

Lil' Inker Designs (LID) is introducing a new product line this month that we think you're going to fall in love with!  2 Cute Ink is the first artist created line to be featured at Lil’ Inker Designs. Artist Heidi Schwoerer, of 2 Cute Rubber Stamps, will now exclusively release her designs at Lil’ Inker!

Are you anxious to see the first set?


Pretty cute, huh!


I went with a winter theme for this card but the great thing about this image is that it could be used year round!  I colored the image with copics and then paper pieced the scarf and ice cream scoops.  Of course I had to add glitter to the top of the ice cream!


I stamped the sentiment with an ice cream cone on the inside.  Very, very simple but I love how the sentiment can be carried through to the inside!


Did I mention that there are prizes up for grabs?!

Two $10 store credits
1 grand prize...the entire release

To be eligible for the grand prize comments must be left on each designer's blog each day of the hop Monday - Friday.

Your next stop on the hop is the fabulous Alicia Thelin!! I always love to see what she has been up to!

Thanks again for joining us!! Be sure to check out the Lil' Inker blog each day this week for more designs! We have THREE fun sets being released this month!  I'll be back with a post on Thursday & Friday. 

Have a great day!!


Supplies
Paper:  PTI Aqua Mist, White, Bazzill, Lime Twist Happy Go Lucky
Ink:  Memento Black ink
Other:  Copics, Embossing Folder Cuttlebug, PTI Button, DMC White Floss, Crystal Stickles

Christmas Giveaway!

Hey everyone!  How are you!?  Tonight I will have a new post up on my blog for Lil' Inker Designs!  But for today, I want to share a giveaway with you!


How about a custom-made button ring from my Etsy shop, Jen's Ink Spot!  You can choose any of the $11 rings (or less) from My Etsy store OR customize one in the colors you would like OR you can choose one of the adjustable resin rings I have in my store too.

Want so see some examples?


How can you win?

Easy!

1.  Become a follower of my blog.  You can see the follower list on the right.  If it doesn't show up, you may have to refresh the screen, sometimes it will play hard to get!  Leave a comment letting me know that you follow me (or have already followed me).

For extra entries:

1.  Leave me a comment on this blog post.
2.  Share about this giveaway on Facebook or Twitter.  Leave me a comment letting me know where you shared it at!

That's it!!  Very easy!  The contest will stay open until Friday, December 16th at Midnight.  I will announce the winner this weekend so be sure to check back to see if you were the winner!

In the meantime, if you need some unique Christmas gifts, visit my Etsy shop and check out all the different options!  What a fun stocking stuffer these rings would make!

Thank you for visiting!


Thursday, December 8, 2011

Rainbows & Lil' Inker News

Hi!! There is exciting news to share about Lil' Inker Designs today! But first, I wanted to share a card!


I made this several months ago and it's been sitting in my folder waiting to be shared.  The rainbow is from Lil' Inker Designs.  Oh my! I LOVE those rainbow dies! This rainbow was made with scraps. I keep all of the my rainbow "extra" pieces in a clam shell and when I need to throw together a quick card I sort through it looking for the perfect colors and sizes.  Love it!


The grid background is from Market Street Stamps.  They have the best background stamps!  They fit the entire card front!  The sentiment, a personal favorite, is from Verve.


So...have you heard what next week is?  It is a new release from Lil' Inker Designs!  But, this month, LID brings you something fresh and new...


2 Cute Ink is the first artist created line to be featured at Lil’ Inker Designs! Artist Heidi Schwoerer, of 2 Cute Rubber Stamps, will now exclusively release her designs at Lil’ Inker!  Lil' Inker will be releasing some of Heidi’s existing images as well as brand new, never released, irresistibly adorable images! All stamps sets will be available in LID's customary, but fabulous, clear stamp format and will feature sentiments designed by Laura and Ariana of Lil’ Inker Designs with ag designs done in a perfectly fun coordinating font!

There will be three stamp sets released this month and they are cute, cute, cute!

If you would like to see a few sneak peeks, visit the Lil' Inker Designs blog!  The Design Team will be sharing posts every day next week, December 12th - 16th.   I will have a post on Tuesday, Thursday & Friday to share what I've made for this release!

Enjoy your day!!  Thanks for stopping by!


Supplies
Stamps:  Verve Making a Statement, Market Street Stamps Pretty Perfect Grip
Paper:  PTI & From Stash
Other:  Button, Rhinestones, Twinery Twine, pop dots

Sunday, December 4, 2011

Bloom

Market Street Stamps is having a Block Party to celebrate their new release and I decided to play along!

The challenge was to create any card using Market Street Stamps.


I used most of the MSS that I have!  I stamped the grid background & the carrots/ground from the Homegrown set with Amuse's Fern ink and the sun with Amuse Buttercup ink!  Let's pause right here for a commercial break...

Amuse Inks...no I don't sell them but I bought a few with birthday money and I LOVE them so far!  I bought colors that matched PTI and I love, love, love the way that the ink looks!  It makes such a nice crisp image, they are gorgeous, gorgeous colors! If you need some good inks, give Amuse a try!

...commercial break over! :)


Here's a closeup.  I used The Twinery's Mandarin twine to stitch the carrots.  I love how they look plump and ready to pick!  I also tied a strand of Denim twine around the grass to add another pop of color.  The grass is cut with Amuse Sage felt (have to recommend the felt too!  It is thinner than PTI's but cuts really well!)  using PTI's In the Meadow die.


To create the sun, I used the Market Street Stamps Here Comes the Sun background stamp and stamped just a portion of it on my panel.  It was such a perfect fit!  I love how I can use the whole stamp as a background or just a part of it for smaller areas! 

I hope you had a great weekend!! Thank you for coming by!

Friday, December 2, 2011

Sweet Season's Greetings

Hey everyone!! Sorry it has been so quiet around here! I've been working on projects though to share with you at a later date!  Today I wanted to share a card I made with the products from the last Lil' Inker Designs release.


You know how much I've enjoyed using fabric on my projects lately and this one is no exception.  I cut the tree from Holly Jolly out of some fabric that I love!  I cut it out twice so it would have a front and a back and also cut out a piece of Pellon Wonder-Under to adhere the two pieces together. 

Here's why I did that:


The Christmas tree comes off the card and is a pin.


I sewed the pin onto the backside of the tree (very crookedly apparently!!).


I love how these trees look cut out of vellum!  Such a soft, wintry feel.

Thank you for stopping by today!  Keep your eyes open because Lil' Inker Designs (LID) will be having another release soon!  More on that to come!