Home

Friday, April 29, 2011

CASE'ing Keva

Hi everyone!! I have a card to share with you today that is a CASE of Keva!!  It is her blogaversary and so she issued a challenge to pick one of her cards to CASE.  She has so many great ones to choose from but I chose one from March.
Here is Keva's card that I CASED.  It is a beauty!


I just loved the simplicity of this card and I have had on my "list to do" to stamp on my ledger paper so I thought that this would be a great one to CASE.

Here is my version:


I kept everything very similar to her design.  That vine image is from PTI's "With Sympathy" set.  Love it!  It can be used for tons more than just sympathy cards, which is something that I really, really like in a set!


Thanks for stopping by today!! Have a great day!


Supplies (all PTI unless noted)
Stamps: With Sympathy, Verve Kind Words
Paper: Kraft, Sweet Blush, Dark Chocolate, Library Ledger
 Ink: Sweet Blush, Dark Chocolate, VersaMagic Ocean Depth
Other: Ribbon, Button, Twine, Fiskars Border Punch

Wednesday, April 27, 2011

Button, Button, Whose Got the Button?

I finally updated my Etsy shop, Jen's Ink Spot, with new rings today!  It's been quite a while since I've shared anything on my blog about my rings, so I thought since I updated my shop, I'd update my blog as well!

Here is what I've added:


There are tons of other rings to choose from too!  Can I share just a few of my personal favorites while I'm at it?

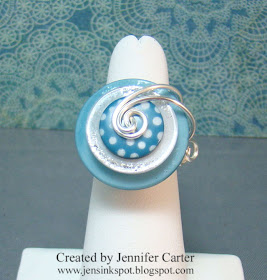
Love, love this ring!!  It is so fun and perfect for my summer shirts! I love the glittered rim of the middle button and of course the fun polka dots!


I wear this one all the time!! It goes with so many things and is so versatile!

Maybe it's because I'm a Kansas girl, but I just love this summery sunflower ring!  So fun!

You want in a secret?   Curious to know what my number one selling rings are?  Here are the top 3!
#1
I personally LOVE this ring and wear it all the time! I have sold so many of these!! Crazy, huh!?

#2
This is such a classic (and versatile) ring!  Really pretty!

and last but not least...
#3
This was my first and signature ring!  It is another one that I wear tons!  Such a great color!

If you've stuck with me this far, thanks!! And because I value you as a follower of my blog and as someone who takes an interest in my rings, I want to offer a special sale just to you!  All my rings are now 10% off in my Etsy shop with this coupon:  "SPRING".   This discount coupon will be available now until next Wednesday, May 4th, so you have one week to save!   Just enter the coupon code during checkout to receive the discount! 

Thanks so much for visiting today!!  I appreciate all of you so much!  Have a great day!

Tuesday, April 26, 2011

The Twinery + Stamps of Life Blog Hop

Are you ready for some fun?


The {Stamps} of Life and The Twinery Design Teams are playing together for this hop!

About The Twinery:

Our twine is made from 100% cotton, it's eco-friendly and made in the USA. Whether you're gift wrapping, crafting or tying up baked goods to give to a friend, our baker's twine adds a fresh, yet nostalgic look to any project at hand! Our baker's twine comes in 11 delicious colors and is uniquely twisted against a bright white hue, creating an eye-popping burst of color and a creative embellishment! Our twine has lots of color which lends to a fun, candy-striped look.

For creative ideas & more...visit OUR BLOG!

We feature high quality, made in the USA, clear stamps and digital stamps/brushes for stampers, card makers and scrapbookers. Feel free to browse our gallery with more than 2500 samples using our stamps, watch our free how-to videos and join our club!

As you make your way through the hop make sure you comment on each and every post. There will be 4 prize winners chosen randomly among the blogs:

Two winners will win 2 stamp sets of winners choice valued at $12.95. (total retail value: $26.90 per prize) from The {Stamps} of Life.
and
Two Colorful Bunch Sampler Packs ($20 value!) from The Twinery!!!


The prize winners will be announced on The {Stamps}of Life and The Twinery Blogs on Tuesday May 3rd.

Be sure to check out the list of all those participating in this hop below!

Now onto the projects I created!  The stamp set that I used from The Stamps of Life was trees2build.


This set was so much fun to create with!  I just really love it!

The first project I created focused on new life.  I thought that the little bird with the sentiment "a little birdie told me..." was the perfect way to send someone a card congratulating them on a new baby or a pregnancy.


I stamped the grid tree image on muslin and then stitched Honeydew twine from the Twinery around the edge of the oval.  I then cut around the oval and frayed the edges of the muslin to give it that fuzzy look.


I used Cappuccino & Blossom twine to sew a birds nest with eggs in the muslin as well, to carry on the new life theme.


I paper pieced the largest of the adorable bird images and cut out two wings and glued them on.  The birds in this set are just so super cute!  And the fonts and sentiments...love them too!!

The last card I want to share with you today was also a lot of fun to put together!


I was shopping in some scrapbook stores a few weeks ago and noticed that they have embellishments for sale that are large spirled circles made out of baker's twine (which wasn't nearly as pretty as The Twinery's twine, lol) with a button in the middle.  I couldn't wait to make one myself...and save money at the same time!


I covered a large circle with adhesive from my ATG gun and then started spinning the Honeydew twine from the center of the circle working toward the outside of the circle.   The button is tied with my personal favorite color of twine, Caribbean.  I stamped the leaves in VersaMark and then framed the entire image.

That's all I have for you today! Be sure to leave a comment for your chance to win one of 4 prize packs!  And, be sure to visit the other blog hop participants as well:


Thanks for stopping by! Have a great day!

Supplies:
Stamps:  trees2build by The Stamps of Life
Twine: The Twinery
Other Supplies: Canvas, Cardstock (PTI), Glitter Cardstock (DCWV), Dies & Impression Plates (PTI), Ink (PTI & VersaMark), Corner Rounder, Pop Dots

Monday, April 25, 2011

Papertrey April Blog Hop Challenge


Welcome to the April PTI Blog Hop!

This month's blog hop is dedicated to all the boys and men in our lives! Now's your chance to create Father's Day projects, boy birthday cards and more to build up your stash! Focus on masculine color schemes, fresh pattern combinations, understated embellishments and unique uses of images you may already have in your stash!

For this blog hop I kept it super, super, super simple.  I literally had just a few minutes to put a card together and get it ready for this blog hop, so simple was the way to go!


Star Prints is a great set for masculine cards!! I paired that with the Boy Basics: Simple Circles set stamped on the Simple Circles Border die.


The stars are popped up for dimension, the twine and impression plate were added for texture.

Thanks so much for stopping by today! Be sure to visit the rest of the posts in the blog hop listed on Nichole's blog!

Supplies (all PTI unless noted)
Stamps: Just the Ticket, Star Prints, Boy Basics: Simple Circles
Paper: Kraft, Smokey Shadow, Rustic White
Ink: Pure Poppy, Oasis Green VersaMagic, Tea Dye Duo
Other: Pop Dots, Twinery Twine, Simple Circles Border Die, Sunshine Impression Plate

Friday, April 22, 2011

Cute as a Button

Hello!! I wanted to share a card that I finished very late tonight so I'm going to keep this post pretty short.  I needed to add some baby cards to my stash and so with that in mind, set out creating this card...it is so fun to create a card for babies!!


I have loved the PTI set Bitty Baby Blessings set for a LONG time but just recently purchased it because I finally needed to have a baby set (NOT for me, for friends!!)!   Anyway, I wanted to use the Boy Basics Circles die on this card (I tell ya, the possibilities with this die are limitless!!) and it was so fun to experiment with different stamps to see what looked good in the circles.  I finally settled on the star from the Simple Circles set and the flower from the Delightful Doilies set.


Isn't that off-white posie like flower so pretty!  That was a fun find at Hobby Lobby in the wedding aisle!  Last week they had all their wedding supplies 50% off.  I've never really looked down that aisle much before but they have some cute flowers (this was a pack of 3 on sale for $1) and corsage pins and even rhinestones in that aisle for cheap!!    It has a pearl in the middle that matches the pearls in the centers of the stars.  It's hard to see in the photo but it is a great accent!


When I was putting my stamp set together after it came, my 3-year old daughter was sitting on my lap and was telling me the names of the images.  When she got to this one, she said "bunny rabbit". I said "no, dog".  She was insistent that it was a bunny and the closer I looked the more I realized she was right! LOL!!  What can I say except that at the time, it looked like a dog! :)

Thanks for stopping by today!  Have a great weekend!  I am excited to celebrate such a special holiday!  If you are feeling inspired to watch a video, this is one of my favorite Easter songs!


One day He's coming! Oh Glorious Day!!  Happy Easter!

Supplies (all PTI unless noted)
Stamps: Bitty Baby Blessings, Button Boutique, Delightful Doilies, Polka Dot Basics, Simple Circles
Paper: Spring Moss, PTI Patterned Paper, Rustic White, Purple Bazzill
Ink: Sweet Blush, Dark Chocolate, Lemon Tart, Spring Pansy VersaMagic
Other: Simple Circles Die, Pop Dots, Flower (HL), Pearls, Button Card Die, Ribbon (HL)

Wednesday, April 20, 2011

Keeping the Focus on Simple

Hi everyone!! Today it is my turn to post on The Twinery's blog!  If you haven't visited there before, take a look around! There are tons of ideas of how to use your twinery twine!

My post today won't show you any new techniques or even any "wow, how did she do that?" type things but instead I kept the focus on my favorite way to use The Twinery's Twine and that is by keeping the focus on keeping things simple.

I love simple.  Most of the time I like to keep my cards simple.  One of the first things that drew me to baker's twine, and The Twinery's twine specifically, was how a little bit of twine on a card can add such a "wow" factor.  I love how you can use twine from The Twinery to really pack a punch on a simple card because the colors of the twine are so vibrant and beautiful!  They make the card shine and add the perfect finishing detail.

Today I want to share three cards with you that I "dressed up" using twine.  Hopefully you will be able to see how using the twine in a simple way can really pack a big punch.


This is such a simple card design but the twine plays a large role in making the design work.  The charcoal  twine pulls the card together and helps the red & turquoise colors to really pop.  It literally ties the card together.  


To make the frame I used my PTI Mat Stack 5 die with Pure Poppy cardstock.  Then, I took that shape and placed the Fillable Frames #10 die where I wanted it and ran it through my Big Shot again.  This cut the center out of my Mat Stack.  I also used the PTI Linen Impression Plate on it to give it some texture.  Then, I took a pencil and traced where my opening would be on my card and then stamped my flowers using the lines as a guide.  I popped the frame up with pop dots to add dimension and make it easier to tie the twine around.

This next card also uses the black & white "Charcoal" twine from The Twinery.


The twine is the only embellishment on this card and just by wrapping it around the layers, it brightens the card up and accents the other colors on the card.  The other thing I love is that there is no bulk which means that it is easy to send in the mail and fits in an envelope easily!


I had used the Turning a New Leaf die cut out on another card that I shared previously on my blog and when I was done cutting it, I just loved how the negative looked on the paper.  I cut the paper down to size and then set it aside to be used later.  To make this card, I took that negative piece, placed a piece of patterned paper under it, stamped the sentiment and then adhered it to the card.  Simple, simple!

This last card is super simple but again, the twine is the highlight of the card.


I used a tree image from The Stamps of Life set "Trees2Build" to make the grid shapes on each of the frames.  The Hawaiian Shores frame is popped up with dimensionals and then the Lemondrop twine is wrapped around it. 


I kept it very simple but the twine is the star of the show and draws your eye to the center of the card and to the sentiment panel!

Thanks for visiting today!  I hope that the focus on "simplicity" inspired you!

Supplies
Thanks Card
Stamps:  PTI Spiral Bouquet, Stamps of Life Trees2Build
Inks:  Turquoise Gem VersaMagic, Tea Leaves VersaMagic, PTI True Black
Cardstock:  Pure Poppy & Rustic White PTI
Other:  Charcoal Twine from The Twinery, Mat Stack & Fillable Frames Dies PTI, Red Pears, Pop Dots

Celebrate Card
Stamps:  Damask Designs PTI
Ink: True Black & Tea Dye PTI
Cardstock:  Stella & Rose Patterned Paper & PTI Kraft, Pure Poppy, Hawaiian Shores
Other:  Charcoal Twine from The Twinery, PTI Turning a New Leaf Die, Pop Dots

You're Special CardStamps:  Trees2Build Stamps of Life, Paper Smooches Sentiment Sampler
Ink:  Versamark, PTI Pure Poppy
Cardstock:  PTI White, Hawaiian Shores, Simply Chartreuse, Harvest Gold, Pure Poppy
Other:  Lemondrop Twine from The Twinery, Fillable Frames Die PTI, Pop Dots

Tuesday, April 19, 2011

Get Well Soon

Hi everyone!  I hope your day is going well!  It is beautiful here in Kansas and yesterday was the perfect day!  I found myself thinking that it was the perfect temperature and I could have lots and lots of days exactly like that one!


This card is made from some super cute paper that I found (well, actually Laurie found it for me, thanks Laurie!!) while on my Stamping Away weekend.  It's hard to believe that it was over a week ago that we were all together!  During our weekend, we each issued a challenge.  Laurie's was a sketch challenge and this card is based on her sketch.


I just adore that Country Foliage embossing folder!  There is actually a funny story behind it.  Amy & I like to "dream" about products that we adore, and as a result our wish lists usually grow pretty long.  One day we were looking at embossing folders and this was one we both adored.  It moved to the top of our lists!  Well, later that day when Amy went to make a card, she realized that she already had that embossing folder!  LOL!! I guess she really DID like it!  Once I saw it in action, I knew that someday I would have to buy it.  So, while at her house a few weekends ago, I made sure to use this folder as soon as possible and then looked for it at every store we went to (finally had to order it online instead)!

I'm entering this card in the Wee Memories All Things Adorable challenge this week!


Thanks for stopping by! Be sure to come back tomorrow as it is my turn to post on The Twinery's blog!

Supplies (all PTI unless noted)
Stamps: Trees2Build by Stamps of Life
Paper: Smokey Shadow, Ocean Tides, Melon Berry, Rustic White, DCWV Glitter
Other: Banner Dies, Rhinestone, Country Foliage Embossing Folder (sizzix), PTI Vineyard Impression Plate, pop dots

Saturday, April 16, 2011

Sweetest Day

While on our Stamping Away weekend I fell head over heals in love with a strawberry stamp by Unity.  I am not sure what it is about strawberries that I love (besides eating them!).  I think it has to do with memories of picking strawberries in my Grandparents strawberry patch when I was a kid, so maybe it is a sentimental thing to me.  Not sure. :)

Anyway, I didn't buy the stamp at the store I saw it in.  1.  Because I just don't use rubber stamps much any more and 2. it was more than I wanted to pay for it at the time (I kind of got use to the price of clear stamps, you know?).

Well, the entire time after that I wished I had bought that stamp.  And that feeling just got worse as I used the strawberry paper that matches the image that I had purchased last weekend (which you will see in a future post as well).  So, out of curiosity I did some searching (and by doing so I earned Swagbucks to redeem for Paypal $$!!!) and found one of the stamps for the same price with shipping as I would have paid in the store so I bit the bullet and bought it which, granted it wasn't a large purchase by any stretch of the imagination!

So last night I colored the image and this morning I turned it into a super quick card!


Isn't that strawberry so cute!?  It is called "Sweetest Day" by Unity Jillibean Itty Bitty.   I pulled out my copics to color the strawberry (and I do like how it looks in person better than in the photo because the leaves look blended better in real life).


Thank you so much for stopping by!  Especially on the weekend!  Have a sweet day!! :)

Supplies (all PTI unless noted)
Stamps: Sweetest Day by Unity (Jillibean Itty Bitty)
Paper: Kraft, Scarlet Jewel, Ripe Avocado, Rustic White
Ink: Moulin Rouge Palette & Tea Dye Duo
Other: Twine, Pop Dots, Copics, Sizzix Country Foliage Embossing Folder

Thursday, April 14, 2011

Paper Dolls Challenge #36

Hey everyone! Today I get the honor of hosting the Paper Dolls Challenge and I wanted to share about that here on my blog as well!  This challenge is a photo inspiration challenge.

Recently I was at Walmart when I saw a pretty quilt with colors that just called my name!  The price was right so I purchased it.  The packaging from that quilt is where this photo came from.  You can interpret it anyway you like.  If you find inspiration in the colors or the design or anything else, feel free to take it and run with it!


And here is my sample card:


I used the colors and the shape of the quilt pieces as my inspiration for the main backdrop.  The twine is added for the "homespun" feeling it gives. 


I also stamped patterns on each shape to mimic the ones in the quilt and added the Tin Types impression plate on the white background to mimic the "quilted" look as well.


I hope you are able to play along!  Everyone is invited to participate!  Simple add your link to the Inlinkz form on the Paper Dolls blog!

Thanks for stopping by!

Supplies:
Stamps:  Tiny Tags, Giga Guidelines, Retro Background, Bitty Background Basics, Dot Spot
Ink:  Versamark, Pure Poppy, Black
Paper:  Hawaiian Shores, Pure Poppy, Harvest Gold, Simply Chartreuse
Other:  Twinery Twine, Tiny Tags Die, Pop Dots

Tuesday, April 12, 2011

A little Donnerwetter


This is my second post today!  Please scroll down to see my "Just a Note" card from my Stamping Away weekend!

I know what you are thinking.  A little what?  Well, we'll get to that I promise! :)

You all know that I spent the weekend with some great stamping friends Amy, Laurie, Barb & Eva.  I thought that now was the perfect time to share with you about another friend who is also very creative, Kelley! 


But, first, let me tell you a little bit about her.  She was my best friend in High School.  I have so many wonderful memories with her.  We were in newspaper together, yearbook together, forensics together, we were together all the time.  She was Valedictorian, I was Salutatorian.  Growing up we had roller skating parties, New Years Parties, slumber parties, etc.  I first met Kelley in 5th grade when her school combined with our school.  That year we were on and off again friends.  But, after that, the rest is history! :)  I thought it would be fun to share some pictures of us from way back.  (Sorry Kelley!)

This is Halla (our friend & exchange student from Iceland), Kelley & I.

Kelley & I on "Twin Day" our Senior Year.

 Kelley & I performing "There's a Hole in My Bucket" at the High School Variety Show.

Wow!  The memories that those bring back! LOL!!  Good days! :)  Kelley now lives with her husband and son (another baby is on the way!) in Germany.  To say the least we don't see each other often, but it is so fun how the world of blogging and facebook and the Internet in general can keep us in contact.  Kelley recently started a blog with lots of fun craft projects and recipes and I get the honor of sharing it with you!

Here is a little bit more about Kelley and her blog:


Now that I'm a stay at home mom, I finally have time to be creative and I'm loving it. Baby quilts, homemade stuffed animals, mobiles, and more... From sewing my own toys to making my own baby food, I've been very busy. This blog is my way of sharing my ideas with other creative parents and my hope that many of you will share your ideas as well.

For those of you who are unfamiliar with German, the word “Donnerwetter” has two meanings. It’s literal translation is “thunderstorm”, but it is often used as an exclamation – Donnerwetter! - to mean “Oh my goodness”, especially when talking to children. Since my last name is Donner, I found the title very fitting. In other words: things to do on a rainy, thunderstormy, day.

Since all of the crafts, clothing items, and recipes are my own creations, I only post items about 3 times a month. If you are interested in following my blog, just hit subscribe on the top left of the blog and I will send you updates. I love comments and great new ideas and recipes, so please send your thoughts my way.

Thank you for checking out my blog A little Donnerwetter.
I want to share a sneak peek of one of her most recent projects. Hold on because it is a cutie!  Meet floppy dog!


You can see step-by-step directions on her blog here.  Isn't he cute!?  Love him!

Here's another sneak of one of my favorite projects on her blog!  You'll have to check out her post here to see the entire project and get all the details!


Doesn't this look yummy?


That is making me very hungry!! You can find the recipe here.

Please take a moment to visit her blog and give her some love and while you are at it, add her to your reader too so you don't miss out on her fantastic projects and recipes!

Thanks for stopping by today!  Have a great day!